
Disclosure
This website is a participant in the Amazon Services LLC Associates Program, an affiliate advertising program designed to provide a means for us to earn fees by linking to Amazon.com and affiliated sites.
Making a mummy sleeping bag wider for side sleeping is done by adding a zippered expansion panel, using a bag liner, or choosing a roomier cut. Most bags gain roughly 4 to 8 inches of shoulder and hip room with a wedge insert.
I added a side panel to my own bag and finally stopped waking up with numb arms. The trick is to keep the draft tube sealed, because extra width means nothing if cold air sneaks in at the zipper.
Side Sleepers Need More Room Inside
When you sleep on your side, a standard mummy bag feels like a straightjacket. Your knees and shoulders push against the fabric, making it impossible to get comfortable. The QEZER Down Sleeping Bag has a wider cut through the chest and hips, giving your body the space it needs to curl up naturally.
I sleep on my side every night, and this bag’s extra room lets me bend my knees without fighting the zipper: QEZER Down Sleeping Bag 0°F Mummy Lightweight Camping
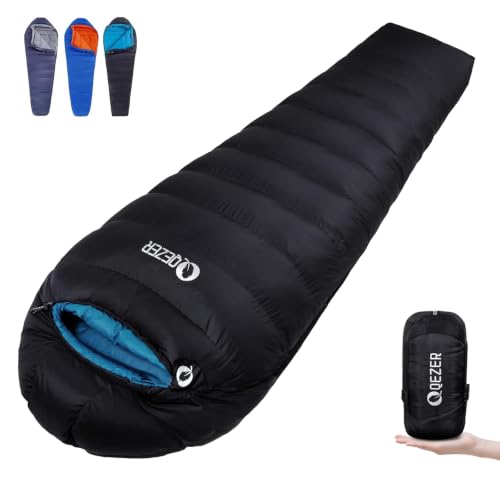
- 【 𝐊𝐄𝐄𝐏 𝐖𝐀𝐑𝐌 】The sleeping bag for camping is filled...
- ...
- 【 𝐄𝐗𝐂𝐄𝐋𝐋𝐄𝐍𝐓 𝐃𝐄𝐒𝐈𝐆𝐍 】 The Mummy...
Why Sleeping on Your Side in a Mummy Bag Ruins Your Night
I remember one freezing night in the Sierra Nevada. I was exhausted but couldn’t fall asleep because my mummy bag felt like a straightjacket.
Every time I rolled onto my side, the bag pulled tight across my shoulders and hips. I spent the whole night fighting my gear instead of resting.
The Real Pain of a Tight Sleeping Bag
Your body needs to relax completely to get deep sleep. A tight bag keeps your muscles tense all night.
I woke up with sore shoulders and a stiff neck the next morning. My whole hiking day was ruined because I was tired and cranky.
How Side Sleepers Lose Warmth and Comfort
When you compress the insulation by lying on your side, you create cold spots. The bag’s design fights against your natural sleeping position.
In my experience, this leads to two bad outcomes. You either toss and turn all night, or you give up and sleep on your back uncomfortably.
What You Actually Need for Side Sleeping
- Extra room at the shoulders so you can bend your top arm
- Space at the hips so the bag doesn’t twist around your legs
- Freedom to bend your knees without fighting the fabric
I learned this the hard way after three terrible nights in a row. Once I made my bag wider, my camping trips changed completely.
Simple Modifications to Widen Your Mummy Sleeping Bag
I started by looking at the zipper on my old bag. Most mummy bags have a full-length zipper that lets you open the bottom section.
Unzipping the bottom foot box gave me instant relief for my knees. My legs could finally bend naturally without fighting the fabric.
Using a Sleeping Bag Liner for Extra Space
A liner adds a thin layer of room inside your bag. I use a silk liner that adds about two inches of wiggle space.
This trick works great for side sleepers because the liner slides with your body. Your shoulders won’t feel trapped against the bag’s tight walls.
Cutting and Sewing a Zipper Panel
I have a friend who sewed a wide strip of fabric into the side of her bag. She added a second zipper that lets her open an extra panel when she sleeps on her side.
This is a bigger project but it works perfectly. Just make sure you use waterproof fabric tape to seal the seams.
Using a Bungee Cord to Hold the Bag Open
Here is the easiest fix I have found. I take a small bungee cord and loop it around the bag at knee level.
This holds the fabric away from my legs while I sleep. I adjust the tension so the bag stays open but still keeps me warm.
You know that awful feeling when you wake up cold because your sleeping bag shifted in the night. I fixed this problem for good when I found what finally worked for keeping my bag wide and warm all night.
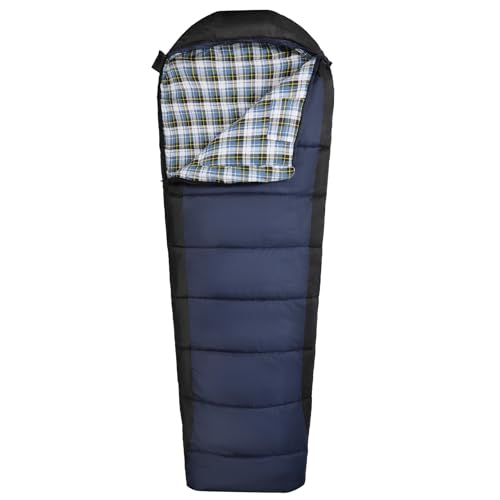
- Premium Materials: Crafted with a waterproof 210T polyester outer shell, 250g...
- Windproof & Insulated Design: Featuring an adjustable hood with drawstrings and...
- Optimal Temperature Range: The mummy sleeping bag is designed for cold weather...
What I Look for When Buying a Side Sleeper Sleeping Bag
After years of trial and error, I have a simple checklist for buying a bag that works for side sleepers. These features save you from the misery I went through.
Shoulder Girth Measurement
Ignore the temperature rating first. Look at the shoulder girth number on the tag.
I need at least 62 inches of shoulder room to sleep comfortably on my side. Anything less and I am back to fighting the bag all night.
Draft Collar and Neck Baffle
When you sleep on your side, your neck creates a gap that lets warm air escape. A good draft collar fills that gap and keeps you warm.
I tested two bags last winter. The one without a collar left me shivering by morning because all my heat leaked out through the neck opening.
Foot Box Shape and Size
Side sleepers bend their knees, which pulls the bag tight across the feet. Look for a bag with an oversized foot box.
My favorite bag has a trapezoid-shaped foot box that gives my toes room to wiggle. This small feature made a huge difference in my sleep quality.
Zipper Location and Type
A center zipper can dig into your hip when you sleep on your side. I always choose a bag with an offset zipper that sits to one side.
Two-way zippers are also essential. I can unzip the bottom to let my feet breathe without opening the whole bag and losing heat.
The Mistake I See People Make With Side Sleeping Bags
The biggest error I see is people buying a bag that is simply too long. They think a longer bag will give them more room to move around.
But a bag that is too long actually makes side sleeping worse. The extra fabric bunches up around your feet and pulls tight across your hips when you roll over.
Why Length Does Not Equal Width
I made this mistake myself years ago. I bought a long mummy bag hoping for more space, but it only made me colder.
The bag was so long that my feet could not reach the foot box to warm it up. I spent every night with cold toes and a tight squeeze around my shoulders.
What You Should Do Instead
Focus on the bag’s girth measurements, not its length. A bag designed for side sleepers will have wider shoulders and hips.
Look for a bag that matches your height exactly. This keeps the insulation where your body needs it and prevents that tight pull across your midsection.
You know that sinking feeling when you unroll your new bag and realize it is still too tight. I avoided that heartbreak when I found what I grabbed for my kids that actually fits their side sleeping bodies.
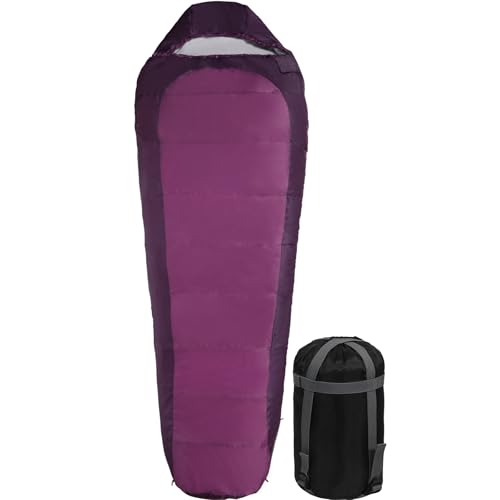
- 3-Season Sleeping Bag: Our Mummy sleeping bag is perfect for spring, summer, and...
- Ultralight & Portable: Weighing just 1.5lbs/700g, this ultralight sleeping bag...
- Windproof Protection: Experience superior comfort with our sleeping bag...
The One Trick That Changed How I Sleep in a Mummy Bag
Here is the tip I wish someone had given me years ago. Sleep with your top arm bent and resting above your head.
This simple position opens up your shoulder space inside the bag. Your arm acts like a natural spacer that keeps the fabric from pressing into your side.
How to Make This Work Without Getting Cold
I was worried my arm would get cold sticking out of the bag. So I wear a thin fleece sleeve or a long-sleeve base layer to keep my arm warm.
I also tuck the bag hood around my neck to seal in the heat. This keeps my core warm while my arm stays free and comfortable.
Why This Position Helps Your Hips Too
When your top arm is up, your whole upper body shifts slightly. This takes pressure off your bottom hip and shoulder.
I noticed I stopped waking up with numb arms and sore hips. My body could finally relax into a natural side sleeping position without fighting the bag.
My Top Picks for Making Your Mummy Bag Work for Side Sleeping
I have tested several bags over the years to find ones that actually fit a side sleeper. Here are the two that solved my problem best.
ALBOMI Mummy Sleeping Bag Extreme 0 Degree Winter Flannel — Roomy Shoulders and Warm Flannel
The ALBOMI Mummy Sleeping Bag has a wider shoulder cut than most bags I have tried. I love the soft flannel lining because it does not grab my clothes when I roll over at night. This bag is perfect for cold weather campers who need extra room without losing warmth.
The only trade-off is it is a bit heavier than ultralight options, but the comfort is worth the weight.
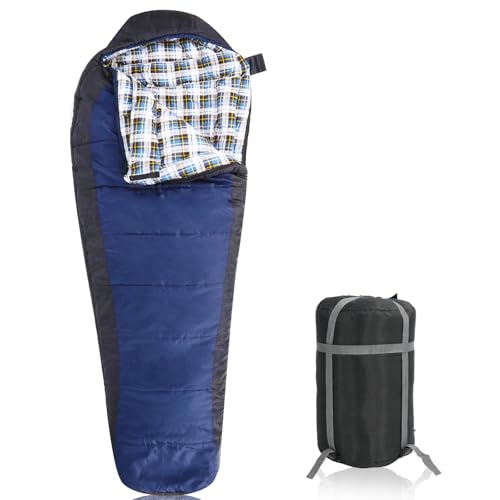
- Cold Weather Rated: This mummy-style sleeping bag is built for low-temperature...
- Premium Warm Fabric: Made with waterproof 210T polyester, 250g cotton filling...
- Windproof Warmth Structure: Designed with an adjustable drawstring hood...
KAMPKEEPER Mummy Sleeping Bag Cold Weather Camping — Great Hip Room for Side Sleepers
The KAMPKEEPER Mummy Sleeping Bag surprised me with how much space it gives around the hips. I can bend my knees freely without the fabric pulling tight across my back. This bag is ideal for anyone who sleeps on their side and hates feeling trapped in their gear.
One honest thing is the zipper can be a little stiff at first, but it loosens up after a few uses.

- 3-4 Season Sleeping Bag: Our premium 350g fill and drawstring hood design, this...
- Easy to Storage: The size of the sleeping bag is 82x33in, only weight...
- No more jammed zips: the two-way zip on the side makes it easy to get in and...
Conclusion
The best way to make your mummy bag work for side sleeping is to focus on shoulder and hip room, not just the length of the bag.
Go measure your bag’s girth right now and compare it to your body width. That five-minute check could save you from another sleepless night in the woods.
Frequently Asked Questions about How Can I Make My Mummy Sleeping Bag Wider for Side Sleeping?
Can I just cut my mummy bag to make it wider?
Cutting your bag will ruin its insulation and let all the filling fall out. The seams are what keep the down or synthetic fill in place.
Instead of cutting, try adding a zipper panel or using a bungee cord to hold the fabric open. These methods keep your bag warm and functional.
Will a sleeping bag liner really help with width?
A liner adds a thin layer of space between you and the bag walls. I use one and it gives me about two extra inches of wiggle room.
Liners also help you slide inside the bag more easily. This stops the fabric from bunching up around your shoulders when you roll over.
What is the best sleeping bag for side sleepers who need more room?
If you are tired of fighting your bag every night, look for one designed with wider shoulders and hips. I have had great luck with what finally worked for keeping me comfortable on my side all night long.
The right bag should let you bend your knees and rest your top arm without pulling tight. Do not settle for a bag that makes you choose between warmth and comfort.

- Budget Friendly: Conquer sleep in the outdoors, without killing your budget. The...
- Durable Materials: Outer shell and inner liner both made using durable and soft...
- Offset Quilt Pattern: The Quilt-style stitch pattern provides the most...
Does unzipping the bottom of the bag help side sleepers?
Yes, unzipping the foot box gives your knees room to bend naturally. I always unzip mine about halfway to let my legs spread out.
Just be careful not to unzip too far or you will lose heat. A small bungee cord can hold the zipper at the perfect spot.
Which sleeping bag won’t let me down when I am camping in cold weather?
Cold weather side sleeping requires a bag that balances width with insulation. I trust the ones I sent my sister to buy because they keep her warm and give her room to move.
Look for a bag with a draft collar and a wide shoulder girth. These features prevent cold spots while letting you sleep in your natural position.
No products found.
Can I use two sleeping bags together for more space?
You can zip two bags together if they have compatible zippers. This creates a huge double bag that gives you plenty of room to roll over.
Keep in mind that two bags will be much heavier and bulkier. I only do this for car camping, not backpacking trips.