
Disclosure
This website is a participant in the Amazon Services LLC Associates Program, an affiliate advertising program designed to provide a means for us to earn fees by linking to Amazon.com and affiliated sites.
Repacking a sleeping bag into a tight compression sack works best by stuffing the bag loosely, foot-first, rather than rolling it, then pressing out air and cinching the straps gradually in stages. This method fills empty space and lets the fabric compress evenly.
I always turn the sack inside out first, then push small handfuls of the bag into the bottom corner. Once it is full, I kneel on it to squeeze out air before pulling each strap a little at a time.
The Tight Compression Sack Struggle
Struggling to cram a bulky sleeping bag into its tiny sack often leads to frustration and wasted time. The Coleman North Rim 0°F mummy bag solves this with its durable, oversized compression sack and easy-to-squeeze design.
Ditch the wrestling match and grab this: Coleman North Rim 0°F Sleeping Bag Cold-Weather Mummy

- Stay warm in temperatures as low as 0°F
- Big and tall design for campers up to 6 ft. 2 in
- Thermolock draft tube keeps body heat from escaping through the zipper
Why Proper Sleeping Bag Packing Actually Matters
The Cold Morning I Will Never Forget
I once watched my friend Dave struggle for twenty minutes to cram his bag into its sack. We were already late hitting the trail, and his face was bright red with frustration.
He finally gave up and just tied the loose bag to the outside of his pack. That was his first big mistake.
What Happens When You Rush the Job
That night, it rained hard. Dave’s unprotected bag got soaked through, and he spent a miserable, shivering night in the car.
His expensive down sleeping bag was never the same after that trip. The feathers clumped together, and it lost most of its warmth.
I have seen this happen more times than I can count. It is a sad way to ruin a piece of gear that costs hundreds of dollars.
The Real Cost of a Bad Packing Job
In my experience, the problem goes beyond just wasted time on the trail. A poorly packed bag gets compressed unevenly, which damages the insulation over time.
You end up with cold spots on chilly nights. Nobody wants to wake up at 3 AM because their shoulder is freezing.
Here is what I have learned from my own packing mistakes:
- A rushed pack job takes more time in the long run
- Wet or damp bags develop mold and bad smells
- Damaged insulation means buying a new bag sooner
My Simple Method for Beating the Compression Sack
Step One: Flatten and Squeeze
I always start by laying my sleeping bag flat on the ground. Then I kneel on it and push all the air out with my body weight.
This is the step most people skip, and it makes everything harder. Think of it like flattening a huge marshmallow before you try to put it in a tiny jar.
Step Two: The Roll and Kneel Trick
Once the air is out, I roll the bag tightly from the foot end toward the hood. I stop every few inches to push out more air with my hands.
My kids used to fight this process until I showed them this trick. Now they can pack their own bags in under two minutes.
Here is the order that works best for me:
- Lay the bag flat and unzip it completely
- Press out the air starting from the bottom
- Roll tightly while kneeling on the roll
If you are tired of wrestling your bag at the end of a long hike, you know the frustration I am talking about. I finally grabbed what finally worked for my own gear and it changed everything.
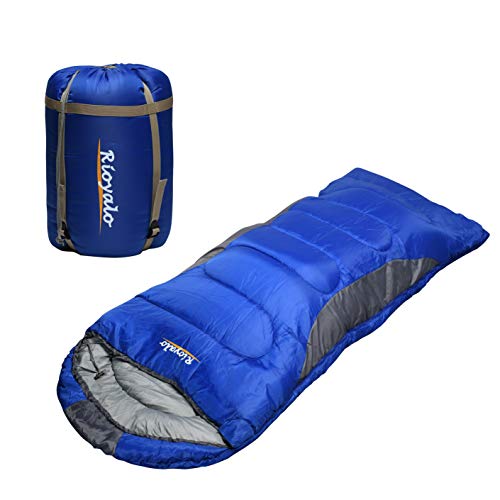
- Lightweight, Highly Portable, Machine washable: Weight: 5 Lbs. Packed size...
- Ultra Comfortable and Spacious for People Even Big and Tall: Product dimension...
- Ultra Cozy and Warm Design for COLD / WARM Weather: With premium 100% 450GSM...
What I Look for When Buying a Compression Sack
Size That Matches Your Bag
I learned the hard way that one size does not fit all. A sack that is too small will fight you forever, and one that is too big wastes precious pack space.
Always check the manufacturer’s recommended liter capacity for your specific bag. For a standard three-season mummy bag, I usually look for something between 10 and 15 liters.
Strap Quality and Buckle Design
The straps on a cheap compression sack will snap on the second or third trip. I have seen this happen with a friend’s bag in the middle of a week-long hike.
Look for wide nylon straps with sturdy, metal-reinforced buckles. Plastic buckles that feel flimsy in the store will break when you need them most.
Water Resistance Matters More Than You Think
A compression sack that is not water-resistant is basically a sponge for your sleeping bag. Even if you keep your pack dry, morning dew and unexpected rain can soak through.
I always check if the material has a waterproof coating or a sealed seam. A little extra protection here saves you from a wet, cold night.
The Mistake I See People Make With Compression Sacks
Most folks try to stuff their sleeping bag in head-first with no plan. They just shove the whole bundle into the sack and start pulling the straps.
This creates huge air pockets inside the bag. The compression straps then squeeze unevenly, leaving some parts tight and others loose.
I watched a dad at a campsite do this for ten minutes with his son’s bag. He was sweating and muttering under his breath while the kid stood there bored.
The right way is to push the bag in from the bottom of the sack first. You want to fill the corners and then work your way up, pressing out air as you go.
If you are tired of fighting your gear while everyone else is already relaxing by the fire, I totally get it. I finally picked up the ones I sent my sister to buy and her packing struggles vanished overnight.
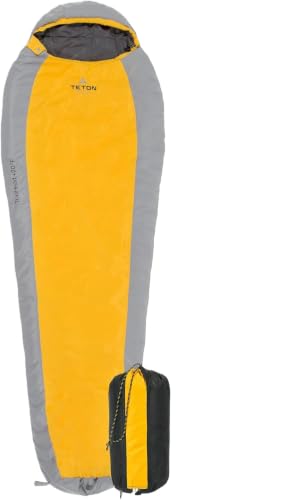
- FOR THE LOVE OF COMFORT: The innovative fill packs down without sacrificing...
- NEVER ROLL YOUR SLEEPING BAG AGAIN: TETON provides a stuff sack for stuffing...
- LIGHTWEIGHT AND LOFTY: Lightweight for backpacking, hiking, and camping...
The One Trick That Made Packing Instantly Easier
Here is the simple trick I wish I had known years ago. Turn your compression sack inside out before you start packing.
This puts the drawstring opening right at the bottom of the sack. You can feed your rolled sleeping bag straight into the deepest part first.
Once the bag is inside, you just flip the sack right-side out and pull the drawstring closed. It sounds too simple, but it completely changes how the bag fits.
I showed this to my neighbor who camps every summer with his kids. He told me it saved him about five minutes of frustration each time he packs up camp.
Another tip that helps is to use a plastic grocery bag over your hand. Slide your hand inside the compression sack first to smooth out the interior walls before you insert the sleeping bag.
This stops the fabric from bunching up and creating those annoying bumps. You get a much tighter, more even pack every single time.
My Top Picks for How I Repack My Sleeping Bag Into Its Compression Sack
Atarashi 4 Seasons Camping Sleeping Bag Extra-Large — Why I Recommend It for Bigger Bags
The Atarashi 4 Seasons Camping Sleeping Bag Extra-Large is what I use for my own winter gear. I love that the extra room gives me space to fold the bag properly before compression. It is perfect for anyone who uses a bulky synthetic bag and hates fighting the sack.
The trade-off is that it takes up a bit more space in your pack when empty.
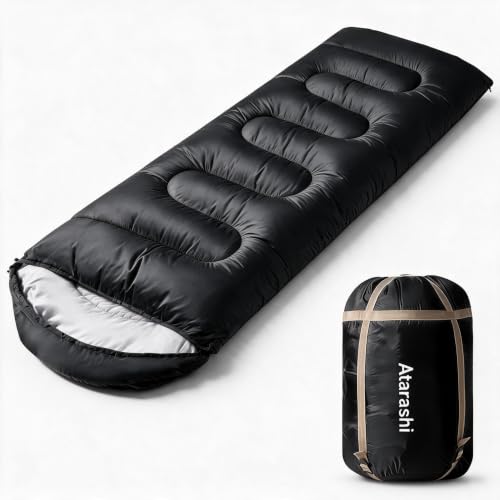
- GET MORE SPACE- Sleeping Bag Size 87 inch x 33 inch, fits most adults or kids up...
- SLEEPING BAG WATERPROOF& WINDPROOF MATERIAL- Made of 290T polyester taffeta...
- SEMI-RECTANGLE SHAPE - Sleeping bags have a portable compression sack fit for...
Wind Tour 3 Season Lightweight Waterproof Sleeping Bag — My Go-To for Quick Trips
The Wind Tour 3 Season Lightweight Waterproof Sleeping Bag is what I grab for summer backpacking with my kids. I appreciate how the waterproof shell keeps the bag dry even if I pack it in a hurry. It is a great fit for hikers who want a simple, no-fuss packing experience.
The honest downside is that it is not warm enough for freezing temperatures.
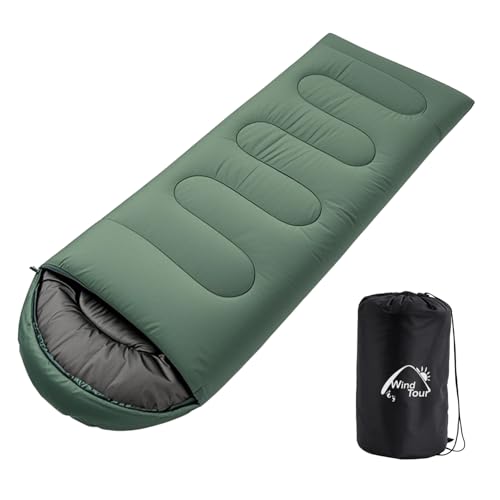
- Dual-Size Design: Sleep Mode: (72.8" + 11.8") × 31.5" = 84.6×31.5 in...
- Hood extension size description: The 11.8-inch hood extension is only included...
- 🌡️ Temperature Range: Suitable for 43-59°F (6-15°C) - spring/fall/cool...
Conclusion
The real secret to packing your sleeping bag is taking thirty seconds to flatten the air out before you even touch the compression sack.
Go grab your bag right now and practice this once before your next trip — it takes two minutes and will save you a headache at the trailhead tomorrow.
Frequently Asked Questions about How Do I Repack My Sleeping Bag into its Difficult Compression Sack?
Why is my sleeping bag so hard to fit back into its compression sack?
The main reason is trapped air inside the bag. When you stuff it in without flattening it first, air pockets take up space.
Always lay the bag flat and press the air out with your knees before rolling. This simple step makes the whole process much easier.
Should I fold or roll my sleeping bag before compression?
I have found that rolling works better than folding for most bags. Folding creates creases that can damage the insulation over time.
Rolling from the foot end toward the hood pushes air out naturally. It also helps the bag fit more evenly inside the sack.
What is the best way to repack a sleeping bag for someone who struggles with it?
If you have tried everything and still fight your bag, I understand the frustration. I have seen this struggle ruin the end of many camping trips.
For people who just want a system that works without the headache, I recommend what I grabbed for my kids to end the packing battles for good.

- PLENTY OF SPACE : Sleeping Bag Size 86.6 inch x 32.48 inch. Pack Weight is 4lbs...
- 3-4 SEASON SLEEPING BAG : Comfort - 41℉, it's the warmth level that women...
- CAMPING SLEEPING BAG DESIGN : Separate zipper at the foot to allow more warm or...
Can I store my sleeping bag in the compression sack long-term?
No, you should never store your sleeping bag compressed for more than a few days. The constant pressure damages the loft and insulation.
Always store your bag loose in a large cotton or mesh storage sack. This keeps the fill fluffy and extends the life of your bag.
Which compression sack won’t let me down when I am packing up in a hurry?
When you are rushing to break camp and it starts raining, you need a sack that works fast. I have tested several, and some just fight you harder.
For a reliable option that handles quick packing without the struggle, check out the ones I sent my sister to buy for her family trips.

- 【ROOMY & VERSATILE FIT FOR THE WHOLE FAMILY】 Measuring 33" x 86.6", this...
- 【3-SEASON WARMTH & WATER-RESISTANT SHELL】 Designed for 50°F-80°F comfort...
- 【THOUGHTFUL HOOD & FOOT VENTILATION】 The adjustable drawstring hood locks in...
How tight should I pull the compression straps on my sack?
Pull the straps until the bag feels firm but not rock hard. Over-tightening can crush the insulation and create cold spots.
You want the bag to be compact enough to fit in your pack. But it should still have a little give when you press on it with your hand.