Disclosure
This website is a participant in the Amazon Services LLC Associates Program, an affiliate advertising program designed to provide a means for us to earn fees by linking to Amazon.com and affiliated sites.
Introduction
Looking to breathe new life into an old blanket or comforter? The simple answer is: yes, you can absolutely turn it into a rug—and it’s easier than you might think.
Every year, millions of textiles are thrown away, contributing to environmental waste. But what if you could give that old comforter a second chance—as a cozy, stylish rug? Whether it’s a sentimental blanket you can’t part with or just an extra comforter collecting dust, this DIY transformation is both creative and practical.
Why would someone want to turn a blanket or comforter into a rug?
- Sustainability: Reusing textiles reduces waste and helps the environment.
- Cost-Effectiveness: Rugs can be pricey—why not make your own from what you already have?
- Personalization: Create a rug that fits your space, style, and story.
- Comfort: Quilted comforters make especially plush, padded rugs—perfect for kids’ rooms or reading nooks.
Best Tools for Turning a Blanket or Comforter into a Rug
To make your DIY rug project a success, you’ll need the right tools. Here are three highly-rated and widely recommended products that make the transformation easier, cleaner, and more durable.
1. Gorilla Heavy Duty Spray Adhesive
- All purpose glue: Gorilla spray glue is heavy duty and multi-purpose; it bonds…
- Easy to use: This glue spray has a comfort nozzle for a controlled fine mist
- Dries clear: Our adhesive spray dries clear and does not yellow to keep the…
- Why we picked it:
This industrial-strength adhesive creates a long-lasting bond between fabric and non-slip backing, ensuring your rug stays put and looks professional.
2. Rug Pad USA – Felt + Rubber Non-Slip Rug Pad
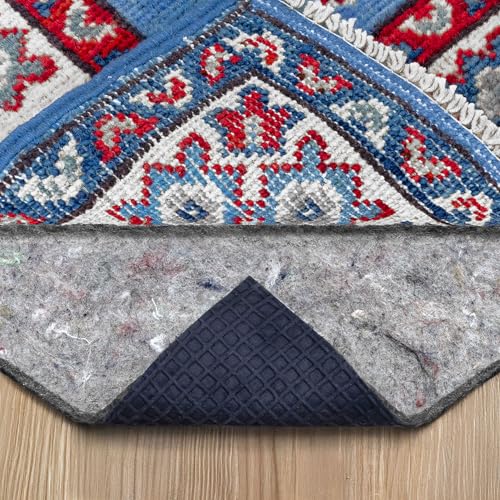
- PERFORMANCE: 15oz sq/yd natural rubber layer with an additional 5oz…
- CUSHION: Dense 1/4″ thick felt provides cushion underfoot for added comfort…
- PROTECTION: Absorbs impacts and provides a non-abrasive barrier underneath your…
- Why we picked it:
This dual-surface rug pad provides cushioned support and keeps your DIY rug securely in place, especially on hardwood or tile flooring.
3. Singer Heavy Duty 4432 Sewing Machine

- HEAVY DUTY METAL FRAME: Adds stability and provides long lasting durability
- EXTRA HIGH SEWING SPEED: Sew up to 1,100 stitches per minute when you need it…
- TOP DROP-IN BOBBIN WITH CLEAR VIEW COVER: Jam-proof bobbin and clear bobbin…
- Why we picked it:
For those who want a truly polished finish, this powerful sewing machine easily handles thick fabrics like comforters and can help bind the edges securely.
Choosing the Right Blanket or Comforter for a Rug Transformation
Not every blanket or comforter is ideal for turning into a rug. The right choice will determine how durable, attractive, and functional your final product will be.
What to Look for in a Blanket or Comforter
When selecting your material, consider the following:
- Thickness: Heavier comforters or weighted blankets make cushier rugs but may need stronger adhesives or sewing.
Preparing the Blanket or Comforter for Rug Conversion
Before turning your blanket or comforter into a functional rug, proper preparation is key. This step ensures a smooth DIY process and a polished final result.
Step-by-Step Preparation Process
Wash and Dry Thoroughly
- Removes dirt, allergens, and odors.
- Helps you work with a clean, fresh surface.
Flatten and Smooth Out
- Lay the blanket flat on a large, clean surface.
- Iron out wrinkles if necessary (use low heat for delicate materials).
Measure and Cut (Optional)
- If your comforter is too large, measure and mark the desired rug size.
- Use sharp fabric scissors for a clean, even cut.
- Pro Tip: Use a cutting mat and rotary cutter for better precision.
Reinforce the Edges
- Prevent fraying by folding over the edges and sewing them down.
- Alternatively, use bias tape, rug binding tape, or fabric glue for a no-sew finish.
Choose a Backing Material
- Essential for grip and durability.
- Recommended backing options:
- Non-slip rug pad (like Rug Pad USA – Felt + Rubber)
- Canvas fabric for added weight and stability
- Old yoga mat for small rugs
Tools You Might Need
- Fabric scissors or rotary cutter
- Measuring tape
- Sewing machine or fabric glue
- Non-slip rug pad or rubber backing
- Straight pins or clips to hold fabric in place
Assembling and Securing the Rug
Now that your blanket or comforter is prepped, it’s time to transform it into a proper rug. This step ensures your creation is sturdy, safe, and stylish.
Methods to Assemble the Rug
Depending on your tools and preference, there are a few ways to assemble your DIY rug:
A. No-Sew Method (Beginner-Friendly)
- Spray adhesive: Use Gorilla Heavy Duty Spray Adhesive to attach the blanket to your rug pad or backing. Spray evenly across both surfaces, then press them together.
- Double-sided carpet tape: Apply tape along the edges and center to hold layers in place.
- Fabric glue: For extra strength, use fabric glue around the perimeter.
Best for: Lightweight blankets and low-traffic areas.
B. Sew Method (More Durable & Long-Lasting)
- Use a heavy-duty sewing machine (like the Singer Heavy Duty 4432).
- Stitch around the border to bind the blanket and backing together.
- Use a zigzag or straight stitch to secure the center in a grid or diamond pattern if desired.
Best for: High-traffic areas and thick, heavy comforters.
Optional Additions
- Edge Binding:
- Finish the look with fabric trim or rug binding tape.
- Prevents fraying and enhances aesthetics.
- Padding or Cushioning Layer:
- Add a foam pad between layers for extra comfort.
Tips for Success
- Work in a well-ventilated area when using adhesives.
- Use clips or weights to hold the blanket in place while glue dries.
- Test adhesives on a small section first to ensure fabric compatibility.
Styling and Using Your DIY Blanket Rug
Once your rug is assembled and secured, it’s time to place it and make it shine. Styling and usage are where your effort pays off—turning a recycled item into a statement piece.
Best Places to Use Your DIY Blanket Rug
- Living Room: Use under a coffee table or in a reading corner to add texture and warmth.
- Bedroom: Place at the foot of the bed or beside it as a soft landing.
- Kids’ Room: Great for play areas thanks to their softness and cushioning.
- Entryway or Hallway: Use durable fabrics for high-traffic zones.
- Pet Area: A perfect cushioned spot for pets to lounge.
Tip: Use rubber backing or anti-slip pads in high-traffic areas to prevent sliding.
Styling Tips to Match Your Home Aesthetic
- Boho or Eclectic Spaces:
- Use patterned or colorful fleece throws.
- Add tassels or fringe to the edges for flair.
- Minimalist Interiors:
- Stick with neutral tones like beige, grey, or muted blue.
- Clean, straight edges give a polished look.
- Rustic or Farmhouse Style:
- Try using flannel or wool blankets.
- Pair with wooden floors and natural textures.
- Modern Spaces:
- Use geometric quilting or color-blocked comforters.
- Clean lines and bold colors work best.
Maintenance and Cleaning
- Vacuum regularly using a handheld or brushless attachment.
- Spot-clean with mild detergent and warm water.
- Machine-washable? Even better! Just remove any non-washable backings first.
Common Mistakes to Avoid When Turning a Blanket into a Rug
Even simple DIY projects can go wrong without the right know-how. Avoiding these common mistakes will save you time, frustration, and ensure your rug turns out great.
Mistake #1: Using the Wrong Type of Blanket
- Avoid ultra-thin or slippery fabrics like silk and polyester without quilting—they won’t hold shape or grip the floor.
- Heavy blankets with loose stuffing can shift or bunch up if not secured correctly.
Solution: Choose sturdy, stitched, or quilted materials with some texture or weight.
Mistake #2: Skipping the Backing
- A rug without a backing can slip, wrinkle, or wear out quickly.
- It may also damage your floor or fail to provide traction.
Solution:
- Use a high-quality non-slip backing like Rug Pad USA.
- Alternatively, repurpose an old yoga mat or felt fabric.
Mistake #3: Using Weak Adhesives or Inadequate Stitching
- Low-quality glue can cause peeling or detachment over time.
- Incomplete stitching may lead to curling edges or loose corners.
Solution:
- Use Gorilla Spray Adhesive or a heavy-duty sewing machine for strong, long-lasting attachment.
Mistake #4: Not Reinforcing the Edges
- Raw or frayed edges can unravel and ruin the look of your rug.
Solution:
- Use rug binding, bias tape, or a tight zigzag stitch around all sides.
Mistake #5: Ignoring Maintenance
- Even DIY rugs need care. Accumulated dust, pet hair, or stains can reduce lifespan.
Solution:
- Vacuum weekly, spot clean spills immediately, and inspect for edge wear or slipping.
Conclusion
Turning a blanket or comforter into a rug is not just a creative DIY project—it’s a smart, sustainable way to reuse what you already have. Whether you’re refreshing your space on a budget or giving sentimental items new life, this process is easy, rewarding, and totally customizable.
Key Takeaways:
- Choose the right type of blanket: thick, durable, and stitched.
- Prep properly: wash, flatten, and reinforce edges.
- Secure it well with adhesives or stitching for long-lasting results.
- Add non-slip backing for safety and function.
- Style it to suit your space—and enjoy the results.
Frequently Asked Questions About Turning a Blanket or Comforter into a Rug
Can any blanket or comforter be turned into a rug?
Not all, but many can. The best candidates are:
- Thick and durable materials like wool, fleece, or quilted comforters.
- Stitched or quilted designs that hold shape.
- Good condition—avoid overly worn or frayed pieces.
Do I need to sew, or can I make a no-sew rug?
You can absolutely make a no-sew rug using:
- Spray adhesive (like Gorilla Heavy Duty)
- Fabric glue
- Double-sided carpet tape
However, sewing adds durability, especially for high-traffic areas.
What can I use for backing?
Great backing materials include:
- Non-slip rug pads
- Old yoga mats
- Canvas or felt fabric
- Rubber shelf liner (for small rugs)
Backing is essential to:
- Prevent slipping
- Add durability
- Provide structure
Will the rug be washable?
It depends on the materials used:
- If fully sewn and made with washable fabric and backing, yes.
- If adhesive or non-washable backing is used, spot clean only.
Tip: Always check your backing and adhesive product labels for care instructions.
How long does it take to make one?
Most DIY rug projects take:
- 1 to 3 hours, depending on size and method (sewing vs. no-sew).
- Add time for drying if using adhesives.
Will it last?
With the right:
- Material choice
- Securing method
- Backing
- Cleaning routine
…your DIY rug can last several years, especially in low to medium traffic areas.