Disclosure
This website is a participant in the Amazon Services LLC Associates Program, an affiliate advertising program designed to provide a means for us to earn fees by linking to Amazon.com and affiliated sites.
Introduction
If you’re wondering how to patch an air mattress, the short answer is: locate the leak, clean and dry the area, then seal it with a patch or alternative fix. Whether you’re dealing with a tiny pinhole or a slow leak that’s ruining your night’s sleep, patching an air mattress is a simple task—when you know what to do.
Air mattresses are super convenient for guests, camping, or short-term sleep setups, but nothing deflates your plans (literally) like waking up on a sagging surface. Luckily, you don’t need to toss it out or rush to buy a new one. With a bit of know-how and the right tools, you can restore it in under 30 minutes.
In this guide, we’ll walk you through:
- How to find the leak
- Tools you’ll need
- Step-by-step patching (with or without a repair kit)
- Pro tips to make your repair last
Best Patch Kits for Repairing an Air Mattress
Not all patch kits are created equal. Whether you’re repairing a tear at home or while camping, having a reliable patch kit on hand can make the process fast, effective, and frustration-free. Below are the top 3 patch kits recommended by DIY users and repair professionals alike.
1. TEAR-AID Fabric Repair Kit
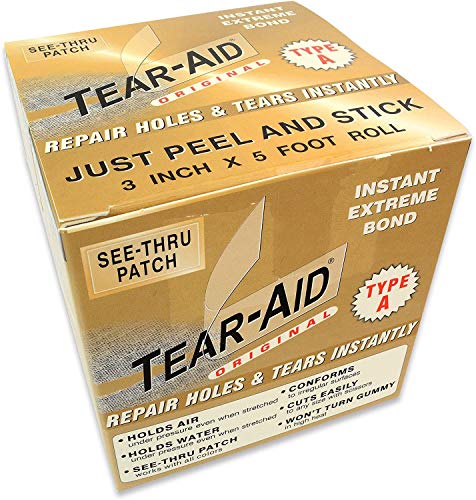
- Provide a simple and easy method of patching holes and tears. Easy peel and…
- Includes alcohol prep pads
- 3″ x 5 Foot Roll. Includes alcohol prep pads
Why we picked it:
- Specially designed for vinyl and plastic surfaces like air mattresses
- No messy glue—uses a clear adhesive patch
- Durable, flexible, and waterproof for long-lasting repairs
2. Coghlan’s Airstop Sealant + Patches Kit

Why we picked it:
- Includes both a strong adhesive sealant and vinyl patches
- Ideal for both small holes and seam repairs
- Compact and affordable—great for camping and travel
3. Intex Repair Patch Kit
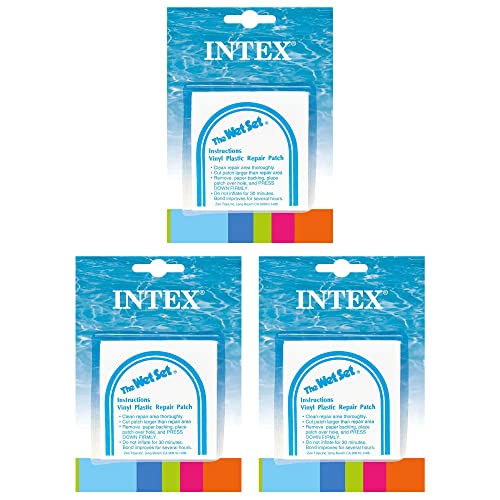
- INTEX Wet Set Vinyl Repair Patch** 6 Pack
- Designed for Intex products
- Great to have extras around for quick fixes
Why we picked it:
- Made by a trusted air mattress manufacturer
- Works seamlessly with most Intex and similar vinyl airbeds
- Easy to apply with pre-cut patches included in the kit
How to Find the Leak in Your Air Mattress
Before you can fix your air mattress, you need to find the leak—which can be trickier than it sounds. Some holes are microscopic or hidden in seams, making them almost invisible until the mattress loses air overnight.
Step-by-Step: Finding the Leak
Here’s how to track it down efficiently:
Fully inflate the mattress
- Ensure it’s as firm as possible without overinflating.
- Listen closely for hissing sounds—this could point to the leak.
Do a visual and hand inspection
- Feel along the seams, corners, and around the valve.
- Gently press down to increase air pressure and spot escaping air.
Use the soapy water method (most effective)
- Mix dish soap and water in a spray bottle.
- Spray over the mattress surface in sections.
- Look for bubbles forming—that’s your leak.
Mark the spot
- Use a marker or masking tape to mark the leak before deflation.
- You’ll need this visible when applying the patch.
Common Leak Locations
- Valve stem or plug area
- Seams and edges
- Bottom of the mattress (often overlooked)
- Crease folds if stored for long periods
Tools and Materials You Need to Patch an Air Mattress
Before you start repairing, having the right tools on hand is key. Whether you’re using a professional patch kit or a DIY workaround, preparation ensures a quick and lasting fix.
Essential Tools
- Patch kit (or DIY materials like duct tape or bike tire patches)
- Isopropyl alcohol or soap and water (for cleaning the area)
- Soft cloth or paper towels (to dry and prep the surface)
- Scissors (for cutting patches)
- Marker or chalk (to outline the leak)
- Heavy object (like a book, to press the patch down)
If you’re not using a patch kit, substitute with:
- Strong adhesive glue (e.g., rubber cement)
- Plastic material (like a shower curtain or vinyl from packaging)
Recommended Materials in Patch Kits
Most good-quality patch kits include:
- Pre-cut or rollable vinyl patches
- Adhesive sealant or peel-and-stick patches
- Sandpaper or primer (optional, for surface prep)
Things to Avoid
- Super glue or hot glue: These don’t flex well with the mattress and may crack or peel.
- Masking tape or scotch tape: Temporary and unreliable for long-term sealing.
Step-by-Step Guide to Patching an Air Mattress
Once you’ve found the leak and gathered your tools, it’s time to patch the air mattress. Whether you have a professional repair kit or need to improvise with household items, here’s how to do it right.
A. Patching With a Kit
Clean the area
- Use isopropyl alcohol or soapy water to remove dirt and oil.
- Dry it completely with a lint-free cloth.
Deflate the mattress
- This prevents air pressure from interfering with the seal.
Apply the patch
- Cut a patch slightly larger than the leak (about 1 inch around the hole).
- Peel and stick (for adhesive patches) or apply glue if required.
- Firmly press and smooth out any air bubbles.
Let it cure
- Follow the kit’s instructions. Most require 4–12 hours to fully bond.
B. Patching Without a Kit
Choose your patch material
- Use plastic from a shower curtain, pool float, or bike tube patch.
Apply adhesive
- Use rubber cement, waterproof epoxy, or strong vinyl glue.
Place and press
- Stick the patch over the leak and press firmly for 1–2 minutes.
- Use a book or heavy object to keep it pressed for several hours.
Let it dry fully
- Wait at least 6–12 hours before reinflating for best results.
How to Prevent Future Leaks in Your Air Mattress
Repairing your air mattress is just part of the story—preventing future leaks is what ensures you won’t have to repeat the process over and over. With a few easy habits, you can extend your mattress’s life by years.
Use It on a Clean, Smooth Surface
- Avoid rough floors: Always place a sheet, tarp, or blanket under the mattress to shield it from sharp objects.
- Watch out for pet claws: Keep pets off the mattress or use a protective cover if necessary.
- Don’t drag it: Pick it up instead of sliding to avoid friction tears.
Don’t Overinflate
- Follow manufacturer PSI guidelines: Overinflation stresses seams and valves.
- Allow for expansion: Especially in hot environments where air expands.
- Use a built-in or auto-stop pump to prevent accidental overfilling.
Clean and Store It Properly
- Wipe it down after use: Dirt and body oils can weaken materials.
- Let it dry completely before storing to avoid mold.
- Roll instead of folding: Folding can stress seams and create weak points.
Store in a Cool, Dry Place
- Avoid direct sunlight: UV rays can degrade vinyl and plastics.
- Keep it in a bag or box to avoid contact with sharp items in storage.
- Check for damage before packing it away—catching issues early is easier and cheaper to fix.
When to Replace vs Repair an Air Mattress
Sometimes a quick fix does the job, but other times, your air mattress might be past the point of no return. Knowing when to patch it—and when to say goodbye—can save you time, money, and frustration.
When to Repair Your Air Mattress
Stick with a repair if:
- The leak is small (like a pinhole or minor seam split)
- You’ve located and patched fewer than 3 holes
- The mattress is relatively new and still holds shape
- The valve is intact and functioning properly
- The damage is on a
When to Replace vs Repair an Air Mattress
Sometimes a quick fix does the job, but other times, your air mattress might be past the point of no return. Knowing when to patch it—and when to say goodbye—can save you time, money, and frustration.
When to Repair Your Air Mattress
Stick with a repair if:
- The leak is small (like a pinhole or minor seam split)
- You’ve located and patched fewer than 3 holes
- The mattress is relatively new and still holds shape
- The valve is intact and functioning properly
- The damage is on a flat surface (easier to patch successfully)
When It’s Time to Replace
Consider replacement if:
- The air mattress loses air even after multiple patches
- There are large tears, especially near seams or around the valve
- You notice mold, mildew, or foul smells (common in long-term storage issues)
- The surface material has become sticky, brittle, or degraded
- The mattress no longer feels comfortable or supportive when inflated
Conclusion
Fixing a leaky air mattress doesn’t have to be stressful—it’s all about having the right tools, following a clear process, and knowing when it’s worth repairing versus replacing.
Here’s a quick recap:
- Find the leak using sound, touch, or the soapy water method.
- Gather tools like a patch kit, cloth, and adhesive before starting.
- Follow a step-by-step patching process to ensure lasting results.
- Prevent future damage with proper use, cleaning, and storage.
- Know when to replace if the damage is extensive or recurring.
Frequently Asked Questions About How to Patch an Air Mattress
Can you use duct tape to patch an air mattress?
Yes, but only as a temporary fix. Duct tape may seal the leak for a night or two, but it often peels off or loses grip, especially under pressure or temperature changes.
How long does a patch on an air mattress last?
If applied properly on a clean, dry surface using a quality patch kit, it can last for months to years. DIY patches may wear out faster, depending on use and storage.
Can you sleep on the mattress right after patching it?
No—allow the patch to fully cure. Most adhesives need 4 to 12 hours to bond properly. Sleeping on it too soon may break the seal or cause the patch to shift.
What if the leak is on a seam or valve?
These are harder to repair. Use extra-strong adhesive and a flexible patch. In some cases, valve leaks may require replacement or a new mattress if not sealable.
Is it better to patch or replace?
- Patch if the damage is minor, the mattress is new, and you’re confident in the seal.
- Replace if leaks are persistent, located near the valve, or the mattress no longer holds air well.
Can I use a bike tire patch?
Yes, but only if it’s vinyl-compatible and the adhesive is flexible. Some bike patches are too rigid and may crack with movement.