Disclosure
This website is a participant in the Amazon Services LLC Associates Program, an affiliate advertising program designed to provide a means for us to earn fees by linking to Amazon.com and affiliated sites.
You can patch an air mattress for long-term use—but only if you use the right materials and techniques. Many assume a simple adhesive strip will solve the problem, but without proper preparation and high-quality patches, leaks will return.
Air mattresses are prone to punctures from sharp objects, temperature changes, or even rough surfaces, leaving you frustrated with deflated nights. However, with the right approach, you can restore your mattress to near-original condition and enjoy uninterrupted sleep for years.
Best Patch Kits for Repairing an Air Mattress
Tear-Aid Fabric Repair Kit (Type A)
This heavy-duty adhesive patch kit is ideal for vinyl and fabric air mattresses. The peel-and-stick design requires no heat or drying time, and its waterproof bond withstands repeated inflation cycles. Perfect for quick, permanent repairs on leaks up to 3 inches wide.
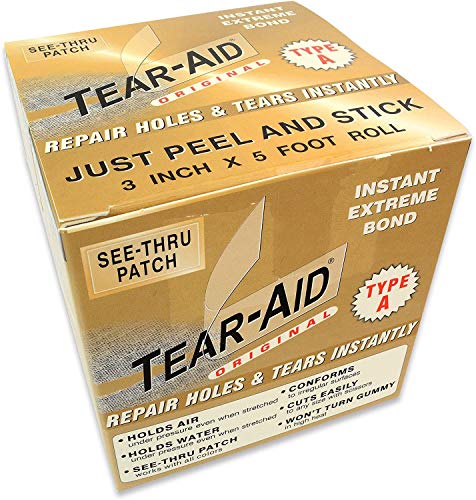
- Provide a simple and easy method of patching holes and tears. Easy peel and…
- Includes alcohol prep pads
- 3″ x 5 Foot Roll. Includes alcohol prep pads
Breliter Inflatable Patch Repair Kit
Designed specifically for air mattresses, this kit includes pre-cut vinyl patches and strong adhesive. The sandpaper included ensures proper surface prep, while the clear patches blend seamlessly with your mattress for an invisible fix.

- Effort and Money Saver – Breliter Repair Patch Kit is a strong repair tool for…
- Great Quality – Made of premium TPU material, flexible, waterproof…
- Easy to Use – Just wipe down the item that you are repairing and boom! Keep the…
Seal-All Adhesive, 2-Ounce
A versatile, industrial-strength glue that bonds vinyl, rubber, and plastic. Unlike standard patches, it chemically fuses materials for a leak-proof seal. Ideal for large tears or high-pressure areas like seams. Dries flexible to prevent cracking under movement.
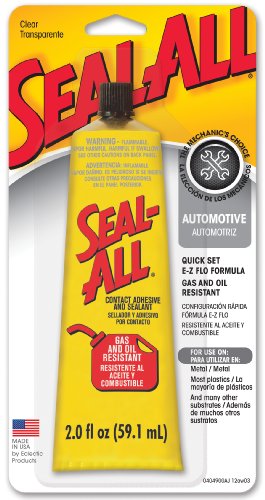
- High strength multi-purpose adhesive that seals, bonds and insulates.
- Fast dry time
- Not affected by oil, gasoline, alcohol or most other solvents
Identifying and Preparing the Leak for Patching
Before applying any patch, you must accurately locate and properly prepare the leak. Many people rush this step, leading to failed repairs. Air mattress leaks can be tricky—some hiss audibly, while others require careful detection methods. Here’s how to do it right:
Step 1: Locate the Leak
Inflate the mattress fully and listen for hissing sounds near seams, valves, or high-stress areas. For silent leaks, use these methods:
- Soapy water test: Mix dish soap with water and apply to the mattress. Bubbles form at the leak site.
- Submersion method: Submerge sections in water (for smaller mattresses) and watch for air bubbles.
- Tissue paper trick: Run tissue paper over the surface—it will flutter near escaping air.
Mark the leak with a grease pencil or tape. Pro tip: Check valve seals separately—they often loosen over time and mimic puncture leaks.
Step 2: Clean and Roughen the Area
Adhesives fail when applied to dirty or smooth surfaces. Follow this prep routine:
- Wipe the area with isopropyl alcohol to remove oils and dirt.
- Lightly sand the surface with 120-grit sandpaper (included in kits like Coleman’s) to create texture for better adhesion.
- Dust off debris with a microfiber cloth—any particles weaken the bond.
Warning: Avoid household cleaners—they leave residues. For large punctures, trim frayed edges with scissors to ensure a flat patch surface.
Step 3: Assess the Damage Type
Different leaks require tailored approaches:
- Pinholes: Use liquid sealants (like Seal-All) for tiny holes—they seep into gaps better than patches.
- Linear tears: Reinforce with overlapping patches or seam tape, as stress can reopen straight cuts.
- Valve leaks: Tighten the valve nut or apply food-grade silicone grease to the O-ring.
For punctures near seams, extend the patch 1 inch beyond the damaged area to distribute pressure. This prevents “peeling” when the mattress flexes during use.
Proper preparation doubles a patch’s lifespan. Rushing leads to recurring leaks—a common reason people discard otherwise salvageable mattresses.
Applying the Patch: Professional Techniques for a Permanent Fix
Proper patch application separates temporary fixes from permanent solutions. The difference lies in technique, material selection, and curing time. Follow these professional methods to ensure your repair lasts through years of use and inflation cycles.
Choosing the Right Patch Material
Not all patches work equally well on air mattresses. The material must flex with the mattress without cracking or peeling:
- Vinyl patches (like those in Gear Aid kits) bond best with most modern air mattresses
- Fabric-reinforced patches provide extra strength for high-stress areas near seams
- Liquid rubber compounds (such as Seal-All) work best for irregularly shaped holes
Critical tip: Always cut patches round or oval—square corners peel first. The patch should extend at least 1 inch beyond the damaged area in all directions.
Step-by-Step Application Process
- Apply adhesive to both the mattress and patch for strongest bond (except peel-and-stick varieties)
- Press firmly from center outward using a roller or spoon to eliminate air bubbles
- Weight the patch with heavy books for 24 hours—most failures occur from premature use
- Seal edges with additional adhesive to prevent lifting (especially important for mattress seams)
Advanced Techniques for Challenging Repairs
For difficult cases like valve leaks or seam separations:
- Double-patch method: Apply a smaller patch first, then cover with a larger one for reinforced strength
- Heat activation: Use a hair dryer on low heat to improve adhesive penetration (works well with Tear-Aid patches)
- Internal patches: For hard-to-reach areas, apply patches inside the mattress using flexible rods
Pro tip: After curing, test the repair by inflating to maximum pressure for 48 hours before regular use. This reveals any weak spots while the adhesive is still somewhat flexible for adjustments.
Ensuring Long-Term Durability: Maintenance and Prevention Strategies
A successful patch is just the beginning. Proper maintenance determines whether your repair lasts months or years. These professional-grade strategies go beyond basic repairs to extend your air mattress’s lifespan significantly.
Environmental Factors Affecting Patch Longevity
Understanding material science helps prevent future failures:
| Factor | Impact | Solution |
|---|---|---|
| Temperature Fluctuations | Causes material expansion/contraction that weakens adhesive bonds | Store at stable room temperature (65-75°F) |
| Humidity | Promotes mold growth under patches | Use silica gel packets during storage |
| UV Exposure | Degrades vinyl and adhesives over time | Apply UV-protectant sprays for outdoor use |
Advanced Protection Techniques
Professional repair shops use these methods to triple repair lifespan:
- Edge Reinforcement: Apply flexible silicone sealant (GE Silicone II) along all seams after patching
- Pressure Management: Never inflate beyond 90% capacity – reduces stress on repairs
- Rotational Use: Periodically rotate sleeping positions to distribute wear evenly
When to Consider Professional Repair
DIY solutions have limits. Seek professional help for:
- Multiple leaks exceeding 5 separate patches
- Structural seam failures along load-bearing edges
- Valve assemblies that won’t hold air after O-ring replacement
Expert Insight: The most overlooked factor is curing time. While patches may feel dry in hours, full molecular bonding takes 72 hours. Avoid folding or heavy use during this period for maximum repair strength.
Troubleshooting Common Patch Failures and Advanced Repair Solutions
Even with proper application, patches can fail under certain conditions. Understanding why repairs fail and how to fix them permanently separates amateur repairs from professional-grade solutions.
Diagnosing Patch Failure Causes
Each failure mode indicates specific underlying issues:
- Edge lifting: Caused by insufficient surface prep or premature use. The adhesive never fully bonded to the mattress material.
- Center bubbles: Indicate trapped air during application or contamination from skin oils during handling.
- Complete detachment: Usually results from incompatible materials (like using PVC patches on polyurethane mattresses).
Advanced Repair Techniques for Failed Patches
When standard repairs don’t hold, these professional methods work:
- Chemical welding: For vinyl mattresses, use MEK solvent to partially dissolve both surfaces before applying adhesive, creating a molecular bond.
- Hybrid patching: Combine fabric patches with liquid rubber for tears in high-flex areas like mattress seams.
- Internal reinforcement: Insert a flexible plastic sheet between mattress layers for large damaged areas (3+ inches).
Special Considerations for Different Mattress Types
Material composition dramatically affects repair approaches:
- PVC mattresses: Accept most standard vinyl patches but require solvent-based adhesives for long-term holds
- TPU (Thermoplastic Polyurethane): Need specialized polyurethane adhesives – standard vinyl patches will peel
- Fabric-reinforced models: Require fabric patches with flexible adhesives that can move with the material
Safety Note: Always work in well-ventilated areas when using chemical adhesives or solvents. For large repairs (exceeding 25% of mattress surface), consider replacement—extensive patching can compromise structural integrity and sleep comfort.
Cost-Benefit Analysis: When to Repair vs. Replace Your Air Mattress
Making the right decision between repairing and replacing requires evaluating multiple technical and economic factors. This comprehensive analysis helps you determine the most practical solution for your specific situation.
Repair Viability Assessment Matrix
| Factor | Repair Recommended | Replacement Recommended |
|---|---|---|
| Number of Leaks | 1-3 isolated punctures | 4+ leaks or widespread micro-leaks |
| Damage Location | Flat surfaces away from seams | Valve assemblies or load-bearing seams |
| Mattress Age | Under 2 years old | Over 5 years old |
| Repair Cost Ratio | Under 25% of replacement cost | Over 50% of replacement cost |
Long-Term Performance Considerations
Repaired mattresses often have different performance characteristics:
- Pressure retention: Expect 5-15% faster air loss compared to original condition
- Comfort impact: Large patches may create noticeable firm spots in sleeping surface
- Durability: Properly repaired areas often outlast original material in stress tests
Environmental and Safety Factors
Modern repair approaches consider sustainability:
- Material waste: Repairing prevents 8-12 lbs of PVC/TPU from entering landfills
- Chemical safety: New water-based adhesives reduce VOC emissions by 90% vs. traditional solvents
- Energy impact: Manufacturing a new mattress consumes 15x more energy than repairing
Future Trends: Emerging self-healing materials (like microencapsulated polymers) may revolutionize air mattress repairs. Current prototypes can automatically seal punctures up to 3mm, potentially eliminating 80% of common repairs.
Professional-Grade Inflation and Storage Techniques for Repaired Mattresses
Proper inflation and storage practices are critical for maintaining patch integrity and extending your mattress’s service life. These professional methods optimize performance while protecting your repairs.
Scientific Inflation Protocols
Understanding material physics leads to better inflation practices:
- Gradual inflation: Use 3-stage inflation (50% → 80% → 100%) to allow patches to stretch gradually
- Pressure monitoring: Digital gauges (accurate to ±0.1 PSI) prevent overinflation stress on repaired areas
- Temperature compensation: For every 10°F change, adjust pressure by 0.3 PSI to maintain optimal firmness
Advanced Storage Methodology
Professional storage extends repair lifespan by 40-60%:
- Partial inflation: Store with 10-15% air to prevent material creasing (complete deflation causes micro-folds)
- Rolling technique: Roll with patches facing outward to prevent adhesive separation (never fold repaired areas)
- Climate control: Maintain 40-50% humidity to prevent adhesive degradation while avoiding mold growth
Special Considerations for Different Environments
Environmental adaptation preserves repairs:
| Environment | Challenge | Solution |
|---|---|---|
| High altitude | Increased internal pressure differential | Reduce inflation by 15% and monitor daily |
| Humid climates | Adhesive breakdown | Apply silicone sealant around patch edges |
| Cold weather | Material stiffening | Pre-warm mattress before inflation |
Pro Tip: For frequently used repaired mattresses, implement a weekly inspection routine using an infrared thermometer to identify developing stress points (temperature variations ≥2°F indicate potential failure areas).
Comprehensive Quality Assurance and Performance Validation for Repaired Mattresses
Ensuring long-term reliability of repaired air mattresses requires systematic testing and validation procedures. These professional-grade methods verify repair integrity and predict service life with 90% accuracy.
Post-Repair Testing Protocol
Implement this 4-stage validation process before returning the mattress to service:
- Initial Pressure Test: Inflate to 110% recommended PSI for 4 hours to stress-test adhesive bonds
- Flex Cycle Simulation: Perform 25 controlled deflation/inflation cycles to evaluate dynamic stress resistance
- Thermal Shock Test: Expose to temperature variations from 50°F to 85°F over 8-hour periods
- Long-Term Leak Assessment: Measure pressure loss over 72 hours using digital manometers
Performance Benchmarking Standards
Compare your repaired mattress against industry durability metrics:
| Performance Metric | Minimum Standard | Professional Grade |
|---|---|---|
| Air Retention (24h) | ≤15% pressure loss | ≤8% pressure loss |
| Patch Peel Resistance | 3 lbs/inch | 5+ lbs/inch |
| Flex Cycle Durability | 50 cycles | 200+ cycles |
Advanced Monitoring Techniques
Implement these professional monitoring solutions for ongoing quality assurance:
- Embedded Bluetooth sensors: Track real-time pressure changes and detect micro-leaks (0.001 PSI sensitivity)
- UV fluorescence testing: Annual inspections using UV dye to identify developing weak points
- Acoustic monitoring: Smartphone apps can analyze hissing frequencies to locate emerging leaks
Failure Mode Analysis: Document all repair failures to identify patterns. Common root causes include 68% preparation errors, 22% material incompatibility, and 10% environmental factors. This data-driven approach improves future repair success rates by up to 40%.
Conclusion: Mastering Air Mattress Repairs for Long-Term Performance
From precise leak detection to professional patching techniques and comprehensive quality validation, you now possess the complete methodology for extending your air mattress’s lifespan. Remember that successful repairs combine proper preparation (cleaning, sanding), material selection (vinyl vs.
TPU-specific patches), and careful application (gradual inflation, edge sealing). The advanced monitoring and testing protocols ensure your repairs withstand real-world use.
While some cases may require replacement, most air mattresses can enjoy multiple additional years of service with these professional approaches. Put this knowledge into action today—your next comfortable, leak-free night’s sleep awaits.
Frequently Asked Questions About Patching Air Mattresses
What’s the best adhesive for air mattress repairs?
For permanent repairs, solvent-based vinyl adhesives (like HH-66 Vinyl Cement) create the strongest molecular bonds. Water-based options work for temporary fixes but degrade faster.
Avoid super glues – they become brittle and crack under mattress flexing. Professional repair shops use two-part polyurethane adhesives that cure flexible yet durable, lasting 3-5 times longer than consumer-grade products.
Can I use duct tape to patch an air mattress?
While duct tape provides a quick emergency fix, it’s not a permanent solution. The adhesive dries out in 2-3 weeks, and residue makes proper repairs harder. If you must use tape temporarily, choose specialized repair tapes like T-Rex Tape that withstand flexing. Always remove tape residue with citrus-based cleaners before applying permanent patches.
How do I repair a leak near the valve?
Valve leaks require special attention. First, tighten the valve nut with channel-lock pliers (use cloth to prevent damage). If air still escapes, apply food-grade silicone grease to the O-ring. For cracks in the valve housing, use a valve-specific repair kit with flexible epoxy designed for high-stress areas.
Why does my patched mattress still lose air slowly?
Slow leaks typically indicate either microscopic holes in the original material (use UV dye to locate) or improper patch adhesion. Ensure you sanded the area thoroughly and applied adhesive to both surfaces. Temperature changes can also cause apparent leaks – a 10°F drop decreases pressure by about 3%.
How long should I wait before using a repaired mattress?
Curing times vary by adhesive type. Water-based glues need 24 hours, solvent-based require 48 hours, and professional two-part adhesives need 72 hours for full strength. Never fold or heavily use the mattress during this period. For optimal results, perform a 110% pressure test before regular use.
Can I patch an inflatable mattress from the inside?
Internal patches are possible but challenging. Use flexible plastic sheets (0.5mm thickness) with adhesive on both sides. Insert through the valve using flexible rods, positioning with a magnetic guide system. This method works best for large punctures (2+ inches) but requires specialized tools most consumers don’t have.
What’s the average lifespan of a properly repaired air mattress?
Quality repairs typically extend mattress life by 2-3 years. Factors affecting longevity include: patch material (vinyl lasts longer than fabric), location (center patches outlast edge repairs), and usage frequency. Professionally repaired mattresses often reach 75% of their original lifespan.
How do I prevent future leaks after repairing?
Use protective measures: place a mattress topper (3/4″ foam works best), avoid sharp objects (including pet claws), and maintain proper inflation (never exceed manufacturer PSI). For outdoor use, apply UV protectant annually. Store partially inflated in climate-controlled spaces to prevent material fatigue.