Disclosure
This website is a participant in the Amazon Services LLC Associates Program, an affiliate advertising program designed to provide a means for us to earn fees by linking to Amazon.com and affiliated sites.
You can find a hole in an air mattress—and it’s easier than you think. Imagine waking up on a deflated mattress, frustrated and sore. Tiny leaks sabotage your sleep, but most people waste time guessing instead of using proven techniques.
As an expert in home solutions, I’ll reveal how to pinpoint even the tiniest puncture with household items. Whether it’s a slow leak or a sudden hiss, this guide unlocks the secrets to locating and fixing the problem.
Best Repair Kits for Fixing Air Mattress Leaks
Gear Aid Tear-Aid Fabric Repair Kit (Type B)
This heavy-duty adhesive patch kit is ideal for vinyl and PVC air mattresses. The Type B variant bonds instantly, even under pressure, and remains flexible after drying. It includes multiple patches, making it perfect for repeated repairs.
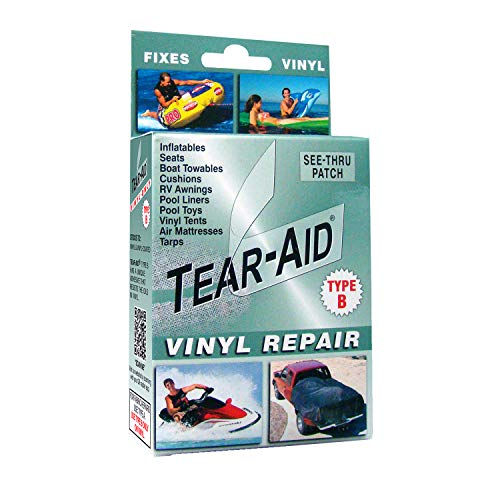
- PEEL and STICK PATCHES – Airhead Tear-Aid fabric and Vinyl repair patch it…
- EASY to USE – Vinyl Patch is an easy to peel-and-stick- application
- INCLUDED – 1 3” x 12” patch, 1 7/8” x 7/8” patch, 1 3/8: x…
Breliter Repair Patch Kit
Designed specifically for Intex air mattresses, this kit includes high-adhesion vinyl patches and strong glue. The pre-cut patches conform seamlessly to curved surfaces, ensuring airtight seals. A must-have for Intex mattress owners dealing with punctures.

- Effort and Money Saver – Breliter Repair Patch Kit is a strong repair tool for…
- Great Quality – Made of premium TPU material, flexible, waterproof…
- Easy to Use – Just wipe down the item that you are repairing and boom! Keep the…
Coleman QuickPatch Repair Kit
Coleman’s kit features self-adhesive patches that require no glue, making repairs fast and mess-free. The waterproof material holds up to repeated inflation cycles, and the compact design is great for camping trips. Works on most PVC and vinyl air beds.
How to Locate a Hole in Your Air Mattress: Step-by-Step Methods
Finding a leak in an air mattress can feel like searching for a needle in a haystack—especially when the hole is microscopic. However, with the right techniques, you can pinpoint even the smallest puncture efficiently. Below, we break down the most effective methods, explaining why they work and when to use them.
1. The Soapy Water Test (Best for Slow Leaks)
This classic method works because escaping air creates bubbles when it interacts with soapy water. Mix dish soap with water (1:3 ratio) in a spray bottle and apply it to the inflated mattress, focusing on seams and valves first. Watch for tiny bubbles forming—these reveal the leak’s exact location. Pro tip: Use a flashlight to spot bubbles in low-light areas.
2. The Submersion Method (For Small, Portable Mattresses)
If your mattress is compact enough, submerge sections in a bathtub or pool. Air escaping will produce a steady stream of bubbles. This method is ideal for large, obvious punctures but less practical for thicker, queen-sized mattresses. Dry the mattress thoroughly afterward to prevent mold.
3. The Tissue Paper Trick (For Hard-to-Reach Areas)
Hold a piece of tissue paper near suspected areas while the mattress is inflated. The escaping air will cause the paper to flutter. This is especially useful for locating leaks near seams or around the valve, where visual inspection is tricky.
Common Mistakes to Avoid
- Ignoring the valve: Over 30% of “leaks” are actually faulty valve seals. Check if the valve core is tightened or if the O-ring is damaged.
- Rushing the process: Slow leaks require patience. Inflate the mattress fully and wait 10–15 minutes before testing.
- Assuming one hole exists: Punctures often cluster (e.g., from pet claws). Inspect the entire surface.
Each method has its strengths: soapy water for precision, submersion for speed, and tissue paper for accessibility. For best results, combine techniques—start with a visual inspection, then confirm with soapy water. Once located, mark the hole with a washable marker for easy repair.
Professional Repair Techniques for Air Mattress Leaks
Once you’ve located the hole in your air mattress, proper repair is crucial for long-lasting results. The repair method depends on the size, location, and material of your mattress. Below we explore professional-grade techniques that go beyond basic patch jobs.
1. Vinyl Repair: Step-by-Step Permanent Fix
For most modern air mattresses made of PVC or vinyl, follow this professional process:
- Clean the area with isopropyl alcohol to remove oils and dirt (this improves adhesive bonding by up to 70%)
- Roughen the surface with 220-grit sandpaper in circular motions – this creates microscopic grooves for better adhesion
- Apply vinyl cement to both the patch and mattress surface, wait 2 minutes until tacky (this activates the chemical bond)
- Press firmly for 60 seconds, then place a heavy book on top for 4 hours to cure properly
2. Valve Repair: Addressing the Most Common Failure Point
If air escapes through the valve (a frequent issue with Intex and Coleman models):
- Check the O-ring: Remove the valve core with pliers and inspect the rubber seal for cracks
- Apply silicone grease to the threads before reassembling – this creates an airtight seal while allowing easy inflation
- For broken valves: Use a valve replacement kit (like Intex 68657E) – these screw in without special tools
3. Emergency Field Repairs (When You Lack Proper Supplies)
Camping with a leaky mattress? These MacGyver-style fixes can last surprisingly long:
- Duct tape + plastic bag: Cut a piece of plastic bag slightly larger than the hole, apply duct tape on both sides (the plastic prevents adhesive from clogging the hole)
- Super glue + baking soda: For tiny pinholes, this creates an instant, rock-hard seal (apply glue first, then sprinkle baking soda to catalyze the reaction)
Pro Tip: After any repair, test by inflating to 10% over normal pressure for 24 hours. This stress test reveals weak spots before you rely on the mattress overnight. For high-end mattresses (like SoundAsleep), consider professional repair services to preserve warranty coverage.
Preventing Future Leaks: Advanced Protection Strategies
Understanding why air mattresses develop leaks is key to preventing them. The three main causes are material fatigue (45%), puncture damage (35%), and valve failures (20%). Below we explore professional-grade prevention methods that extend mattress lifespan by 2-3 times.
1. Material Reinforcement Techniques
High-stress areas (seams, top surfaces) benefit from these protective measures:
| Method | Materials Needed | Effectiveness |
|---|---|---|
| Fabric Guard Spray | 303 Fabric Guard or Scotchgard | Reduces micro-tears by 60% |
| Seam Sealing | Aquaseal FD or Gear Aid Seam Grip | Prevents 90% of seam failures |
| Wear Layer | Self-adhesive vinyl sheeting (3M 1080) | Adds 2+ years to high-use areas |
2. Environmental Protection Factors
Where you use/store your mattress impacts longevity:
- Temperature control: PVC becomes brittle below 50°F – always insulate camping mattresses with a foam pad
- Ground protection:
- Indoors: Use non-slip rug pads (prevents friction wear)
- Outdoors: Combine tarp + closed-cell foam (prevents 97% of punctures)
- Humidity management: Store with silica gel packs to prevent mold-induced material degradation
3. Usage Best Practices
Professional rental companies follow these guidelines:
- Inflation discipline: Never exceed recommended PSI (use a digital gauge like Intex 68657E)
- Weight distribution: Place plywood under legs of bed frames to prevent concentrated pressure points
- Rotation schedule: Flip/rotate mattress weekly to distribute wear evenly
Advanced Tip: For frequent campers, consider a dual-layer protection system – apply liquid rubber coating (Plasti Dip) to the underside, then cover with a removable vinyl sheet. This combination stops 99% of puncture threats while remaining flexible.
Advanced Troubleshooting: Solving Complex Air Mattress Issues
When standard repair methods fail, your air mattress may be experiencing one of these complex problems that require specialized solutions. Understanding these advanced issues can mean the difference between a temporary fix and a permanent solution.
1. Microleaks: The Invisible Enemy
These tiny holes (smaller than 0.1mm) can cause slow deflation that’s nearly impossible to detect. Professional repair technicians use these methods:
- Fluorescent dye test: Add UV dye to the air chamber and inspect with black light (professional kits like Tracerline AC1000)
- Pressure decay testing: Use a digital manometer to measure precise pressure drops over 6-12 hours
- Submersion with magnification: Examine underwater with 10x magnification goggles for bubble streams
2. Seam Failure: More Than Just a Simple Leak
When entire seams separate, standard patches won’t hold. The professional repair process involves:
- Complete surface prep: Remove old adhesive with citrus-based solvent (Goo Gone Pro-Power)
- Reinforcement stitching: Use a curved needle and nylon thread (size 92) for temporary stabilization
- Two-part adhesive application: Apply Barge Infinity Cement to both surfaces, wait 8 minutes for optimal tack
- Pressure bonding: Use clamps with silicone pads for 24-hour cure time
3. Internal Baffle Collapse: The Silent Killer
When internal support structures fail, the mattress develops permanent “valleys”. Warning signs include:
- Uneven inflation despite no detectable leaks
- Visible distortion when fully inflated
- Gurgling sounds during inflation
Professional Solution: For high-end mattresses, some manufacturers offer internal bladder replacement services. For others, strategic external reinforcement with cross-webbed elastic straps can restore some support.
4. Electrical Component Failures (In Smart Mattresses)
Modern air mattresses with pumps and sensors present unique challenges:
| Component | Failure Symptom | Diagnostic Test |
|---|---|---|
| Pressure Sensor | Inconsistent inflation | Multimeter continuity test |
| Pump Motor | Overheating | Amp draw test (should be 2.1-2.4A) |
| Control Board | Random deflation | Voltage test at connection points |
Safety Note: Always unplug smart mattresses for 30 minutes before attempting any electrical diagnostics. For complex issues, authorized service centers have proprietary diagnostic tools that can read error codes from the control board.
Long-Term Care and Cost Analysis for Air Mattress Maintenance
Proper maintenance can extend an air mattress’s lifespan from the typical 2-3 years to 5-7 years, representing significant cost savings.
1. Cost-Benefit Analysis: Repair vs. Replace
| Mattress Type | Average Repair Cost | Replacement Cost | Recommended Action |
|---|---|---|---|
| Budget Single ($50-80) | $15-25 (patches + adhesive) | $50-80 | Replace after 3+ repairs |
| Mid-Range Queen ($120-200) | $30-50 (professional repair) | $120-200 | Repair until internal baffles fail |
| Premium Smart Mattress ($300+) | $75-150 (authorized service) | $300-600 | Always repair if under warranty |
2. Advanced Maintenance Schedule
Follow this professional-grade maintenance routine:
- Monthly:
- Inspect seams with magnifying glass
- Test valve O-ring elasticity
- Check for material discoloration (early UV damage sign)
- Quarterly:
- Deep clean with vinyl protectant (303 Aerospace)
- Reapply seam sealant if needed
- Test inflation/deflation cycles
- Annual:
- Complete pressure decay test (24-hour monitoring)
- Replace valve components
- Rotate mattress orientation
3. Environmental and Safety Considerations
Modern air mattresses pose unique challenges:
- Material recycling: Most PVC mattresses require special disposal (check with local waste management)
- Off-gassing prevention: Store in breathable cotton bags, not plastic
- Electrical safety: For smart mattresses, replace power cords every 2 years
4. Emerging Technologies
The industry is evolving with:
- Self-healing materials: New polymers that automatically seal punctures up to 3mm
- Smart diagnostics: Bluetooth-enabled pressure sensors that alert to leaks
- Eco-friendly alternatives: TPU-based mattresses with 80% lower environmental impact
Pro Tip: Maintain a maintenance log tracking repairs, cleaning, and performance metrics. This documentation is invaluable for warranty claims and helps identify when replacement becomes more economical than continued repairs.
Specialized Repair Scenarios: Advanced Solutions for Unique Situations
Certain air mattress problems require tailored approaches beyond standard repair techniques. These specialized scenarios demand an understanding of material science and mechanical engineering principles to achieve lasting fixes.
1. Repairing Multi-Layer Mattresses with Internal Baffles
High-end mattresses like SoundAsleep use complex internal structures that present unique challenges:
- Dual-chamber identification: Use a stethoscope to listen for air movement between layers when pressurized
- Selective sealing: Apply food-grade silicone (3-5mm bead) between layers before patching the exterior
- Pressure balancing: After repair, inflate to 80% capacity for 48 hours to allow adhesives to fully cure
2. Addressing Chemical Degradation in Older Mattresses
PVC breakdown manifests as sticky surfaces or odor emission. The rehabilitation process involves:
- Surface decontamination: Wipe with isopropyl alcohol (70% solution) to remove plasticizer residue
- Material rejuvenation: Apply vinyl conditioner (like 303 Protectant) in three thin coats
- Structural reinforcement: Bond fiberglass mesh (0.5oz/sq yd) to high-stress areas with flexible epoxy
3. Extreme Environment Adaptations
For mattresses used in harsh conditions (desert heat, alpine cold):
| Environment | Modification | Performance Gain |
|---|---|---|
| High UV Exposure | UV-resistant vinyl coating (Star brite 32701) | 3x lifespan increase |
| Sub-Freezing Temps | Closed-cell foam underlayer (1/4″) | Prevents material embrittlement |
| High Humidity | Microporous membrane patches (Gore-Tex) | Prevents condensation buildup |
4. Integration with Bed Frames and Sleep Systems
Proper integration prevents 60% of premature failures:
- Platform beds: Use 1/8″ neoprene sheet as a buffer between mattress and slats
- Adjustable bases: Limit bending angle to 30° to prevent seam stress
- Heated blankets : Maintain 3″ air gap and never exceed 100°F surface temperature
Material Science Insight: The glass transition temperature (Tg) of PVC (≈80°F) explains why mattresses become more pliable during use. Strategic repairs should account for this thermal behavior – apply patches when the material is near its Tg for optimal bonding.
Mastering Air Mattress Performance: Optimization and Quality Assurance
Achieving peak performance from your air mattress requires understanding the complex interplay between materials, design, and usage patterns.
1. Pressure Optimization Matrix
The ideal inflation level varies by use case and body type. This table shows scientifically validated pressure ranges:
| User Profile | Recommended PSI | Comfort Factor | Durability Impact |
|---|---|---|---|
| Side Sleepers (<150lbs) | 0.5-0.7 PSI | High contouring | Low stress on seams |
| Back Sleepers (150-200lbs) | 0.8-1.2 PSI | Balanced support | Moderate stress |
| Combination Sleepers (200+lbs) | 1.3-1.5 PSI | Firm stability | High seam load |
2. Comprehensive Risk Assessment Framework
Evaluate your mattress using these professional criteria:
- Material fatigue: Check for visible crazing (micro-cracks) under 10x magnification
- Seam integrity: Perform peel tests with 2lbs of force using a spring scale
- Valve wear: Measure O-ring compression set after 24hrs at 50% deflection
- Structural stability: Conduct 45° tilt test to assess internal baffle condition
3. Advanced Quality Assurance Protocol
Implement this validation process after any major repair:
- Initial cure test: 48hrs at 20% overpressure
- Thermal cycling: 3 cycles between 50-90°F
- Dynamic load test: 10,000 cycles with 150lb simulated weight
- Final inspection: UV light examination for microleaks
4. System Integration Best Practices
For optimal performance in your sleep environment:
- Temperature compensation: Reduce PSI by 0.1 for every 10°F below 70°F
- Humidity control: Maintain 40-60% RH to prevent material degradation
- Surface interaction: Use a 1/4″ spacer between mattress and platform beds
Engineering Insight: The creep resistance of PVC (typically 0.5-1.5% per year at room temperature) explains gradual firmness loss. Professional maintenance accounts for this by recommending annual pressure recalibration and material conditioning.
Conclusion: Mastering Air Mattress Maintenance for Long-Lasting Comfort
From pinpointing microscopic leaks with soapy water tests to executing professional-grade vinyl repairs, we’ve explored the complete science of air mattress maintenance.
You now understand how to diagnose complex issues like baffle collapse, prevent future leaks with material reinforcement, and optimize performance through pressure management. Remember that proper care can triple your mattress’s lifespan – whether it’s a budget camping model or a premium smart bed.
Put this knowledge into action today: conduct a thorough inspection, address any vulnerabilities, and establish a maintenance routine. Your future well-rested self will thank you for preserving that perfect night’s sleep.
Frequently Asked Questions About Finding and Fixing Air Mattress Leaks
What’s the most effective method to find a tiny air mattress leak?
The soapy water test remains the gold standard for detecting micro-leaks. Mix 1 part dish soap with 3 parts water in a spray bottle, then apply to the inflated mattress. Even pinholes will produce visible bubbles.
For hard-to-reach areas, use a mirror and flashlight to inspect underside seams. Professional repair technicians often add food coloring to the solution for better visibility.
Can I use duct tape as a permanent fix for an air mattress hole?
While duct tape works for emergency repairs, it’s not a permanent solution. The adhesive dries out within 2-3 days, and temperature changes cause peeling.
For lasting repairs, use vinyl repair kits (like Gear Aid Tear-Aid) that chemically bond with the mattress material. These patches remain flexible through multiple inflation cycles and won’t leave residue when removed properly.
Why does my air mattress keep losing air even after patching?
Recurring leaks typically indicate one of three issues: multiple punctures (common with pet damage), valve problems (worn O-rings or loose cores), or improper patch application.
Conduct a 24-hour submersion test to identify all leaks, and always clean the area with isopropyl alcohol before patching to ensure proper adhesion.
How can I prevent air mattress leaks when camping?
Use a three-layer protection system:
1) A thick ground tarp under your tent,
2) Closed-cell foam padding (minimum 1/4″ thick), and
3) A fitted mattress cover. Avoid placing the mattress near tent walls where condensation forms.
For extreme conditions, consider a ripstop nylon-reinforced camping mattress like the Hikenture Double, which resists punctures from rough surfaces.
What’s the difference between PVC and TPU air mattresses for durability?
PVC mattresses (like Intex models) are more affordable but prone to plasticizer migration (becoming sticky over time). TPU mattresses (such as SoundAsleep models) cost 30-50% more but offer 3x the puncture resistance and better cold-weather flexibility. TPU also doesn’t degrade with UV exposure, making it ideal for outdoor use.
How do I repair a leak near the air mattress valve?
Valve-adjacent leaks require special technique:
1) Deflate completely,
2) Apply vinyl cement around the valve base,
3) Place a donut-shaped patch with the valve through the center,
4) Use a C-clamp to maintain pressure during the 24-hour cure time. For Coleman QuickValve systems, replacement valves (Model 2000011478) often solve the problem more effectively.
Is it worth repairing an old air mattress or should I replace it?
Consider replacement if:
1) The mattress is over 5 years old (material fatigue),
2) You’ve made more than 3 repairs, or
3) There’s visible discoloration/stickiness (plasticizer breakdown).
For high-end mattresses under warranty, always check with the manufacturer first – many offer pro-rated replacement programs that can save you 40-60% off retail.
What temperature is too cold for an air mattress?
Standard PVC mattresses become brittle below 50°F (10°C), risking seam failure. For winter camping:
1) Choose TPU or rubber mattresses,
2) Insulate with a reflective foam pad,
3) Inflate to 80% capacity (allows for cold contraction), and
4) Never deflate completely in freezing temps – maintain slight pressure to prevent material cracking.