Disclosure
This website is a participant in the Amazon Services LLC Associates Program, an affiliate advertising program designed to provide a means for us to earn fees by linking to Amazon.com and affiliated sites.
Want to turn your bedroom into a Halloween haven but don’t know where to start? You’re not alone. Many people assume Halloween decor is just plastic spiders and fake cobwebs, but the best Halloween bedroom ideas go far beyond clichés. Imagine drifting off to sleep under a canopy of twinkling orange fairy lights or waking up to a bewitchingly elegant gothic setup—your space can be both eerie and inviting.
This year, Halloween decor trends blend nostalgia with modern sophistication. Whether you crave a haunted-house vibe or a subtle autumnal retreat, the right mix of textures, colors, and lighting can transform your room. From DIY projects to pro-level ambiance tricks, we’ll reveal how to create a space that’s spine-tingling yet stylish—no cheap props required.
Best Halloween Decor Products for a Spooky Bedroom
Govee 100ft RGBIC LED Strip Lights
Transform your bedroom into a haunted paradise with the Govee LED Strip Lights. These smart lights offer 16 million colors, including eerie purples, deep oranges, and blood reds—perfect for setting a chilling ambiance. Control them via app or voice commands for dynamic Halloween lighting effects.

- More Length, More Impact: 100ft Alexa LED light strip (2 rolls of 50ft) provides…
- Smart RGBIC Effects: Unlike RGB, RGBIC LED strip lights present stunning…
- Voice Control LED Lights: Compatible with Alexa and Google Assistant, this 100ft…
6Pack Halloween Black Gauze Wall Decor, Outdoor Halloween Fake Spider Web
For a quick yet terrifying transformation, the Fake Spider Web Kit is a must. This 6-pack of ultra-fine, stretchable webbing clings easily to walls, furniture, and ceilings, creating an instant haunted-house effect. Pair with plastic spiders for extra creepiness.
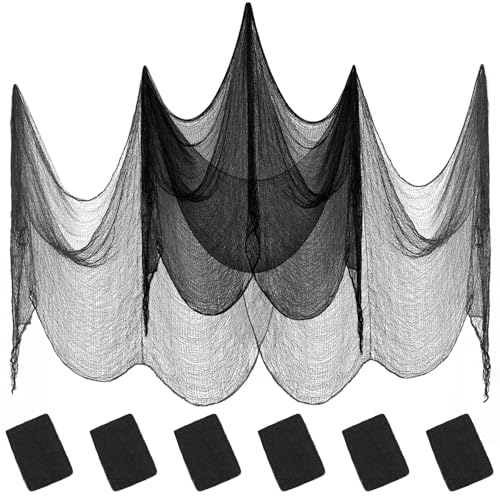
- 【Package includes】 6 packs black cheesecloth halloween Netting decorations…
- 【Novel design】 Black gauze cloth is made of high-quality cotton, and this…
- 【Operation tutorial】This black spider web is the best choice for Halloween…
Luminara Realitic Flameless LED Candles (Set of 3)
Add a ghostly glow with Luminara’s Flameless LED Candles. These battery-operated candles flicker like real flames, casting eerie shadows without fire hazards. Their realistic wax design and remote control make them ideal for a safe yet spooky Halloween bedroom setup.

- Enjoy the cozy glow of candles without any of the fuss! These three candles are…
- Luminara Flameless LED Moving Flame Pillar Candles are made with 100% pure…
- The light is a warm white color encased in a yellow flame designed to be as…
How to Create a Hauntingly Atmospheric Bedroom with Lighting
Lighting is the most powerful tool for transforming your bedroom into a Halloween sanctuary. Unlike generic decorations, strategic lighting manipulates shadows, depth, and mood—turning ordinary spaces into eerie environments. The key lies in layering different light sources to create dynamic, spine-chilling effects.
1. Use Colored LED Strips for a Supernatural Glow
Warm orange and deep purple hues instantly evoke Halloween vibes. Smart LED strips like the Govee H6199 allow you to adjust colors via app, enabling effects like pulsating “haunted house” reds or a slow, ghostly fade. Place them under beds, behind headboards, or along ceiling edges to cast unsettling glows. For extra drama, sync them with sound-activated modes to flicker with creaks or thunder sounds.
2. Incorporate Flameless Candles for Safe Spookiness
Real candles pose fire risks, but flameless alternatives like Luminara LED candles offer realistic flickering without danger. Cluster them on nightstands or windowsills to mimic a séance setup. Pro tip: Place them near sheer fabrics (like cheesecloth “ghosts”) to project eerie moving shadows onto walls.
3. Play with Directional Lighting for Dramatic Shadows
Uplighting (placing lights at floor level) elongates shadows, making furniture look distorted. Try these setups:
- Jack-o’-Lantern Projectors: Use a HallowDreams Pumpkin Light to cast moving bat or witch silhouettes onto ceilings.
- Blacklight Accents: Expose hidden “bloodstains” (washable UV paint) or make white fabrics glow unnaturally.
Avoid overlighting—darkness is essential for suspense. Use dimmers or smart bulbs to maintain a balance where details are visible but unsettlingly vague. This mimics the psychological tension found in horror films, where the unknown triggers fear.
Common Mistakes to Avoid
Many DIY haunters make these errors:
- Overloading on strobes: Rapid flashes cause discomfort. Opt for slower, irregular flickering instead.
- Ignoring light temperature: Cool whites feel clinical, while warm ambers (2700K–3000K) enhance coziness—even in scary setups.
For a next-level touch, integrate motion-activated lights that trigger when someone enters the room, simulating a ghostly presence. Pair with faint howling wind sounds for a fully immersive experience.
DIY Halloween Bedroom Decor: Transform Your Space with Budget-Friendly Projects
Creating a spine-chilling bedroom doesn’t require expensive props—just creativity and a few household items. These DIY projects combine craftsmanship with horror aesthetics, offering professional-looking results without professional costs. Below are step-by-step methods to elevate your space from ordinary to otherworldly.
1. Floating Ghost Illusion with Cheesecloth
This classic effect creates ethereal, floating specters in corners or above your bed. Here’s how to execute it perfectly:
- Materials: Cheesecloth, liquid starch, a balloon, and a LED tea light.
- Process: Inflate the balloon to head-size. Drape cheesecloth over it, then brush with liquid starch. Let dry overnight for a stiff, hollow shape.
- Pro Tip: Use a heat gun (low setting) to create tattered edges for a decayed look. Insert the tea light before hanging with transparent fishing line.
Why it works: The translucent fabric diffuses light unevenly, mimicking paranormal apparitions. For groups of ghosts, vary sizes and heights to simulate movement.
2. “Haunted Mirror” Using Two-Way Film
Turn any mirror into a jump-scare centerpiece with this illusion:
- Apply one-way window film (like Rabbitgoo’s Privacy Film) to the mirror’s surface during daylight—it becomes reflective at night when your room is brighter than the hidden area behind.
- Hide a motion-activated figure (e.g., a skeleton hand) behind the mirror. When someone approaches, the movement triggers the reveal.
Troubleshooting: If the effect fails, ensure the hidden space is pitch black. Use black fabric to block ambient light leaks.
3. Bloody Wall Art with Washable Paints
Create gruesome yet removable “crime scenes” using:
- Base Layer: Mix acrylic paint with corn syrup for thick, drippy blood effects.
- Details: Add “handprints” by pressing plastic gloves coated in paint against walls.
- Removal: Use warm water and dish soap—test a small area first to ensure wall safety.
Alternative Approach: For renters, create blood-splattered canvases or fabric panels that hang like tapestries. This preserves walls while maintaining horror appeal.
Common Challenges & Solutions
DIYers often face these issues:
- Weak Adhesion: For hanging elements, use Poster Putty instead of tape—it holds heavier items without damaging surfaces.
- Overcrowding: Limit to 2–3 focal pieces per wall. Clutter dilutes the scare factor.
For advanced crafters, integrate Arduino microcontrollers to automate effects like flickering lights or sudden sound bursts when motion is detected. Pair with a smart plug for voice-controlled scares.
Advanced Halloween Bedroom Effects: Sensory Techniques for Maximum Impact
True horror immersion engages all five senses. While most decor focuses on visuals, these advanced techniques create a multi-sensory haunting experience that will leave guests genuinely unsettled. We’ll explore professional-grade methods used in haunted attractions, adapted for residential use.
1. Atmospheric Soundscaping for Psychological Terror
Sound is 40% more effective than visuals at triggering fear responses, according to haunted house designers. Implement these layered audio techniques:
| Sound Type | Recommended Source | Psychological Effect |
|---|---|---|
| Infrasound (below 20Hz) | Buttkicker LFE transducer under bed | Creates subliminal unease and “haunted” sensations |
| Directional Audio | Soundlazer SL-1 parametric speaker | Makes whispers seem to come from empty corners |
| Environmental Loops | FreeSound.org atmospheric tracks | 60-minute tracks of distant screams/wind prevent pattern recognition |
Pro Tip: Place vibration speakers inside hollow furniture for “haunted house” knocking effects that seem to come from within walls.
2. Olfactory Effects: The Power of Scent
Smell triggers memory 100x faster than visual cues. Use these scent combinations with ultrasonic diffusers:
- Graveyard Fog: 3 parts vetiver + 1 part patchouli + 1 drop geosmin (petrichor compound)
- Haunted Attic: 2 parts cedarwood + 1 part vanilla + 1 part black pepper
- Industrial Horror: Ozonic notes with hints of burnt wire (use sparingly)
Warning: Always use scent diffusers with timers – continuous exposure causes olfactory fatigue within 15 minutes.
3. Tactile Surprises for Jump Scares
Incorporate these touch-based elements at key interaction points:
- Bed Entry: Line sheets with “flesh” textured silicone patches (Smooth-On EcoFlex 00-30)
- Doorknobs: Coat with food-grade gelatin for a decomposing feel
- Floor Path: Alternate carpet squares with chilled marble tiles (use freezer packs underneath)
Common Mistakes: Overloading tactile effects causes desensitization. Limit to 3-4 well-placed interactions per room. Always provide clear exit paths for those who need to escape the experience.
4. Temperature Manipulation Techniques
The human body perceives cold spots as paranormal. Create controlled thermal zones:
- Place dry ice foggers near vents (ensure proper ventilation)
- Use smart thermostats to drop room temp by 5°F when motion detected
- Position standing fans behind curtains blowing over ice buckets
For advanced setups, combine with thermal camera projections that show “ghostly” cold spots moving across walls.
Safety Considerations for Halloween Bedroom Transformations
While creating an immersive haunted bedroom is exciting, safety must remain the top priority. Professional haunt designers follow strict protocols that residential decorators should adapt. This section covers comprehensive safety measures that protect both participants and your property.
1. Electrical Safety for Atmospheric Lighting
Halloween lighting setups often overload circuits. Follow these professional electrical guidelines:
- Circuit Management: Never exceed 80% of a circuit’s capacity (1,440W on a 15-amp circuit). Use a Kill-A-Watt meter to monitor loads.
- Extension Cord Safety: Only use outdoor-rated cords (12-14 AWG) with GFCI protection. Never run cords under rugs or through doorways.
- LED Conversion: Replace incandescent bulbs with LED equivalents to reduce heat and power consumption by up to 90%.
Fire Prevention Tip: Maintain 3-foot clearance around heat sources and use flame-retardant sprays (like Flame Check) on fabrics.
2. Structural Safety for Hanging Decorations
Improper hanging methods cause most Halloween accidents. Use these professional hanging solutions:
| Surface Type | Recommended Hardware | Weight Limit |
|---|---|---|
| Drywall (no stud) | Toggle bolts | 50 lbs per anchor |
| Ceiling tiles | Grid clips | 15 lbs max |
| Doors/windows | Over-door hangers | 20 lbs distributed |
Always test installations by applying 150% of expected force before adding decorations.
3. Psychological Safety Considerations
Haunted experiences can trigger real trauma responses. Implement these protective measures:
- Clear Exit Paths: Maintain 36-inch wide walkways with glow tape markings
- Safe Words: Establish “stop” phrases that immediately pause effects
- Content Warnings: Disclose intense elements (strobe lights, jump scares) at entry
For Children: Create “monster-free zones” with normal lighting where kids can retreat. The American Academy of Pediatrics recommends limiting scary experiences to 10-15 minutes for children under 12.
4. Post-Event Safety Protocols
Proper takedown prevents long-term damage:
- Wall Protection: Use 3M Command Strips instead of tape – removes cleanly after 60 days
- Fog Machine Maintenance: Run distilled water through machines after use to prevent mineral buildup
- Decor Storage: Seal foam props in plastic with desiccant packs to prevent mold
Professional Insight: Haunt industry standards recommend documenting all installations with photos before operation – this assists insurance claims if accidents occur.
Long-Term Halloween Decor: Sustainable and Reusable Solutions
Moving beyond disposable decorations, this section explores professional-grade solutions that offer multi-year usability while reducing environmental impact. We’ll analyze cost-per-use ratios, material durability, and storage solutions that transform Halloween decorating from an annual expense to a long-term investment.
1. Investment-Worthy Decor: Cost-Per-Use Analysis
Compare these common Halloween items through a 5-year lens:
| Item | Disposable Version Cost | Premium Version Cost | Break-Even Point |
|---|---|---|---|
| Artificial Cobwebs | $5/year (single-use) | $35 (reusable polyester) | 3 seasons |
| LED Lighting | $15 (seasonal strings) | $50 (commercial-grade) | 2 seasons |
| Prop Skeletons | $30 (PVC) | $120 (anatomical resin) | 4 seasons |
Pro Tip: Look for theatrical supply companies offering lifetime warranties on mechanisms – these often pay for themselves within 5 years.
2. Material Science for Durable Decor
These advanced materials withstand repeated use while maintaining eerie realism:
- FlexFoam-IT: Professional urethane foam that retains detail after 100+ compressions (ideal for monster masks)
- Dragon Skin FX: Platinum-cure silicone for props needing skin-like flexibility
- FRP (Fiberglass Reinforced Plastic): For outdoor elements needing structural integrity
Storage Consideration: These materials require climate-controlled storage (40-70°F, 40-50% humidity) to prevent degradation.
3. Future-Proofing Your Collection
Stay ahead of trends with these adaptable systems:
- Modular Scare Components: Invest in systems like ScareFactory’s interchangeable animatronic bases
- Smart Home Integration: Choose lighting and effects compatible with HomeKit/Google Home for voice control
- 3D Printing: Maintain digital files of custom props for on-demand replacement parts
Environmental Impact: The Halloween industry generates 1.9 billion pounds of annual waste. By switching to reusable decor, an average household can reduce their Halloween waste by 83% over 5 years.
4. Maintenance Protocols for Longevity
Extend decor lifespan with these professional preservation techniques:
- Post-Season Cleaning: Use isopropyl alcohol (70%) on plastics to prevent plasticizer migration
- Fabric Preservation: Store textiles with acid-free tissue paper to prevent yellowing
- Electronics Care: Remove batteries and use silica gel packs in storage containers
Emerging Trend: The haunt industry is shifting toward “living decor” – elements like preserved moss walls or air plants that evolve annually while maintaining a spooky aesthetic year-round.
Professional-Grade Automation for Halloween Bedroom Effects
Transitioning from static decorations to dynamic, interactive experiences requires sophisticated automation systems. This section breaks down professional haunt automation techniques adapted for residential use, covering everything from basic motion triggers to advanced show control systems.
1. Motion-Activated Trigger Systems
Create intelligent scares that respond to movement with these implementation strategies:
| Sensor Type | Best Placement | Recommended Delay | Ideal Effect Pairing |
|---|---|---|---|
| PIR Motion | Doorways (7ft high) | 0.5-1 second | Lightning flashes |
| Pressure Mats | Under rugs | Instant | Footstep sounds |
| Laser Tripwires | Hallways | 0.3 second | Animatronic jumps |
Technical Note: Use opto-isolators to protect your home automation system from voltage spikes when controlling high-power devices.
2. Show Control Programming
Professional haunts use these timing techniques to maximize scare impact:
- Peak-Through Timing: 2-3 second tease before main scare (activates peripheral vision)
- Reset Cycles: Program 30-45 second pauses between activations to prevent predictability
- Randomization: Add 10-15% timing variance to avoid rhythmic patterns
Advanced Method: Use DMX controllers (like ENTTEC Open DMX) to synchronize lighting, sound, and props on a unified timeline.
3. Smart Home Integration
Leverage existing home systems for enhanced effects:
- Voice Control: Program Alexa/Google routines to trigger effects with spooky phrases
- Climate Integration: Sync smart thermostats to drop temperature during scares
- Security Cameras: Use motion zones to trigger location-specific effects
Power Management: Professional haunts use sequenced startup (15-second stagger) to prevent circuit overloads when multiple devices activate simultaneously.
4. Troubleshooting Common Issues
Solve these frequent automation problems:
- False Triggers: Adjust sensor sensitivity and create exclusion zones for pets
- Timing Drift: Use NTP-synced controllers instead of internal clocks
- Effect Fatigue: Rotate 3-4 different scare profiles throughout the night
Future Trend: The haunt industry is adopting PoE (Power over Ethernet) for all low-voltage devices, reducing cable clutter while enabling centralized control through network switches.
Mastering Psychological Horror: Advanced Techniques for Maximum Impact
The most effective Halloween experiences leverage deep psychological principles to create authentic fear responses. This section reveals professional techniques used by theme park designers and horror filmmakers, adapted for residential haunting applications.
1. Cognitive Dissonance Techniques
These methods exploit the brain’s discomfort with conflicting information:
| Technique | Implementation | Psychological Basis | Effect Duration |
|---|---|---|---|
| Uncanny Valley | Nearly-human animatronics with subtle facial distortions | Activates threat detection in amygdala | 2-3 minute residual anxiety |
| Paranormal Sound | Reverse speech layered under ambient tracks | Triggers subconscious pattern recognition | 5-7 minute unease |
| Impossible Spaces | Trompe-l’oeil hallway extensions with forced perspective | Disrupts spatial processing | Immediate disorientation |
Pro Tip: Combine techniques in sequence – start with spatial distortion, layer in uncanny elements, then introduce auditory dissonance for cumulative effect.
2. Stress Wave Patterning
Professional haunts use scientifically-designed scare rhythms:
- Baseline Establishment: 90 seconds of moderate tension (flickering lights, distant sounds)
- Peak Stress: 15-20 second intense scare (multiple simultaneous effects)
- Recovery Valley: 45 seconds of decreased intensity (allows adrenaline processing)
Advanced Application: Program your automation system to track visitor movement and adjust timing dynamically based on their pace through the space.
3. Sensory Deprivation Tactics
Controlled removal of senses amplifies remaining stimuli:
- Visual: Blackout curtains with occasional strobes (activates retinal persistence)
- Auditory: Noise-cancelling zones followed by sudden sound bursts
- Tactile: Textured floor panels in complete darkness
Safety Protocol: Always provide clearly marked exit paths and limit deprivation sequences to under 30 seconds for residential applications.
4. Long-Term Psychological Considerations
Responsible haunting requires these safeguards:
- Post-Experience Care: Designate a well-lit “recovery room” with seating and water
- Participant Screening: Create intensity tiers (PG-13 to R-rated experiences)
- Memory Formation: End with a memorable but non-traumatic finale (e.g., surprising humor)
Quality Assurance: Test your scares with control groups, measuring heart rate variability (ideal range: 15-25% increase from baseline) and recording spontaneous reactions for refinement.
Emerging Research: Studies show optimal fear experiences maintain a 0.6:1 ratio of anticipation time to payoff duration – use smart timers to maintain this balance automatically.
Conclusion: Transform Your Bedroom into the Ultimate Halloween Experience
From eerie lighting techniques to professional-grade automation and psychological horror principles, we’ve explored how to create a Halloween bedroom that goes far beyond basic decorations. You’ve learned:
- How to layer lighting for maximum atmospheric effect
- Professional DIY methods for realistic, reusable props
- Advanced sensory techniques that engage sight, sound, and touch
- Critical safety considerations for responsible haunting
- Long-term investment strategies for sustainable decor
Now it’s your turn: Start with one signature element – perhaps the floating ghost illusion or motion-activated scares – then build your haunting masterpiece over time. Remember, the most effective Halloween experiences balance genuine scares with careful consideration for participants’ comfort and safety. Whether you’re aiming for subtle spookiness or full haunted house intensity, these professional techniques will help you create unforgettable Halloween memories year after year.
Frequently Asked Questions About Halloween Bedroom Decorations
What’s the safest way to create a spooky lighting effect in a bedroom?
For maximum safety, use LED lighting solutions with proper certifications (UL/ETL listed). Smart LED strips like Philips Hue allow eerie color effects without heat buildup. Avoid open flames completely – instead, use flameless candles with realistic flicker effects. For projection lighting, choose low-wattage (under 50W) LED projectors that won’t overheat. Always maintain clear paths to exits and use surge protectors for all electrical decorations.
How can I make Halloween decorations look more professional?
Professional haunts use three key techniques: layering (combining foreground, midground, and background elements), texturing (mixing materials like burlap, cheesecloth, and foam), and controlled lighting angles. Invest in a fog machine (like the Chauvet DJ Hurricane 700) to add atmospheric depth. The secret is subtlety – professional displays suggest horror rather than showing it outright.
What are the best reusable Halloween decorations worth investing in?
Top reusable investments include: commercial-grade animatronics (like Spirit Halloween’s motion-activated props), high-density foam tombstones, and professional fog machines. For lighting, DMX-controlled systems offer years of use. The most cost-effective pieces are versatile “base items” like high-quality cobwebs, skeleton props, and modular wall panels that can be rearranged annually for fresh looks.
How do I prevent Halloween decorations from damaging my walls?
Use museum putty for lightweight items and French cleat systems for heavier pieces. For hanging fabrics, install temporary ceiling hooks in existing screw holes. Painters tape with a hairdryer removal technique works for paper decorations. The key is surface preparation – clean walls with isopropyl alcohol before applying any adhesives, and always test in inconspicuous areas first.
What’s the best way to store Halloween decorations to preserve them?
Professional storage involves: climate control (55-65°F), acid-free tissue paper for delicate items, silica gel packs to prevent moisture damage, and rigid plastic bins (not cardboard). Separate components – store lighting cords wrapped separately from props. For animatronics, remove batteries and lubricate moving parts with white lithium grease before storage. Label all containers with photos of contents for easy retrieval.
How can I create effective scares without expensive animatronics?
Psychological scares work best on budgets: use Pepper’s Ghost illusions with mirrors and LED lights, create jump scares with hidden fishing line triggers, or employ simple but effective lighting tricks. A basic strobe light (even a smartphone app) combined with strategically placed static props creates the illusion of movement. Sound design is crucial – free horror soundscapes can elevate simple setups dramatically.
What are common Halloween decorating mistakes to avoid?
Top mistakes include: overloading circuits (stick to 80% of capacity), using flammable materials near heat sources, creating tripping hazards with poorly placed cords, and neglecting exit paths. Thematically, avoid mixing horror styles (e.g., zombies with witches) and don’t over-explain your scares – mystery creates fear. Always test your setup in daylight and darkness before the big night.
How early should I start setting up elaborate Halloween bedroom decor?
For complex setups, begin 4-6 weeks out.
Week 1: Plan and acquire materials.
Week 2-3: Build major props and install infrastructure (lighting, sound systems).
Week 4: Add details and test effects.
The final week is for refinements and safety checks. Professional haunt builders recommend working from the ceiling down – install overhead elements first, then walls, then floor decorations last.