DIY Canopy Bed Frames

DIY canopy bed frames

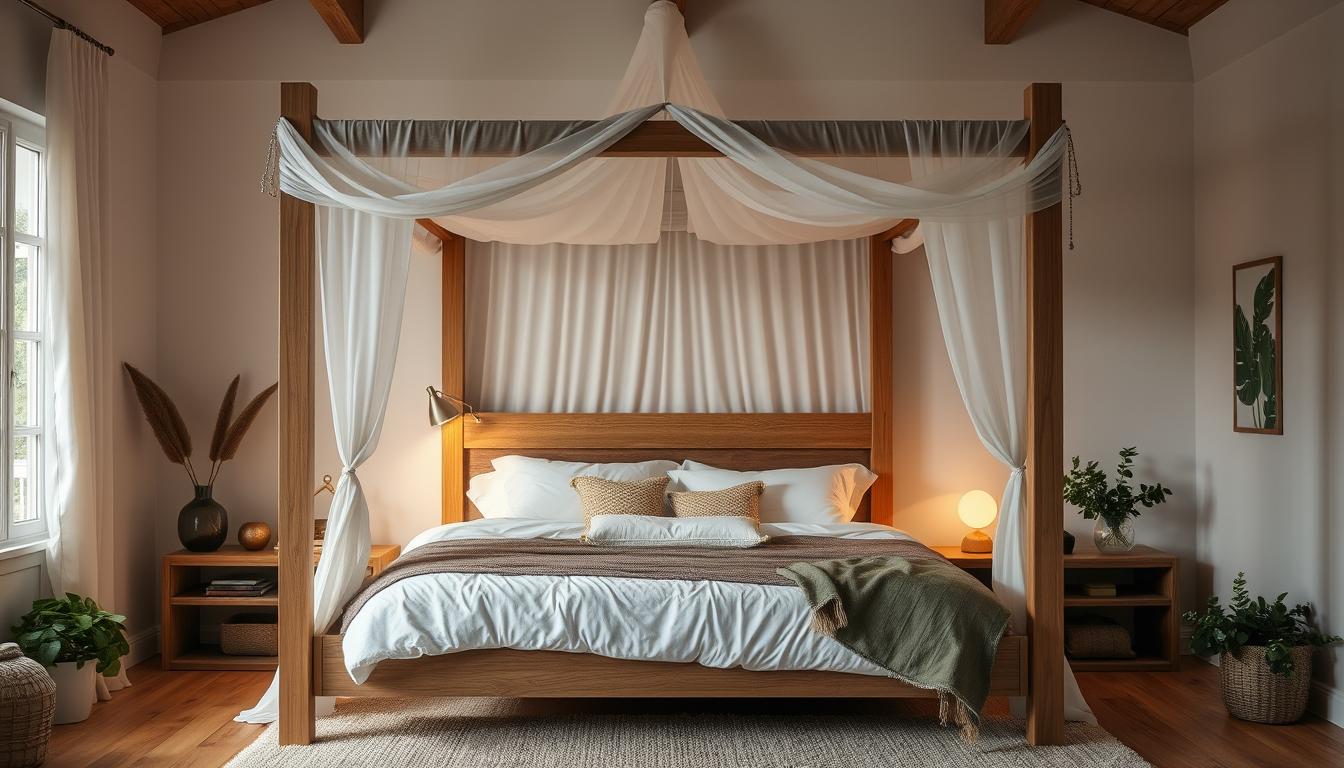
Make your sleep better with DIY canopy bed frames! Building your own canopy bed is rewarding and saves money. It adds elegance and luxury to your room. You can choose from classic four-poster or modern ceiling-mounted designs.

Using materials like PVC pipes, wood, or old curtain rods, you can make a bed that shows your style. This guide will show you how to make a DIY canopy bed. We’ll cover the benefits, what you need, and how to do it step by step.

Key Takeaways

  • DIY canopy bed frames are cheaper and customizable.
  • Building your own bed lets you create a unique space that shows your style.
  • You can make many designs, from classic to modern, with the right materials and instructions.
  • DIY projects give you a sense of pride and accomplishment.
  • Planning and following safety tips are key to a successful and lasting DIY bed.

Introduction to DIY Canopy Bed Frames

Canopy beds make your bedroom look fancy and cozy. You can choose from old-fashioned or modern styles. Making your own canopy bed is fun and lets you make it just right for you.

Why Choose a Canopy Bed?

Canopy beds are loved for many reasons. They make your bedroom feel snug and fancy. Plus, making one yourself can save you money and let you pick the design.

Benefits of Going DIY

  • Customizable design to fit your specific needs and preferences
  • Significant cost savings compared to store-bought canopy beds
  • Opportunity to showcase your DIY skills and create a unique piece of furniture
  • Potential for incorporating personal touches and custom features
  • Sense of accomplishment and pride in building your own bed frame

With the right stuff and a little effort, you can make your bedroom look great. It’s a fun and money-saving project for anyone who loves making furniture.

Materials Needed for Your Project

Starting a DIY canopy bed frame project means getting the right stuff. You’ll need tools like a miter saw, Kreg Jig, drill, table saw, brad nailer, and sander. These tools help you cut, join, and smooth the wood for a pro finish.

For the wood, pine or common boards in different sizes are good. Hardwood plywood adds durability. For a king-size bed, you’ll need about 22 2x4x8 boards, 4 1x10x8 boards, and 22 1x4x8 boards. You’ll also need pocket hole screws, wood screws, wood glue, and wood filler for your bed woodworking plans.

Essential Tools for Building

  • Miter Saw
  • Kreg Jig
  • Drill
  • Table Saw
  • Brad Nailer
  • Sander

Suggested Wood Types for Frames

  1. Pine
  2. Common Boards
  3. Hardwood Plywood

Looking to save money? Try using PVC pipes for your DIY bedroom decor project. With the right tools and materials, you can make a beautiful canopy bed frame that matches your style and space.

Design Options for Canopy Beds

DIY canopy beds offer endless design choices. You can pick from classic four-poster frames to sleek, modern styles. The right bed can make your bedroom look and feel amazing. Whether you like fancy headboards or simple four-poster designs, knowing your options helps you pick the best one.

Traditional vs. Modern Styles

Traditional canopy beds are all about grandeur. They have fancy headboards, big curtains, and a strong look. On the other hand, modern beds are sleek and simple. They use clean lines and light materials for a fresh, modern feel.

How to Choose Your Design

  • Think about your room’s size. Big rooms can handle bold, dramatic beds. Smaller rooms do better with simpler designs.
  • Look at your room’s decor and what you like. Classic beds fit elegant rooms, while modern ones suit modern or industrial styles.
  • Choose how much you want to see. A full canopy wraps you in comfort. A partial one or bed crown adds a touch without being too much.

The best canopy bed design is one that matches your taste and room. With so many choices, you’ll find the perfect fit for your space and style.

Step-by-Step Guide to Building a Canopy Bed

Making your own canopy bed is rewarding and saves money. First, set up your workspace and get all the materials. Here are the main steps to build the bed frame and add the canopy.

Preparing Your Workspace

Find a big area with lots of light and easy tool access. Put out all the lumber, hardware, and supplies before starting. Make sure you have a strong work surface, like a workbench or big table, to put things together.

Constructing the Frame

Begin by cutting lumber for the legs, rails, and headboard/footboard. Use a miter saw or table saw for accurate cuts. Drill holes for screws and start with the side assemblies.

Then, add the mattress slats and build the headboard and footboard. Lastly, connect everything to make the full bed frame.

Adding the Canopy

To add the canopy, install ceiling brackets or use adhesive hooks for a temporary fix. Measure your bed well to fit the canopy fabric right. Hang the curtains or fabric and adjust them to get the look you want.

Following these steps will help you make a beautiful DIY canopy bed. Always work safely, measure carefully, and take your time. This way, you’ll create a sturdy and nice-looking piece of furniture for your bedroom.

Finishing Touches

As you near the end of your DIY canopy bed project, focus on the finishing touches. Sanding, painting, and picking the right fabrics for your canopy are key. These steps will make your bedroom look great and your bed look professional.

Sanding and Painting Your Bed

First, sand the canopy bed frame well. Use a random orbital sander or a handheld belt sander for a smooth finish. Always sand with the wood grain for the best results.

After sanding, clean off dust and prime the frame. Then, pick your paint or stain color and apply it evenly. For a pro look, use a spray paint or stain applicator. Let it dry fully before moving on.

Choosing the Right Fabrics

  • For a light, romantic feel, choose lightweight fabrics like voile or chiffon for your canopy bed.
  • For more privacy and light blocking, go for heavier materials like velvet, satin, or blackout curtains.
  • Use curtain tape or rings and hooks to make attaching and hanging fabric easy.

The fabrics you pick should match your DIY bedroom decor. They should help create the perfect mood for your canopy bed.

Safety Tips for DIY Projects

When you start a DIY canopy bed frame project, safety is key. Use the right tools and follow the best methods. This way, your bed will be strong and last long, avoiding common mistakes.

Ensuring Stability and Strength

For a solid bed woodworking plans, use strong screws and good joints. Get a reliable drill and top-notch screws for the canopy’s weight. If it’s ceiling-mounted, check the hardware’s weight limit and use the right anchors.

Avoiding Common Mistakes

  • Double-check your measurements to fit your mattress right.
  • Add support like cross-bracing to keep the frame stable.
  • Work safely on ladders with spotters and wear sturdy shoes.

Focus on safety and follow the best methods. You’ll make a beautiful, useful, and lasting canopy bed for your room.

DIY safety

Customizing Your Canopy Bed

Make your bedroom special with a unique canopy bed. Choose your own fabrics and add storage. Turn your bedroom into a cozy retreat.

Ideas for Unique Canopy Designs

Try out different canopy styles for a unique look. Go for a soft fabric canopy for romance or a rigid one for modern style. Add asymmetry for a bold look.

Decorate your canopy with trim, tassels, or lights. Make it truly yours.

Incorporating Storage Solutions

Add smart storage to your canopy bed. Use under-bed drawers for clothes or linens. Add shelves to the headboard for books or decor.

Customizing your canopy bed is fun. Get creative with fabrics, decor, and storage. With DIY, you can make a beautiful and useful canopy bed. It will make your bedroom makeover ideas and custom bed frames stand out.

Budgeting for Your DIY Canopy Bed

Building a beautiful canopy bed doesn’t have to cost a lot. You can make one yourself for much less than buying one. With some planning and creativity, you can make a DIY canopy bed that’s both affordable and stylish.

Estimated Costs Breakdown

Building a DIY canopy bed frame can cost about $375. This includes the wood, hardware, and other supplies. In contrast, a ready-made canopy bed can cost over $1,000.

Tips to Save Money

  • Think about using materials like PVC pipes or old furniture to save money.
  • Use old sheets, curtains, or other fabrics to make the canopy instead of buying new ones.
  • Look for sales, discounts, and coupons on materials to cut costs.
  • Choose cheaper options like pine wood instead of hardwoods.
  • Do the work yourself to save on hiring a professional.

With a bit of creativity, you can make a stunning affordable DIY furniture piece. Focus on saving money to enjoy a beautifully made canopy bed without spending too much.

Maintaining Your Canopy Bed

Having a beautiful canopy bed is a dream for many. But, keeping it in top shape needs some care. Regular canopy bed care and furniture maintenance are key to making it last.

Cleaning Tips for Longevity

Dust the wooden or metal frame of your canopy bed often. Use a soft cloth and mild polish to clean it. For the canopy fabric, follow the care instructions from the maker.

Gently wash the fabric by hand or in a machine, as suggested. Make sure it dries completely before putting it back.

When to Make Repairs

Check your canopy bed for loose screws or wobbles. Tighten any loose parts to keep the frame strong. If you hear creaks or unusual sounds, fix them right away to avoid damage.

For big repairs like broken posts or torn fabric, get a professional. Following these furniture maintenance tips will keep your canopy bed in great shape. With the right care, your DIY canopy bed will be a bedroom highlight for years.

Inspiring DIY Canopy Bed Ideas

Building a DIY canopy bed can add elegance to your bedroom. You can choose from simple designs to ones with lots of details. Let’s look at some ideas to get you started.

Minimalist Canopy Beds

A minimalist canopy bed is perfect for a modern look. It has a simple wooden frame and white fabric panels. This design creates a calm, clean space.

Luxury Canopy Inspirations

For something fancy, go for a luxury canopy bed. These beds have fancy woodwork, metal details, or rich fabrics. Think of a bed with a big, flowing canopy or one with lace and velvet.

DIY canopy beds let you express your style. You can use old doors or branches for a unique look. Try different fabrics, lights, and decorations to make it yours.

bedroom furniture projects

With creativity and the right tools, you can make your bedroom special. Whether you like simple or fancy designs, making your own canopy bed is rewarding and inspiring.

Troubleshooting Common Issues

Building a DIY canopy bed is rewarding, but you might face some problems. Don’t worry, you can solve these issues easily. This way, you’ll enjoy your canopy bed for many years.

How to Fix Wobbly Frames

If your canopy bed frame wobbles, there are easy fixes. First, check if all joints are tight. Use a wrench or screwdriver to tighten loose screws or bolts. If it’s not fixed, add support brackets to make it stable.

Dealing with Fabric Hang-ups

Keeping your canopy fabric looking good can be hard. Make sure the fabric is tight when you first put it up. Use weights or tie-backs to keep it in place. If it sags, adjust the mounting points or add more support.

With patience and the right methods, you can fix any canopy bed maintenance issues. Fix problems early to avoid bigger problems. By doing this, your canopy bed will stay cozy and useful for years.

Conclusion and Encouragement

Building a DIY canopy bed frame is a fun project. It makes your bedroom look great and saves money. You can make a space that shows off your style and makes your bedroom feel special.

Celebrate Your DIY Success

Be proud of what you’ve made. You can choose from many designs, like a simple metal frame or a fancy draped canopy. It shows your creativity and DIY skills.

Enjoy the feeling of making your room cozy and inviting. It’s a special place just for you.

Sharing Your Creation with Others

Share your DIY bed project on social media. Use hashtags like #DIYCanopyBed or #BedroomMakeover. This might inspire others to try DIY projects too.

It helps build a community of people who love DIY and making their homes special.

How to Repurpose Memory Foam Mattress Topper

how to repurpose memory foam mattress topper

Are you tired of throwing away your old memory foam mattress topper? Don’t let it end up in the trash! Instead, find new uses for it. Memory foam mattress toppers can last 3-5 years. With a bit of creativity, you can make them last longer and give them a new purpose.

Key Takeaways

  • Memory foam mattress toppers can be repurposed for a variety of creative projects
  • Repurposing extends the lifespan of the topper and reduces waste
  • Sustainable options include donating, recycling, or composting old toppers
  • DIY projects like pet beds, cushions, and insulation can give new life to used toppers
  • Proper care and maintenance can prolong the usefulness of your memory foam topper

Understanding Memory Foam Mattress Toppers

Memory foam mattress toppers are loved for their comfort and support. They shape to your body, easing pressure points and boosting sleep quality. Yet, they have a life span, and knowing when to replace them is key.

What is a Memory Foam Mattress Topper?

A memory foam topper is a thick layer of foam on your mattress. It molds to your body, spreading your weight and easing pressure. This can ease back pain, improve posture, and make sleeping more comfortable.

Benefits of Using a Mattress Topper

  • Provides extra comfort and support
  • Reduces pressure points and aligns your spine
  • Can make your mattress last longer
  • Improves sleep quality and rest

Signs It’s Time to Repurpose Your Topper

Memory foam toppers last 3-5 years, based on quality, density, and use. As they age, you might see signs it’s time for a change. Look out for:

  1. Loss of shape and elasticity
  2. Deep body impressions in the foam
  3. Less comfort and support
  4. Doesn’t fit your mattress or bed anymore

Spotting these signs helps you plan for your topper’s next use. This way, you keep enjoying a comfy and supportive sleep.

Creative Ways to Use Your Old Mattress Topper

Reusing your old memory foam mattress topper is smart and eco-friendly. It gives a new life to something you already bought. You can make cozy pet beds or add comfort to outdoor seats. There are many ways to reuse your memory foam topper.

DIY Pet Beds

Turning your old mattress topper into a pet bed is very practical. It’s great for older pets that need support. Just cut the foam, add a fabric cover, and your pet will have a comfy bed.

Extra Cushions for Outdoor Seating

Make your outdoor furniture more comfy with your old memory foam topper. Cut it to fit benches or deck chairs. It adds luxury and makes these spots perfect for relaxing or having fun.

Making Drawer Organizers

Use your memory foam topper to line drawers. Cut it to fit and make custom organizers for jewelry, office stuff, or small items. It keeps things in place and protects them from getting damaged.

Repurpose Idea Benefits
DIY Pet Beds Provides joint support for senior pets
Outdoor Seating Cushions Enhances comfort of outdoor furniture
Drawer Organizers Protects delicate items and prevents shifting

Using your old memory foam mattress topper in creative ways is smart. It saves money and helps the environment. Enjoy making memory foam crafts that are both useful and eco-friendly.

Transforming Your Mattress Topper into Supportive Gear

Your old memory foam mattress topper can be turned into many useful items. It can add extra comfort to your camping setup or make seat cushions for long drives. There are lots of ways to give your topper a new life.

Adding Cushion to Camping Gear

Make your outdoor trips better by using your memory foam topper as a sleeping pad. It will mold to your body, giving you comfort and relief, even on rough ground. Just cut it to size and take it on your next camping trip for a comfy night’s sleep.

Creating a Lumbar Support Pillow

Sitting for a long time can hurt your back. Turn your memory foam topper into a lumbar support pillow. Cut it to fit, then cover it with fabric. It will help your back feel better and keep you in good posture.

Customizing Seat Cushions for Long Drives

Long drives can be hard on your body. But, your old memory foam mattress topper can help. Use it to make a seat cushion for your car or RV. It will ease the pressure on your back and legs, making long drives more comfortable. You can also add a washable cover to make it your own.

Turning your memory foam mattress topper into useful gear is smart and practical. It can make your camping, commuting, or work trips more comfortable. These hacks will help you get the most out of your old topper.

Eco-Friendly Disposal Options

When your memory foam mattress topper wears out, think about eco-friendly ways to get rid of it. Mattress toppers usually last 3 to 5 years. Bad disposal can harm the planet. Luckily, there are green ways to make sure your old topper doesn’t pollute.

Recycling Your Mattress Topper

Many places and companies recycle old mattress toppers. Check with your local recycling center or companies like Soft Landing and SUEZ. They offer recycling in different areas. This way, your topper is handled responsibly and reused.

Donating to Animal Shelters

If your topper is still usable, give it to a local animal shelter. Shelters use old toppers for pets. It’s a win-win: your topper gets a new home, and pets get comfy beds.

Composting Biodegradable Materials

Can you compost your topper if it’s made from natural materials? Ask your local council or waste service about composting. It’s a green way to reuse your topper and cut down on landfill waste.

Choosing eco-friendly disposal helps the planet. Memory foam recycling and eco-friendly memory foam mattress topper repurposing are key for a greener future. Let’s take care of our planet together.

Memory foam recycling

Crafting Projects with Your Old Topper

There are many ways to reuse your old memory foam mattress topper. You can make a cozy play mat for kids or stylish throw pillows. These DIY projects can give new life to old items in your home.

Creating a Foam Play Mat for Kids

Turn your memory foam topper into a safe play area for kids. Cut the foam to fit and cover it with a fun fabric. This play mat is soft and comfy for kids to play on.

Making Stylish Throw Pillows

Upcycle your memory foam topper into stylish throw pillows. Cut the foam to size and shape, then wrap it in matching fabric. These pillows add comfort and show off your creativity.

Using it for Upholstery Projects

Use your old memory foam topper to make furniture more comfy. It’s great for adding cushioning to old chairs or benches. This way, you can make your furniture cozy and supportive again.

By trying these DIY projects and upcycling ideas, you can give your topper a new life. It’s also good for the planet. Get creative and make your home more personal and comfy.

Maintaining Your Mattress Topper for Longevity

Getting a good memory foam mattress topper is great for comfort and support. But, you need to take care of it to make it last longer. A few easy steps can help your topper keep giving you great sleep.

Cleaning and Care Tips

How often you clean your topper depends on its material. Cotton and wool toppers need washing every 2-4 months. Memory foam and latex toppers can wait 6 months. Always use mild detergent and cold water. Never dry it in a machine to avoid damage.

Storing Your Memory Foam

When you’re not using it, store your topper right to keep it in shape. Roll or fold it gently and put it in a bag or container that breathes. Don’t store it where it’s damp, as mold and mildew can grow.

Recognizing Wear and Tear

A good memory foam topper can last up to 8 years with care. But, cheaper ones might show wear in 3-5 years. Watch for sagging, tears, or if it feels less comfy and supportive. These signs mean it’s time for a new one.

By following these care tips, your memory foam mattress topper will last longer. Proper care means you’ll enjoy its comfort for many years. It’s worth the effort to keep your topper in top shape.

Budget-Friendly Alternatives to New Foam Products

Don’t throw away your old memory foam mattress topper. You can use it for many practical and affordable home solutions. Check out memory foam mattress topper reuse ideas and budget-friendly projects. There are lots of ways to breathe new life into your old topper.

Using Topper Shreddings for Insulation

Shred your old memory foam topper into small pieces. Use them as a cheap insulation material. Stuff the shredded foam into tight spots like attics or walls. It keeps your home warm in winter and cool in summer.

This green method saves resources and cuts down on waste.

DIY Draft Stoppers

Turn your memory foam topper into custom draft stoppers. Cut it into long shapes, then wrap it in strong fabric. Place these homemade stoppers by windows and doors. They block cold air and save on heating costs.

Cushioning for Furniture Legs

Use your memory foam topper to cushion furniture legs. Cut it to fit, then stick it to chair or table legs. This softens the impact on your floors and reduces noise.

By reusing your memory foam topper, you save money and reduce waste. You can make insulation, draft stoppers, and furniture cushions. These projects are cheap and eco-friendly, making your home better without breaking the bank.

Upcycling Ideas for Home Décor

Turn your old memory foam mattress topper into something new. Use it for memory foam crafts and more. You can make wall art, toppers for outdoor furniture, and seasonal decorations.

Foam Wall Art Projects

Let your creativity shine with foam wall art. Cut your memory foam into shapes, patterns, or designs. Its softness lets you create anything you imagine.

Try different textures and colors. Add LED lights for extra sparkle. Your foam art will stand out.

Unique Toppers for Outdoor Furniture

Give your outdoor furniture a new look with foam toppers. The foam is weather-resistant and comfy. It makes old furniture look new again.

Make seat cushions, back rests, or even whole chair pads. Your outdoor space will look amazing.

Incorporating Foam into Seasonal Decorations

Get creative with foam for your seasonal decor. Carve it into shapes like pumpkins or snowflakes. These decorations are light and easy to make.

They add a unique touch to your home. Plus, you can use them every year.

Explore the world of memory foam crafts. Turn your old mattress topper into something special. Let your imagination run wild and find beauty in the old.

memory foam crafts

Enhancing Comfort in Other Rooms

Your old memory foam mattress topper can be used in many places in your home. It can make gaming chairs and office chairs more comfortable. This makes relaxing and working more enjoyable.

Extra Padding for Gaming Chairs

Gamers need comfort during long playtimes. You can cut and shape your memory foam topper into custom cushions. These cushions add padding to your gaming chair.

This makes sitting more ergonomic and helps avoid aches. You can play games for longer without feeling uncomfortable.

Cushions for Floor Seating

Make your old memory foam topper into cozy floor cushions. They’re great for a reading nook or meditation area. The soft, supportive material is perfect for floor relaxation.

It’s great for reading, mindfulness, or just hanging out with friends. It makes floor seating very comfortable.

Reinventing Your Office Chair

Make your office chair more comfortable with a memory foam makeover. Cut your topper into a custom seat cushion. This adds padding to your chair.

It improves your chair’s ergonomics. This helps your posture and reduces back, hip, and leg strain. It makes working more comfortable and productive.

Repurposing your memory foam mattress topper can make your home more comfortable. It’s great for gaming, office work, and more. This versatile material can improve your daily life.

Seasonal Uses for Your Repurposed Topper

As the seasons change, your repurposed memory foam mattress topper can serve many purposes. It can add comfort to outdoor activities or keep guests warm in winter. This material adapts to the changing needs of the year.

Summer Day Camp Mats

Use your memory foam topper to make comfy mats for summer day camps. The soft surface is great for kids to play and rest outside. It’s also durable for all the fun summer camps bring.

Winter Sleeping Pads for Guests

In winter, your topper can be a cozy sleeping pad for guests. Cut it into custom pads for the floor or guest bed. It keeps guests warm and comfortable, thanks to its insulating properties.

Fall Crafting Projects

Use your topper for fall-themed crafts. Cut it into shapes for seasonal memory foam projects like Halloween decorations or Thanksgiving centerpieces. Memory foam adds a rustic charm to your home in the fall.

By using memory foam mattress topper reuse ideas, you can make your bedding last longer. It lets you add a personal touch to your seasonal celebrations.

Community Donation Options

When it’s time to say goodbye to your old memory foam mattress topper, think about donating it. This helps reduce waste and supports those in need in your area. You can donate to places like homeless shelters and animal rescue.

Finding Local Charities

Look for charities and organizations in your area that accept mattress toppers. Places like shelters and pet rescue centers often need them. You can also reach out to local furniture banks that give items to families in need.

Benefits of Donating Your Topper

Donating your old mattress topper has many benefits. It keeps it out of landfills and supports community reuse projects. Your donation can also improve the lives of those less fortunate by giving them a comfortable place to rest.

Connecting with Community Needs

To find the right place for your old mattress topper, talk to local groups or post on social media. This way, you can find organizations that really need these donations. It ensures your topper goes to a good home.

Donating your old memory foam mattress topper helps with community reuse projects. It makes a positive difference in your local area. Look into the options and find the best place for your unwanted bedding.

Final Thoughts on Repurposing Your Mattress Topper

Repurposing your memory foam mattress topper is a creative way to help the planet. It saves money and helps others. You’re making something new from something old.

Encouraging Creative Solutions

Memory foam can be turned into many useful things. You can make pet beds or camping gear. It’s a fun way to make something special just for you.

Emphasizing Sustainable Practices

Using your mattress topper again is good for the Earth. It keeps waste out of landfills. You’re helping make the future greener.

Celebrating Your Resourcefulness

Be proud of making something new from something old. Your creativity inspires others to be eco-friendly. It’s a great way to show off your skills.