Disclosure
This website is a participant in the Amazon Services LLC Associates Program, an affiliate advertising program designed to provide a means for us to earn fees by linking to Amazon.com and affiliated sites.
Measuring your room for an adjustable bed is the critical first step to a perfect fit. This guide provides the proven methods to ensure your new bed functions flawlessly.
Correct measurements prevent costly mistakes and guarantee optimal comfort and clearance. You’ll avoid issues with walls, furniture, and walking space.
Best Tools for Measuring Your Room for an Adjustable Bed
Laser Measure 393 ft – Best Overall Tool
The Bosch GLM 50 C is the best overall tool for this job. Its laser technology provides pinpoint accuracy up to 165 feet, far superior to a tape measure. It instantly calculates area and volume, saving you time and preventing manual errors. This is ideal for ensuring your adjustable bed’s full range of motion is accounted for.

- 【High Efficiency Dual Measurement Tool】Bilateral laser measure can do…
- 【Green-Beam Laser & LCD Display】The laser distance measuring tool generates…
- 【9 Measure Modes & Multiple Functions】This digital room measuring device…
Stanley 25-Ft PowerLock Tape Measure – Best Budget Option
For a reliable, classic approach, the Stanley 25-Ft PowerLock Tape Measure is a top value pick. Its durable, long blade is perfect for spanning room dimensions and checking ceiling height. The standout feature is the true zero hook for accurate inside and outside measurements. This is the recommended manual tool for most DIY projects.

- Sold as 1 Each.
- Secure lock helps prevent blade from creeping during use 16″ and 19.2″ stud…
- Special Tru-Zero hook does double-duty as a pivot for drawing circles and arcs.
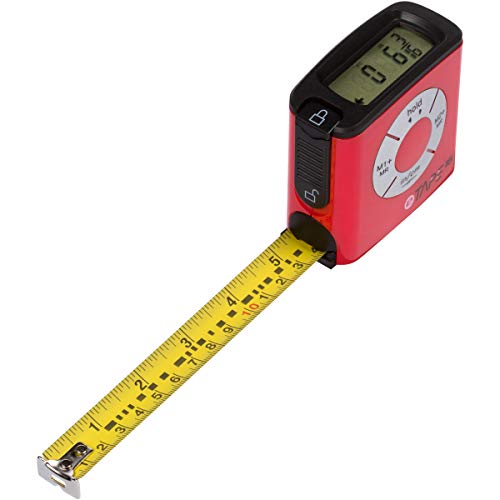
eTape 1752-WP-106 Digital Tape Measure – Best for Solo Use
The eTape 1752-WP-106 Digital Tape Measure is the ideal solution for measuring alone. It combines a standard 16-foot retractable tape with a digital display that shows readings in inches or centimeters. This eliminates squinting at tiny lines and makes recording dimensions for your adjustable bed layout simple and error-free.
- Accurate measuring: ensure that your measurements are accurate and easy to read…
- Durable construction: this digital tape measure is crafted with…
- Multiple memory functions: with three memory functions and a side button wheel…
Essential Tools and Preparation for Accurate Room Measurement
Before you measure a single inch, proper preparation is key. Gathering the right tools ensures your adjustable bed dimensions are perfectly accurate. This prevents frustrating errors during delivery and setup.
Must-Have Measuring Tools for the Job
While a simple tape measure works, specialized tools offer superior precision. Accuracy is non-negotiable for planning your adjustable bed’s footprint and clearance.
- Laser Distance Measurer: Provides the highest accuracy for long wall lengths and diagonal room measurements. It’s ideal for solo use.
- Quality Tape Measure (25-ft+): A reliable backup for shorter measurements and verifying laser readings. Look for a sturdy, locking blade.
- Notepad and Pen/Digital App: Crucial for recording all dimensions clearly. A simple diagram of your room is highly recommended.
- Step Ladder: Necessary for accurately measuring ceiling height, especially if considering a tall headboard or canopy.
Pre-Measurement Room Preparation Steps
Clear the space to get true measurements. This step is often overlooked but critically important for an accurate layout.
Remove all movable items from the immediate bed area. This includes floor rugs, laundry baskets, and nightstands. You need to measure the permanent, empty space.
Identify and note all permanent obstructions. Mark the locations of air vents, electrical outlets, light switches, and windowsills. Your adjustable bed must clear these points in all positions.
Creating Your Room Diagram
Sketch a simple bird’s-eye view floor plan. This visual reference is invaluable for planning.
Draw the basic shape of your room on your notepad. Mark the locations of doors, windows, and closets. Indicate the direction each door swings open.
This diagram is where you will record every measurement. It helps you visualize the final layout and spot potential clearance issues before they become real problems.
Step-by-Step Guide to Measuring Your Room Dimensions
This is the core process for measuring a room for your adjustable bed. Follow these steps in order for a complete and accurate spatial assessment. Precision here guarantees a perfect fit.
Measuring Wall Lengths and Total Floor Space
Start by determining the total available floor area. Measure the length of each wall from corner to corner at baseboard level.
- Measure Primary Wall: Record the length of the wall where the bed headboard will likely rest.
- Measure Opposite Wall: Measure the parallel wall to ensure the room is truly square.
- Measure Remaining Walls: Capture the lengths of the other two walls to complete the perimeter.
Note any alcoves, bump-outs, or permanent fixtures that intrude into the space. These measurements define your maximum possible bed footprint.
Critical Clearance Measurements for Functionality
An adjustable bed needs empty space around it to move. These clearances are as important as the bed’s own dimensions.
- Wall to Bedside Clearance: Measure from the intended headboard wall outward. Ensure there is space for the bed to elevate without touching the wall.
- Walking Paths: Maintain at least 24 inches of clearance on at least one side and at the foot of the bed for safe passage.
- Door & Furniture Clearance: Verify all doors (especially closets and bathrooms) can open fully without hitting the bed in any position.
Accounting for Vertical Space and Ceiling Height
Don’t forget to look up. The vertical dimension is crucial for adjustable beds with tall headboards or zero-clearance designs.
Measure from the floor to the ceiling. Next, if you have a chosen headboard, add its height to the bed base’s elevated height.
This ensures the headboard won’t scrape the ceiling or wall when the bed is in a raised position. Also check for ceiling fans or light fixtures above the bed area.
How to Factor in Your Adjustable Bed’s Specific Dimensions
Your room measurements are only half the equation. You must compare them against the exact specifications of your chosen adjustable bed model. This ensures a harmonious fit.
Understanding Adjustable Bed Size Specifications
Bed size labels like “Queen” can be misleading. You must find the manufacturer’s detailed overall dimensions for the specific base model.
These specs include the length, width, and height of the base itself. Crucially, they should also list the raised height dimensions for both the head and foot sections.
Never assume a standard size. Always verify the exact measurements from the product manual or seller’s website before finalizing your room plan.
Calculating Total Occupied Space with Movement
An adjustable bed occupies more space than a static one. You must account for its range of motion in your layout.
- Head-Up Clearance: When raised, the head of the bed moves backward. Add this extra length to your required wall clearance.
- Foot-Up Clearance: The elevated foot section increases the bed’s effective height at the end. Ensure this doesn’t block views or pathways.
- Articulation Arc: Visualize the sweeping arc the bed creates from flat to fully elevated. This is the true space it commands.
| Bed Size | Typical Base Dimensions (W x L) | Key Clearance to Add |
|---|---|---|
| Twin XL | 38″ x 80″ | +6-12″ for head tilt |
| Queen | 60″ x 80″ | +8-15″ for head tilt |
| King | 76″ x 80″ | +8-15″ for head tilt |
Planning for Nightstands and Additional Furniture
Integrate your bedside furniture from the start. This prevents a cramped, non-functional bedroom layout.
Place your nightstands in the diagram first. Ensure they fit comfortably between the bed and the wall or other obstacles.
Account for drawer clearance and lamp placement. The goal is to create a balanced, accessible space where everything has a designated spot.
Common Measuring Mistakes and Pro Tips to Avoid Them
Even careful planners can make errors. Knowing the most frequent mistakes helps you avoid them entirely. This ensures your adjustable bed fits flawlessly from day one.
Top Errors in Room Measurement for Beds
These common oversights lead to delivery-day disappointments and functional issues. Be vigilant to sidestep them.
- Measuring at the Wrong Height: Measuring wall length at chest height instead of baseboard level can skew results due to molding or uneven walls.
- Ignoring Door Swing: Forgetting to account for how far a door protrudes into the room when open is a classic error that blocks access.
- Forgetting the Mattress Overhang: The mattress can extend 1-2 inches beyond the base frame. This adds to the total occupied width and length.
- Assuming Rooms Are Square: Many rooms are slightly out of square. Always measure both parallel walls to check for discrepancies.
Expert Verification and Double-Checking Strategies
Trust, but verify. A simple verification process catches mistakes before they become costly.
Always take two separate measurements of each critical dimension. If they differ, measure a third time to find the correct value.
Use the “diagonal test” for squareness. Measure from one corner to the opposite corner, then repeat for the other two corners. In a perfectly square room, these diagonal measurements will be equal.
When to Consult a Professional
Some room layouts present unique challenges. Recognize when to seek expert advice for your adjustable bed installation.
Consult a professional if your room is very small, has multiple angled walls, or has low sloped ceilings. An interior designer or the bed manufacturer’s support team can provide tailored layout solutions.
If you are combining an adjustable base with an existing bed frame or custom headboard, professional guidance is wise. They can confirm compatibility and precise spatial requirements.
Final Checklist and Next Steps After Measuring
You’ve gathered all the numbers. Now, use this final checklist to confirm your readiness and take the next practical steps. This transforms measurements into a successful purchase and setup.
Pre-Purchase Verification Checklist
Run through this list before you click “buy” on your adjustable bed. It consolidates every critical measurement into one actionable review.
- Bed Dimensions vs. Room: Does the bed’s flat AND raised length/width fit within your clear wall space?
- Walking Clearance Met: Do you have at least 24 inches on one side and at the foot of the bed?
- Door & Furniture Clearance: Can all doors open fully? Do nightstands fit?
- Vertical Clearance: Does the bed’s highest raised point clear the ceiling, lights, or fans?
- Outlet & Vent Access: Are all essential outlets, switches, and air vents unobstructed?
Creating and Using Your Measurement Document
Organize your data into a single, clear reference document. This is invaluable for speaking with sales reps or installers.
Create a simple document with your room diagram and a summary table. List your room’s dimensions, the bed’s required dimensions, and the resulting clearances.
Include photos of the space, especially any tricky obstacles. This document provides undeniable proof that your chosen model will fit, protecting your investment.
Communicating with Retailers and Delivery Teams
Your precise measurements empower clear communication. This ensures everyone is aligned for a smooth delivery day.
Share your measurement document with the retailer’s sales or customer service team before purchasing. They can confirm model-specific fit.
Provide the same document to the delivery team. Highlight any tight corners, stairwells, or doorways they must navigate to reach the bedroom. This proactive step prevents delivery-day surprises.
Special Considerations for Unique Room Layouts
Not every bedroom is a perfect rectangle. Unique layouts require tailored measuring strategies. These tips address common challenging scenarios for adjustable bed placement.
Measuring Small Bedrooms and Tight Spaces
Maximizing every inch is critical in a compact room. Precision and smart furniture choices become non-negotiable.
- Prioritize Clearance Zones: In very tight spaces, you may need to accept less than 24 inches of walking clearance. Absolute minimum is 18 inches for sidling past.
- Consider a Low-Profile Base: Opt for an adjustable base with a lower height to reduce visual bulk and make the room feel more open.
- Use Wall-Mounted Nightstands: Floating shelves or wall-mounted lights free up crucial floor space compared to traditional bedside tables.
Accounting for Sloped Ceilings and Alcoves
Architectural features add complexity to your vertical measurements. They require specific spatial planning.
For sloped ceilings, measure the ceiling height at multiple points along the wall where the bed’s head will be. The lowest point is your limiting factor.
When placing a bed in an alcove, measure the alcove’s width at both the front and back. Also, measure the depth from the back wall to the room’s main space to ensure the bed doesn’t jut out awkwardly.
Planning for Shared Spaces and Partner Movement
In a shared bedroom, the adjustable bed’s movement must not disrupt your partner’s space or sleep.
Ensure the bed’s articulation—especially the head-up motion—does not encroach on the other side of the bed or block a partner’s bedside access.
If using a split king (two twin XL bases), measure each side independently. Account for the small gap between the bases and ensure both have equal and sufficient clearance to function without interference.
Advanced Measuring Techniques for a Perfect Fit
Go beyond basic tape measurements with these advanced strategies. These techniques provide a deeper understanding of your space and ensure optimal functionality for your adjustable bed.
Using Digital Tools and Room Scanning Apps
Leverage technology to create a precise digital model of your room. This is the modern solution for complex layouts.
- Room Scanning Apps: Apps like MagicPlan or RoomScan LiDAR use your phone’s camera or sensor to create a floor plan. You simply point and click at corners.
- 3D Modeling Software: Free tools like SketchUp allow you to build a 3D model. You can import your adjustable bed’s exact dimensions and test different placements virtually.
- Augmented Reality (AR): Some furniture retailers offer AR apps. You can see a virtual bed in your actual room through your phone screen to judge scale and fit.
Calculating Clearance for Full Articulation Range
Your bed’s most extreme position defines its true space needs. Don’t just plan for a typical raised head position.
Find the specification for your bed’s maximum articulation angle (e.g., head raises 70°, foot raises 45°). Use simple trigonometry or the manufacturer’s provided “raised dimensions” to calculate how much extra length and height this creates.
This is your worst-case scenario for space. If the bed fits in this position, it will fit in all others, guaranteeing future flexibility.
Future-Proofing Your Bedroom Layout
Think ahead to ensure your layout remains functional for years. Consider potential changes in your needs or furniture.
Allow a little extra clearance beyond the minimum if possible. This accommodates future mattress toppers, different headboards, or new bedside furniture.
Consider the path for moving large items in the future. Ensure your bed placement doesn’t permanently block access to closets or create an impossible corner for future furniture delivery.
Conclusion: Mastering the Art of Measuring for Your Adjustable Bed
Accurately measuring your room is the foundation for a successful adjustable bed purchase. It prevents costly errors and ensures your bed functions perfectly within your space.
The key takeaway is to measure the bed’s maximum articulated footprint, not just its flat size. Always prioritize clearance for movement and access.
Now, use your precise measurements and final checklist to confidently select and order your ideal adjustable bed model.
With careful planning, you can create a bedroom sanctuary that combines innovative comfort with flawless, functional design.
Frequently Asked Questions about Measuring for an Adjustable Bed
What is the most important measurement for an adjustable bed?
The most critical measurement is the clearance behind the headboard. You must account for the bed’s backward movement when the head section is elevated. Measure from the wall to where the bed’s frame will end, then add the extra length the raised head requires.
This prevents the bed from pressing against the wall and allows full articulation. Always check the manufacturer’s specifications for the exact “raised head height” dimension.
How much clearance do you need around an adjustable bed?
You need a minimum of 24 inches of clearance on at least one side and at the foot of the bed for safe walking. This is a standard accessibility guideline. More space is always better for comfort and maneuverability.
If your room is very small, 18 inches is the absolute functional minimum. Also ensure doors, drawers, and closet access remain fully usable with the bed in all positions.
How do you measure a room for a king-size adjustable bed?
Start by measuring the exact dimensions of the specific king adjustable base (often 76″ x 80″). Then, measure your room’s open wall space where the bed will go. Add at least 24-30 inches of clearance on each open side and at the foot.
Remember a king bed is wide. Ensure your room’s doorways, hallways, and stairs can accommodate the base for delivery, as it may come in two pieces (for a split king) or one large unit.
What if my room is too small for an adjustable bed?
Consider a low-profile or zero-clearance adjustable base. These models are designed to lift without needing significant space behind the headboard. You can also opt for a smaller bed size, like a Twin XL or Full, to gain precious inches of walking space.
Using wall-mounted lights and floating nightstands maximizes floor space. Always use the painter’s tape method to visualize the footprint before ruling it out.
Do you measure a room with furniture in it?
No, you should measure the empty, permanent space. Move all rugs, benches, and movable furniture out of the area first. You need the dimensions of the room itself, not the current layout.
However, you must note the fixed locations of outlets, vents, and light switches. After getting room dimensions, plan your new layout by factoring in the furniture you intend to keep.
How do you measure for an adjustable bed with a headboard?
You must measure the headboard’s height and thickness separately. Add the headboard’s height to the bed base’s maximum raised height to ensure it won’t hit the ceiling or wall. Also, account for the headboard’s thickness, which may push the entire bed further out from the wall.
Verify the compatibility between your headboard and the specific adjustable base model. Some bases require special mounting brackets or may not support certain heavy headboards.
What is the best tool to measure a room for a bed?
A laser distance measurer is the best tool for accuracy and ease, especially for solo use. It provides precise long-distance measurements and can calculate area instantly. The Bosch GLM 50 C is a highly recommended model.
For most DIYers, a high-quality 25-foot tape measure is perfectly sufficient. The key is using a tool you trust and double-checking all critical measurements.
Can I put an adjustable bed in a corner?
It is not recommended. Placing an adjustable bed in a corner typically blocks essential clearance on one side and may restrict the bed’s articulation. The bed needs open space on at least one side for entry, exit, and making the bed.
If you must use a corner, ensure the bed’s design allows for zero-wall clearance on the headboard wall and that you have ample space on the remaining open side for movement.