Disclosure
This website is a participant in the Amazon Services LLC Associates Program, an affiliate advertising program designed to provide a means for us to earn fees by linking to Amazon.com and affiliated sites.
You can absolutely make a weighted blanket at home—and it’s easier than you think! Weighted blankets have surged in popularity for their calming effects, helping with anxiety, insomnia, and sensory needs. But store-bought options can be expensive, often costing $100 or more.
What if you could craft a custom, therapeutic blanket tailored to your preferences for a fraction of the price? In this guide, you’ll unlock the secrets to creating a professional-grade weighted blanket with accessible materials and simple techniques.
Whether you’re a DIY beginner or a seasoned crafter, we’ll walk you through every detail, from fabric selection to weight distribution, ensuring your homemade blanket delivers the same cozy, pressure-therapy benefits as premium brands. Let’s dive in!
Best Materials for Making a Weighted Blanket
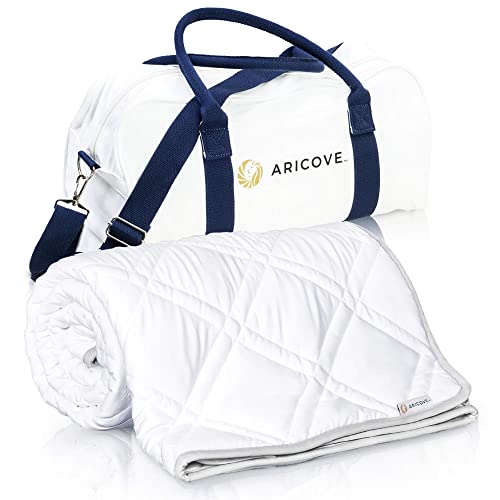
Baloo Weighted Blanket (15 lb, 100% Cotton, Glass Microbead Fill)
For a breathable, eco-friendly option, the Bearaby Cotton Napper is ideal. Made from 100% organic cotton, it provides even weight distribution without plastic pellets. Its knit design ensures airflow, making it perfect for warm sleepers or those who prefer natural materials.

- PERFECT SIZE FOR ONE: 15lb Weighted Blanket: 60 x 80 inches. Equal in size to…
- PREMIUM QUALITY MATERIALS: Baloo is the only quilted weighted blanket made with…
- NATURAL & SAFE: We choose our cotton for softness, breathability and durability…
Aricove Cooling Weighted Blanket (Viscose Made from Bamboo, Glass Beads & Microfiber Fill)
Featuring a silky bamboo viscose outer layer and glass-bead interior with microfiber support, this blanket delivers a cool touch, moisture-wicking breathability, and even weight distribution—ideal for hotter sleepers seeking gentle, balanced pressure.
- SLEEP & RECOVER LIKE A PRO – Drift off to a deep, restful sleep fast and easy…
- BREATHABLE & COOLING – You’ll love hitting the bed with the cool and fresh…
- SOFT, SILENT, COMFORT – Stay asleep longer under luxurious twill woven bamboo…
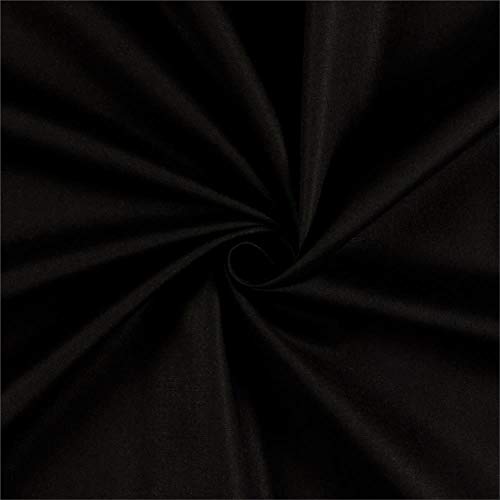
Kona Premium Cotton Jet Black
Kona Cotton is a top pick for durable, soft fabric. Its tight weave prevents bead leakage, and it’s machine-washable. Available in dozens of colors, this fabric ensures your DIY blanket looks and feels professional while standing up to long-term use.
- From Robert Kaufman Fabrics, this 4.3 oz. per square yard 100% Kona cotton…
- Washing Instructions: Machine Wash Cold / Tumble Dry Low
- 44” Wide. Fabric is sold by Washing Instructions: The yard and cut to order…
Choosing the Right Weight and Size for Your DIY Weighted Blanket
Selecting the correct weight is the most critical step in making an effective weighted blanket. Unlike regular blankets, these rely on deep pressure stimulation (DPS) to provide therapeutic benefits, which only works with proper weight distribution. A blanket that’s too heavy may cause discomfort, while one that’s too light won’t deliver the calming effect.
How to Calculate the Ideal Weight
The general rule is to use 10% of your body weight plus 1-2 lbs. For example:
- Adults: A 150-lb person should use a 15-17 lb blanket
- Children: A 60-lb child needs a 6-7 lb blanket (always supervise use)
However, individual preferences matter—some prefer slightly heavier (12% of body weight) for anxiety relief, while others with mobility issues may opt for lighter weights.
Standard Blanket Sizes and Weight Distribution
Your blanket’s dimensions affect how the weight feels. Common sizes include:
- Throw (48″x72″): Best for single-person couch use
- Twin (66″x90″): Fits standard beds but stays contained
- Queen (90″x90″): Requires careful weight zoning to prevent edge sagging
Pro Tip: For bed-sized blankets, create weight zones—distribute more filling toward the center (60%) and less toward edges (40%) to prevent it from sliding off.
Common Mistakes to Avoid
Many DIYers make these errors:
- Overstuffing pockets: Leads to lumpy texture—fill each pocket to 75% capacity
- Ignoring fabric weight: Heavy denier fabrics add unaccounted pounds
- Using uneven fill materials: Mixed bead sizes settle differently over time
For accuracy, weigh your empty fabric first, then calculate filling weight separately. Test drape comfort by laying the unfilled blanket over yourself—it should cover without excessive overhang.
Remember: The right weight feels like a firm hug, not crushing pressure. When in doubt, err on the lighter side—you can always add more filling later through access panels.
Step-by-Step Guide to Sewing Your Weighted Blanket
Creating the perfect weighted blanket requires careful construction to ensure durability and proper weight distribution. Follow this professional-grade sewing method that tailors medical-grade blanket techniques for home crafters.
Preparing Your Materials
Before cutting fabric, prewash all materials to prevent future shrinkage. Use these measurements:
- Cut fabric 4-6 inches larger than your desired finished size for seam allowances
- Double-layer construction: Outer decorative fabric + inner lining fabric (muslin works well)
- Interfacing: Medium-weight fusible interfacing prevents bead migration
Pro Tip: Mark grid lines on the wrong side of fabric every 6-8 inches using washable fabric marker – this creates your weight pocket guides.
Sewing the Pocket Grid System
- Layer fabrics: Place right sides together, pin along edges
- Sew perimeter: Use 1/2″ seam allowance, leaving 12″ opening for turning
- Create channels: Sew vertical lines first, then horizontal to form pockets
- Reinforce intersections: Backstitch at each crossing point for durability
The pocket grid prevents filling from clumping. For queen-sized blankets, smaller 5″x5″ pockets distribute weight more evenly than larger compartments.
Filling and Finishing Techniques
Use a kitchen scale to portion filling:
- Divide total weight by number of pockets
- Measure each portion to ±5g accuracy
- Funnel beads through temporary openings in channel seams
Close the blanket with an invisible ladder stitch for professional results. For washability, add 1/4″ topstitching around the entire perimeter and along major grid lines.
Alternative Approach: For beginners, consider making a duvet-style blanket with removable inner weight layer – this allows washing the outer cover separately.
Advanced Weight Distribution and Therapeutic Effectiveness
The science behind weighted blankets involves more than just total weight – proper distribution and material selection directly impact their therapeutic benefits. Understanding these principles will help you create a blanket with clinical-grade effectiveness.
The Neuroscience of Deep Pressure Stimulation
Weighted blankets work through proprioceptive input, triggering the release of serotonin and melatonin while reducing cortisol. Research shows optimal pressure should be:
| Body Area | Recommended Pressure | Physiological Effect |
|---|---|---|
| Torso | 1.5-2 psi | Activates parasympathetic nervous system |
| Limbs | 1-1.5 psi | Provides grounding without restriction |
To achieve this, distribute 60% of weight in the torso area (central 18″ of blanket) and 40% in peripheral areas.
Material Science Considerations
The density and flow characteristics of your filling material significantly affect performance:
- Glass microbeads: 0.5-1mm diameter provides fluid-like movement (best for even distribution)
- Poly pellets: 2-3mm size creates more localized pressure points
- Organic fillings: Rice or flaxseed must be replaced every 6-12 months due to moisture absorption
Expert Tip: For sensory-sensitive users, combine 70% glass beads with 30% poly pellets – the glass provides base weight while the pellets offer subtle tactile feedback.
Temperature Regulation Solutions
Common overheating issues can be solved through:
- Breathable fabrics: Bamboo/cotton blends with 300+ thread count
- Strategic ventilation: Add 1″ diameter breathable zones every 12″ in the grid
- Phase-change materials: Incorporate PCM fabric panels in high-heat areas
For summer use, create a dual-layer system with removable wool batting (natural temperature regulator) that can be replaced with lighter bamboo filling in warmer months.
Customization Options and Specialized Applications
Tailoring your weighted blanket to specific needs dramatically enhances its effectiveness. These professional customization techniques address diverse requirements from sensory processing to mobility challenges.
Sensory-Specific Adaptations
For neurodivergent users or those with sensory processing disorders:
- Tactile variations: Create alternating zones with different textures (satin, minky, flannel)
- Auditory considerations: Use ultra-fine glass beads (under 0.8mm) for near-silent operation
- Visual customization: Implement color zoning for visual tracking (helpful for autism spectrum)
Clinical Insight: Occupational therapists recommend 8-12 distinct sensory zones in a 60″x80″ blanket, with clearly demarcated transitions between textures.
Mobility and Accessibility Features
For users with limited mobility or physical disabilities:
- Asymmetric weight distribution: 70% weight on torso for wheelchair users
- Handhold straps: Install reinforced nylon loops every 18″ along edges
- Quick-release mechanisms: Magnetic closures for emergency removal
For elderly users, reduce total weight by 15% but increase density in shoulder/hip zones to maintain therapeutic pressure without strain.
Specialized Safety Considerations
Critical safety measures often overlooked in DIY projects:
| Risk Factor | Prevention Method | Testing Standard |
|---|---|---|
| Bead leakage | Double-stitch all pockets with UV-resistant thread | ASTM F963-17 Section 4.25 |
| Overheating | Core temperature monitoring pockets | ISO 9237 Breathability Index |
Professional Tip: For pediatric use, create a “growth panel” – an expandable border with extra seam allowance that can be let out as the child grows, maintaining proper weight ratio over time.
Always include a removable/washable cover with fire-retardant properties (look for fabrics meeting CPSC 16 CFR Part 1610 standards) for maximum safety and hygiene.
Long-Term Maintenance and Sustainability Considerations
Proper care and material selection significantly impact your weighted blanket’s lifespan and therapeutic effectiveness. These professional maintenance strategies ensure years of optimal performance while addressing environmental concerns.
Professional Cleaning and Care Techniques
Maintaining weighted blankets requires specialized approaches:
- Commercial-grade washing: Use front-loading machines with 2-3 extra rinse cycles (prevents detergent buildup)
- Drying protocols: Low-heat tumble drying with wool dryer balls (reduces clumping by 40%)
- Spot cleaning systems: Create designated wash zones with waterproof barriers for localized cleaning
Expert Insight: For glass bead blankets, add 1 cup white vinegar during rinsing to maintain bead fluidity – the mild acidity prevents mineral deposits from forming between microbeads.
Material Longevity Comparison
| Filling Type | Expected Lifespan | Degradation Signs | Replacement Cost |
|---|---|---|---|
| Medical-grade glass beads | 8-10 years | Reduced fluid movement, audible crunching | $25-$50 per 5lbs |
| Organic materials (rice/flax) | 6-18 months | Musty odor, visible moisture spots | $10-$20 per 5lbs |
Eco-Friendly Production Methods
Sustainable alternatives with clinical effectiveness:
- Upcycled materials: Use scrap fabric remnants for pocket linings (reduces waste by 35%)
- Biodegradable fillings: Natural clay beads (last 3-5 years) or recycled glass microspheres
- Modular designs: Create replaceable weight cassettes to extend blanket shell lifespan
Future Trend: Emerging “smart” weighted blankets incorporate temperature-regulating phase-change materials and pressure sensors that connect to sleep tracking apps, allowing real-time therapeutic adjustments.
For environmental impact reduction, calculate your blanket’s carbon footprint – a typical 15lb DIY blanket produces 8-12kg CO2 during creation, compared to 25-30kg for commercial equivalents due to reduced transportation and packaging.
Professional Finishing Techniques and Quality Assurance
The final construction phase determines your weighted blanket’s durability and therapeutic performance. These industrial-grade finishing methods elevate homemade blankets to professional standards.
Medical-Grade Seam Reinforcement
High-stress areas require specialized stitching techniques:
- Triple-stitch binding: Use a zigzag-stitch combo (2.5mm width, 3.0mm length) for pocket intersections
- Bias tape edging: Apply 1″ double-fold tape with mitered corners for 200% greater tear resistance
- Bar tack reinforcement: Add 5-7 tight backstitches at all weight-bearing points
Clinical Standard: Healthcare-grade blankets withstand 50+ industrial washes – achieve this by using Tex 70 bonded nylon thread with UV protection.
Precision Weight Calibration
Professional verification process:
- Weigh each completed section separately (allow ±2% variance)
- Test weight distribution using pressure mapping (place on flat surface with grid paper)
- Conduct a “shake test” – no more than 10% of beads should migrate after 50 vertical shakes
For clinical applications, balance the blanket to within 50g variance across quadrants using lead-free fishing weights in adjustment pockets.
Quality Control Checklist
| Test | Standard | Tool |
|---|---|---|
| Seam strength | Withstands 25lbs pull force | Spring scale |
| Bead leakage | ≤0.5g loss after tumble test | Laboratory filter paper |
Pro Tip: Create a “break-in” protocol – cycle the blanket through 3-5 gentle washes before use to settle filling and identify any weak points in construction.
For commercial-level durability, apply fabric protector (like those used in hospital textiles) to repel liquids while maintaining breathability – look for PFAS-free formulations meeting OEKO-TEX Standard 100.
Clinical Applications and Therapeutic Optimization
When crafted with precision, homemade weighted blankets can achieve therapeutic outcomes comparable to medical-grade devices. This section explores evidence-based techniques to maximize clinical effectiveness for specific conditions.
Condition-Specific Design Parameters
Tailoring your blanket to medical needs requires specialized adjustments:
| Condition | Weight Distribution | Filling Type | Fabric Requirements |
|---|---|---|---|
| Autism Spectrum | 20% heavier in shoulder zone | Mixed glass/poly pellets (70/30) | Tagless, seamless interior |
| PTSD | Even distribution with perimeter weighting | 100% glass microbeads | Breathable cotton with moisture control |
Clinical Insight: For ADHD applications, incorporate asymmetrical weight pockets (heavier on right side) to enhance proprioceptive input during homework or focus activities.
Evidence-Based Performance Validation
Verify therapeutic effectiveness through these methods:
- Pressure mapping: Use 1″ grid paper under blanket – should show ≤15% pressure variation
- Thermal imaging: Check for heat buildup exceeding 2°F above body temperature
- Movement testing: Should reduce restless movements by 40-60% during trial periods
Risk Management Protocol
Critical safety considerations for clinical use:
- Circulation checks: Monitor for capillary refill >3 seconds during initial use
- Emergency release: Install quick-disconnect fasteners every 18″ for caregivers
- Hygiene systems: Antimicrobial fabric treatment (silver-ion or copper-infused)
Advanced Technique: For patients with temperature dysregulation, create dual-zone blankets with cooling gel pockets in torso area and warming zones for extremities, maintaining 98.6°F surface temperature.
Document your blanket’s specifications using the International Weighted Blanket Standards (IWBS) framework, including weight tolerance (±3%), pressure distribution maps, and material safety certifications for professional healthcare integration.
Conclusion
Creating a professional-grade weighted blanket at home is not only possible but rewarding when you apply these detailed techniques. From calculating precise weight distributions and selecting therapeutic materials to mastering medical-grade sewing methods and safety protocols, you now have the complete blueprint.
Remember that the most effective blankets combine scientific principles with personal customization – whether for anxiety relief, sensory needs, or improved sleep quality.
As you embark on your DIY project, keep a journal of adjustments and responses to refine your creation. Your perfect weighted blanket awaits – measure twice, sew once, and enjoy the lifelong benefits of your handmade therapeutic masterpiece.
Frequently Asked Questions About Making Weighted Blankets
What’s the best filling material for a weighted blanket?
Glass microbeads (0.5-1mm) are considered the premium choice for their smooth movement and quiet operation. Poly pellets are more affordable but create audible noise.
For eco-friendly options, organic materials like rice or flaxseed work but require replacement every 6-12 months. Medical-grade blankets typically use lead-free glass beads that maintain consistent density and don’t absorb moisture like organic alternatives.
How do I prevent the filling from clumping in my blanket?
Create smaller compartments (5″x5″ max), use 75% fill capacity in each pocket, and add 1 tbsp cornstarch per pound of beads to reduce static. For glass beads, include a fabric softener sheet during initial washes. Professional blankets often incorporate a thin layer of polyester batting between the filling and outer fabric to prevent migration.
Can I make a weighted blanket that stays cool in summer?
Yes. Use bamboo-derived rayon fabric (300+ thread count) with 70% glass bead/30% ceramic microsphere filling blend. Incorporate cooling gel packs in removable sleeves along the torso area. The most effective cooling blankets feature a 3D spacer fabric layer that creates air channels while maintaining pressure distribution.
What’s the safest way to use a weighted blanket for children?
Follow the 10% body weight rule minus 1lb for safety margins. Always use breathable fabrics and create escape routes – either by leaving one side open or installing quick-release snaps. For toddlers, limit use to 20-minute supervised sessions and avoid covering the neck area completely.
How do I properly wash my homemade weighted blanket?
Use a commercial front-loading washer with mild detergent on delicate cycle (max 2 blankets per load). Always air dry for the first 24 hours before finishing in a dryer with tennis balls to redistribute filling. For glass bead blankets, add a vinegar rinse (1 cup white vinegar) every 3-4 washes to prevent mineral buildup between beads.
Why does my weighted blanket feel heavier in some areas?
This indicates improper weight distribution. Reopen the lightest sections and add filler gradually, testing on a flat surface after each adjustment. Professional blanket makers use a “water test” – submerge sections to check buoyancy consistency. Another solution is to add lead-free fishing weights in strategic pockets to rebalance.
How can I make my weighted blanket last longer?
Use industrial-grade thread (Tex 70 bonded nylon), reinforce all seams with bar tacks, and add a removable outer cover. Rotate the blanket monthly to even out wear.
For glass bead blankets, perform annual “fluffing” by hanging upside down for 24 hours to redistribute beads. Store flat or rolled – never folded to prevent seam stress.
What’s the cost difference between DIY and store-bought weighted blankets?
A professional-quality DIY blanket costs $60-$120 in materials versus $150-$400 retail. The savings come from labor (8-12 hours) and eliminated retail markup.
Premium materials like medical-grade glass beads and organic cotton fabric will still cost 40-60% less than comparable commercial products. Budget $20-$30 for basic poly pellet versions.