Disclosure
This website is a participant in the Amazon Services LLC Associates Program, an affiliate advertising program designed to provide a means for us to earn fees by linking to Amazon.com and affiliated sites.
Introduction
Installing a headboard is a straightforward project that can instantly elevate the look and feel of your bedroom. Whether you’re updating your bed frame or adding a stylish focal point, learning how to install a headboard yourself saves time and money.
Many people hesitate because they think it’s complicated or requires special tools, but with the right guidance, you can complete this task efficiently and confidently. The process involves a few key steps: choosing the right headboard for your bed, gathering the necessary tools, and securely attaching it to your bed frame or wall.
Before you start, it’s important to identify the type of bed frame you have and the kind of headboard you want to install. This ensures compatibility and safety. Plus, a well-installed headboard doesn’t just look great — it also adds comfort and support for sitting up in bed.
Best Tools for Installing a Headboard
To install a headboard smoothly, having the right tools is essential. Here are the top three tools that make the job easier and ensure a secure fit:
1. DEWALT 20V MAX Cordless Drill/Driver Kit
This drill is lightweight yet powerful, perfect for drilling holes and driving screws with precision. Its cordless design offers flexibility and ease of movement during installation.

- Compact, lightweight design fits into tight areas
- High performance motor delivers 300 unit watts out (UWO) of power ability…
- High speed transmission delivers two speeds (0-450 & 1,500 rpm) for a range of…
2. Stanley FatMax Tape Measure (25 ft)
Accurate measurements are key to aligning your headboard properly. This tape measure is durable, easy to read, and provides reliable measurements to help you avoid mistakes.

- 11-foot Standout; 16-inch and 19.2-Inch stud center markings simplify framing…
- Blade arm our coating on the first 3″ maximizes durability of the blade
- Mylar polyester film extends life of entire blade
3. Level Tool by Stabila (9-inch Torpedo Level)
A level ensures your headboard sits perfectly straight against the wall or frame. This compact and highly accurate tool is easy to use and critical for a professional-looking finish.
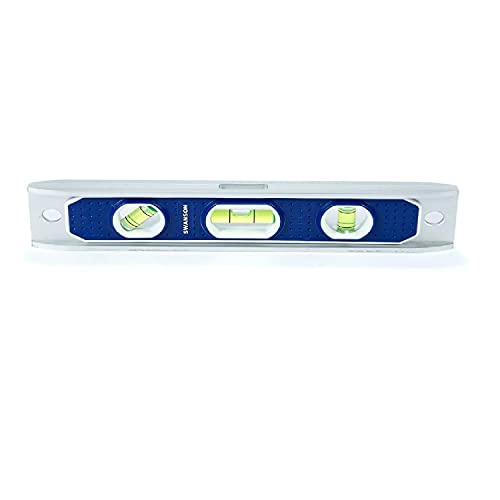
- The item is Swanson Tool TL002M Magnetic Die Cast Torpedo Level
- Used for Test & Measurement, Levels
- The product is manufactured in China
How to Prepare for Installing a Headboard
Preparation is the foundation of a successful headboard installation. Taking time upfront saves frustration and ensures the process goes smoothly.
Identify Your Bed Frame Type
Headboards attach differently depending on your bed frame. Most frames fall into three categories:
- Standard frame with pre-drilled holes — makes installation easier with bolts.
- Platform bed without holes — may require wall mounting or brackets.
- Wall-mounted headboard — requires securing to studs behind the wall.
Measure and Choose the Right Headboard
Measure the width and height of your bed to find a headboard that fits properly. Common bed sizes are twin, full, queen, king, and California king. Make sure the mounting holes on the headboard line up with your bed frame or mark new spots carefully.
Gather Your Tools and Materials
Prepare all necessary tools mentioned earlier and check you have the correct hardware (bolts, screws, washers). If your headboard didn’t come with mounting hardware, you’ll need to buy compatible bolts and brackets.
Clear the Installation Area
Move your bed away from the wall and clear the surrounding floor space. Having enough room to work is essential and helps prevent damage to your mattress or floor.
Step-by-Step Guide to Installing a Headboard on a Bed Frame
Installing a headboard onto a bed frame is a manageable DIY task with the right approach. Follow these steps carefully for a secure and polished result:
Align the Headboard with the Bed Frame
- Position the headboard so its mounting holes line up with the holes on your bed frame.
- If your headboard or frame lacks holes, mark where you will need to drill.
Attach the Mounting Brackets (if included)
- Many headboards come with brackets to connect the frame.
- Secure brackets to the headboard using screws, ensuring they are tight and flush.
Drill Pilot Holes (if necessary)
- For frames or headboards without pre-drilled holes, use a drill to create pilot holes at the marked spots.
- This prevents wood from splitting and makes inserting bolts easier.
Secure the Headboard to the Frame
- Use bolts, washers, and nuts to attach the headboard to the frame.
- Tighten them evenly on both sides with a socket wrench or adjustable wrench.
- Avoid overtightening to prevent damage.
Check for Stability and Alignment
- Ensure the headboard is flush against the frame and doesn’t wobble.
- Use a level tool to check if it’s perfectly straight.
Move the Bed Back to Position
- Carefully slide the bed back against the wall if needed, ensuring the headboard stays in place.
How to Install a Wall-Mounted Headboard
Wall-mounted headboards are a stylish alternative, especially for platform beds or minimalist spaces. Installing one requires careful planning to ensure safety and stability. Follow these steps for a secure mount:
Locate the Wall Studs
- Use a stud finder to locate studs behind the wall where you want to mount the headboard.
- Mark the stud locations lightly with a pencil.
- Mounting directly into studs ensures your headboard is securely anchored.
Measure and Mark Mounting Points
- Measure the width of the headboard and decide the height you want it on the wall.
- Use a level to mark horizontal lines where the mounting brackets or screws will go, ensuring the headboard will be straight.
Attach Mounting Hardware to the Headboard
- Most wall-mounted headboards come with brackets or hanging hardware.
- Secure the hardware to the back of the headboard according to the manufacturer’s instructions.
Drill Pilot Holes in the Wall
- Drill pilot holes into the studs at your marked spots.
- If you can’t hit studs, use heavy-duty wall anchors rated for the headboard’s weight.
Mount the Headboard on the Wall
- Line up the headboard brackets with the drilled holes or anchors.
- Use screws or bolts to secure the headboard firmly to the wall.
Final Stability Check
- Give the headboard a gentle shake to confirm it’s securely fastened.
- Use a level one last time to ensure it’s perfectly horizontal.
Tips for Maintaining and Securing Your Headboard
Keeping your headboard sturdy and looking great over time requires a bit of care and attention. Follow these simple tips to ensure it stays secure and stylish:
Regularly Check and Tighten Bolts
- Over time, bolts and screws can loosen due to movement.
- Set a reminder every few months to check all connections and tighten as needed.
Protect Your Headboard from Damage
- Use furniture pads or felt protectors between the headboard and the wall to prevent scratches.
- Avoid leaning heavy objects against the headboard to prevent dents or cracks.
Clean with Care
- For wooden headboards, use a damp cloth and mild cleaner to wipe dust and dirt.
- Upholstered headboards benefit from regular vacuuming with a brush attachment and spot cleaning stains promptly.
Avoid Excessive Weight or Pressure
- Don’t use the headboard to support heavy items or excessive pressure to prevent warping or damage.
- Discourage jumping or rough use that can loosen hardware.
Reassess Stability After Moving
- If you move your bed or headboard, inspect and re-secure all connections.
- Ensure the headboard remains level and firmly attached.
Conclusion
Installing a headboard is a simple yet rewarding project that transforms your bedroom’s style and comfort. By preparing properly, using the right tools, and following step-by-step instructions—whether attaching to a bed frame or mounting on a wall—you can achieve professional results.
Key takeaways:
- Identify your bed frame and headboard type before starting.
- Use quality tools like a cordless drill, tape measure, and level.
- Follow clear steps for securing the headboard safely.
- Maintain your headboard regularly to ensure long-lasting stability.
Taking the time to install your headboard correctly not only enhances your room’s aesthetics but also provides added support and durability. Ready to upgrade your bedroom? Grab your tools, follow this guide, and enjoy a stylish, sturdy headboard you can be proud of.
Frequently Asked Questions About How to Install a Headboard
Do I need special tools to install a headboard?
No special tools are required. A cordless drill, tape measure, level, wrench, and screwdriver usually cover all the basics. If mounting to drywall, a stud finder and wall anchors might be necessary for stability.
Can I install a headboard without a bed frame?
Yes! Wall-mounted headboards are perfect if you don’t have a traditional bed frame. Just make sure to securely mount the headboard to wall studs or use strong wall anchors.
How do I know if my bed frame is compatible with a headboard?
Check if your bed frame has pre-drilled holes aligned with standard headboard brackets. If not, you may need to drill new holes or consider wall mounting instead.
What type of hardware do I need?
Most headboards come with mounting hardware, including bolts, washers, and nuts. If your headboard doesn’t, purchase hardware rated for your bed’s size and weight for a secure fit.
How high should I mount a wall-mounted headboard?
The ideal height depends on your mattress and personal preference. Generally, the bottom of the headboard should be 2-4 inches above the mattress top for comfort and aesthetics.
Can I install a headboard on a platform bed?
Yes, but platform beds often lack standard mounting holes. Wall-mounted headboards or using special brackets designed for platform beds are common solutions.