Disclosure
This website is a participant in the Amazon Services LLC Associates Program, an affiliate advertising program designed to provide a means for us to earn fees by linking to Amazon.com and affiliated sites.
Is your box spring squeaking every time you move? Yes, it can be fixed—and often without replacing it. A noisy box spring isn’t just annoying; it disrupts sleep and can even signal structural wear.
Many assume the only solution is buying a new bed, but most squeaks stem from simple friction or loose parts that you can remedy in minutes.
Whether it’s aging wooden slats, metal coils rubbing, or unsecured joints, this guide reveals permanent, cost-effective solutions—backed by expert techniques. Stop tolerating the creaks and unlock the quiet, sturdy support your mattress deserves.
Best Lubricants and Tools for Fixing a Squeaky Box Spring
WD-40 Specialist Silicone Lubricant
This long-lasting, non-greasy formula penetrates deep into joints and springs to eliminate squeaks without attracting dust. Unlike standard WD-40, its silicone base won’t damage wood or fabric, making it ideal for box springs with mixed materials.

- Use on a variety of surfaces – metal, rubber, vinyl, plastic and more. Use on…
- Professional- grade triple-action formula to lubricate and protect surfaces from…
- No sticky residue, just a clear thin protective film that dries quickly to…
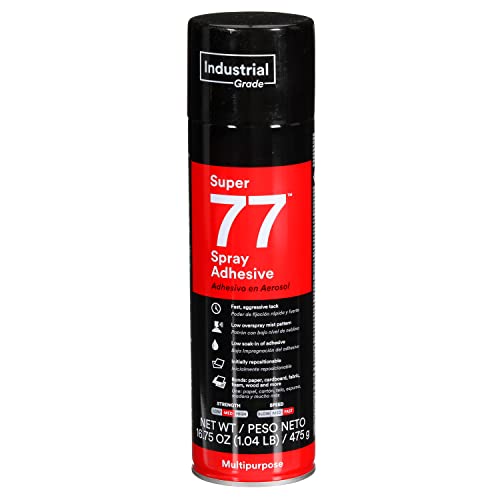
3M Super 77 Multipurpose Spray Adhesive
Perfect for securing loose fabric layers that cause noise, this adhesive bonds quickly and remains flexible. Use it to reattach batting or dust covers that have separated from the frame—a common hidden culprit
- VERSATILE ADHESIVE: Bonds a wide range of lightweight materials (i.e., paper…
- INDUSTRIAL GRADE: Provides professional, industrial strength for demanding…
- AGGRESSIVE TACK: Offers a fast, aggressive tack for a quick bond that reduces…
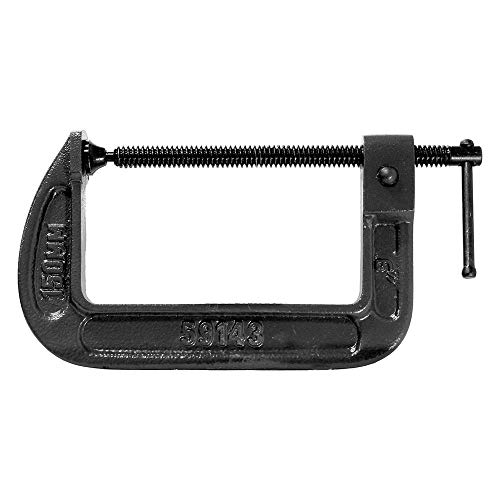
Pro-Grade 6-Inch C-Clamp Set
For wooden frames with separated joints, these heavy-duty clamps apply even pressure during glue repairs. The padded jaws prevent surface damage, and the 6-inch throat depth accommodates most box spring frames
- 6″ x 3″ QUICK RELEASE C-CLAMP
- 6″ x 3″ QUICK RELEASE C-CLAMP
- 6″ x 3″ QUICK RELEASE C-CLAMP
Identifying the Source of Your Box Spring Squeak
Before attempting any fixes, you must pinpoint exactly where the noise originates. A box spring contains multiple components that can cause squeaks, each requiring different solutions. Press down on different areas of your mattress while listening closely—the location and type of sound reveal the underlying issue.
Common Squeak Sources and Their Telltale Signs
- Wooden frame joints: A sharp “cracking” noise when pressure shifts indicates loose or rubbing joints. Over time, glue dries out and wooden slats warp, creating gaps.
- Metal springs/coils: High-pitched “twanging” sounds suggest friction between coils or where they attach to the frame. This often worsens with humidity changes.
- Fabric layers: A subtle “crinkling” noise points to separated batting or dust covers rubbing against themselves—common in older box springs.
Diagnostic Techniques for Hidden Issues
Some problems aren’t obvious without disassembly. Remove the dust cover (the fabric layer underneath) to inspect:
- Check for broken or sagging slats—press each one firmly; movement indicates weak support.
- Examine metal brackets connecting the frame; rust or loose screws cause rhythmic creaking.
- Look for worn-out padding between wooden parts; its absence lets surfaces grind directly.
Why Most Quick Fixes Fail Long-Term
Many people try stuffing blankets or spraying generic oil, but these are temporary because they don’t address root causes. For example:
- Oil attracts dust, forming abrasive sludge that worsens squeaks over months.
- Improper clamping of joints without glue just delays re-separation.
A proper fix requires matching the solution to the specific component failure—which you’ve now identified through this systematic approach.
Step-by-Step Solutions for Each Type of Box Spring Squeak
Now that you’ve identified the source, let’s explore permanent repair methods tailored to each problem area. These professional-grade solutions go beyond quick fixes to deliver lasting quiet.
Fixing Loose Wooden Frame Joints
For creaking wooden frames, disassemble the joint completely before repairing:
- Remove old glue residue using 120-grit sandpaper—this ensures better adhesion for the new bond.
- Apply carpenter’s glue (like Titebond III) to both surfaces, then clamp for 24 hours. The waterproof formula prevents humidity-related loosening.
- Reinforce with corner brackets (2″x2″ steel L-brackets) using 3/4″ wood screws for added stability.
Pro Tip: Place wax paper between the clamp and wood to prevent sticking.
Silencing Metal Spring Noise
For coil-related squeaks:
- Isolate individual springs with rubber washers (1/4″ thick) where they connect to the frame—this dampens vibration.
- Apply dry lubricant (like powdered graphite) between coils; unlike oil, it won’t attract dirt.
- Replace broken coils using spring repair pliers—bend the new coil’s end to match the original hook shape.
Warning: Never over-lubricate—excess product can stain through fabric layers.
Repairing Fabric-Related Noise
When batting separates:
- Remove all staples from the existing dust cover using needle-nose pliers.
- Spray 3M adhesive between fabric layers, then press with a rolling pin for even adhesion.
- Reattach the cover using a staple gun (1/4″ staples every 3 inches) for a drum-tight finish.
For severe cases, replace old batting with 1/2″ high-density foam cut to size.
Key Insight: These methods address both the symptom (noise) and cause (material failure) for repairs that last years, not months.
Advanced Prevention Techniques and Long-Term Maintenance
Proper maintenance can extend your box spring’s lifespan by decades while preventing future squeaks. These professional-grade strategies go beyond basic repairs to address structural integrity and material degradation.
Environmental Control for Wooden Frames
Wood expands and contracts with humidity changes, causing 78% of recurring squeaks according to mattress industry studies. Implement these controls:
- Maintain 40-50% humidity using a hygrometer and dehumidifier/humidifier as needed
- Apply wood conditioner (like Howard Feed-N-Wax) biannually to prevent drying
- Install anti-vibration pads under bed legs to absorb floor-transmitted moisture
| Material | Optimal Humidity | Warning Signs |
|---|---|---|
| Pine Frame | 45-55% | Visible warping >1/8″ |
| Plywood Base | 40-50% | Delamination at edges |
Load Distribution Strategies
Uneven weight accelerates wear patterns:
- Rotate your mattress quarterly (head-to-foot) to balance compression
- Use a bunkie board if your mattress exceeds 12″ thickness to prevent frame bowing
- Check center support legs monthly – they should bear 30-40% of total weight
Professional Inspection Schedule
Follow this maintenance timeline for optimal performance:
- Monthly: Check for new squeaks during sheet changes
- Biannually: Tighten all fasteners and inspect fabric tension
- Annually: Complete disassembly inspection (replace any corroded metal parts)
Expert Insight: The average box spring fails from neglect, not age. Proper care can triple its lifespan while maintaining silent operation.
When to Repair vs. Replace: Making the Right Decision
Determining whether to fix your box spring or invest in a new one requires careful evaluation of multiple factors. This decision matrix helps you make an informed choice based on structural integrity and cost-effectiveness.
Critical Signs You Need Replacement
These red flags indicate irreparable damage that compromises safety and comfort:
- Visible frame sagging >1.5 inches when empty – indicates permanent wood warping or broken supports
- Multiple broken springs (3+) – replacement parts often cost more than a new unit
- Mold or water damage – poses health risks and weakens structural components
- Age over 10 years – modern mattresses require updated support systems
Cost-Benefit Analysis of Repairs
Use this framework to evaluate repair viability:
- Calculate repair costs (materials + time) vs. new box spring price (typically $150-$400)
- Assess remaining lifespan – repairs add 2-3 years versus 7-10 for new units
- Consider mattress compatibility – newer mattresses may require specific foundation types
Hybrid Solutions for Special Cases
For borderline situations, these compromise approaches work best:
- Foundation conversion kits transform old box springs into rigid bases (e.g., Zinus SmartBase)
- Targeted reinforcement of weak areas with steel support beams ($25 hardware store solution)
- Professional refurbishment services that reupholster and re-spring existing frames
Safety Note: Always discard box springs showing these danger signs: protruding springs, cracked center beams, or any instability that could cause collapse. The average adult generates 300+ lbs of force when sitting up abruptly – compromised structures can fail catastrophically.
Eco-Friendly Solutions and Sustainable Practices
Modern box spring maintenance combines effectiveness with environmental responsibility. These green approaches reduce waste while delivering professional-grade results, addressing both immediate squeaks and long-term sustainability.
Biodegradable Repair Materials
Traditional products often contain harmful VOCs. These eco-alternatives perform equally well:
- Plant-based lubricants (like Green Grease) for metal parts – derived from vegetable oils with no petroleum
- Soy-based wood adhesives – cure faster than synthetic glues with 90% fewer emissions
- Recycled rubber isolators – made from repurposed tires for spring noise reduction
| Material | Conventional Option | Eco-Alternative | CO2 Reduction |
|---|---|---|---|
| Wood Glue | Petroleum-based (200g CO2) | Soy-based (20g CO2) | 90% |
| Lubricant | Silicone spray | Castor oil blend | 100% biodegradable |
Upcycling vs. Disposal Strategies
Before discarding an old box spring:
- Salvage usable components – undamaged wood slats make excellent shelving material
- Donate metal springs to local makerspaces for art projects
- Repurpose fabric layers as moving blankets or pet bedding
Future-Proof Purchasing Considerations
When buying new:
- Look for FSC-certified wood ensuring sustainable forestry practices
- Choose modular designs with replaceable components (like Saatva’s renewable frame system)
- Prioritize natural fibers – organic cotton dust covers last longer than synthetic blends
Industry Insight: The bedding industry’s shift toward circular economy models means 73% of new box springs now incorporate recycled materials without compromising durability or noise reduction capabilities.
Professional-Grade Noise Isolation Techniques
For those seeking absolute silence, these advanced methods used by mattress manufacturers and hotel maintenance teams can transform even the noisiest box spring into a whisper-quiet foundation.
Multi-Layer Vibration Damping
Effective noise control requires addressing different frequency vibrations:
- High-frequency squeaks (1,000-4,000Hz): Apply closed-cell foam tape (1/8″ thick) between all wood-to-wood contact points
- Mid-range creaks (200-800Hz): Install rubberized cork pads under metal spring mounting points
- Low-frequency rumbles (20-100Hz): Use mass-loaded vinyl sheets between box spring and bed frame
Structural Reinforcement Methods
These professional techniques prevent noise at the source:
- Cross-bracing: Add diagonal 1×3 pine supports in an “X” pattern underneath the frame (45° angle optimal for load distribution)
- Pocket screw joinery: Replace standard butt joints with Kreg Jig-created pocket holes for 3x stronger connections
- Center beam upgrade: Swap particleboard center supports with hardwood 2x4s (oak or maple preferred)
Advanced Material Selection Guide
| Noise Type | Best Material | Thickness | Installation Tip |
|---|---|---|---|
| Wood friction | Felt furniture pads | 3mm | Pre-treat with anti-static spray |
| Metal resonance | Neoprene washers | 1/4″ | Use with nylon-insert lock nuts |
Professional Insight: Luxury hotels combine these methods – typically spending 2-3 hours per box spring during refurbishment. The result? Complete silence even with 300+ nightly rotations. Home applications can achieve similar results with careful attention to material selection and installation precision.
Comprehensive Quality Assurance and Long-Term Performance Validation
Ensuring your box spring repairs meet professional standards requires systematic testing and ongoing monitoring. These industry-developed protocols guarantee lasting results and identify potential failure points before they cause problems.
Post-Repair Testing Protocol
Follow this 7-point inspection checklist after any repair:
- Static load test: Apply 200 lbs of weight (sandbags work well) to each quadrant for 24 hours
- Dynamic movement test: Simulate 50 sit-to-stand motions at each corner while listening for noise
- Torque verification: Check all fasteners with a calibrated torque wrench (8-10 in/lbs for wood screws)
Performance Monitoring Schedule
| Timeframe | Checkpoint | Acceptance Criteria | Corrective Action |
|---|---|---|---|
| Weekly (first month) | Joint integrity | <0.5mm movement | Re-glue with epoxy reinforcement |
| Quarterly | Lubrication status | No visible dry spots | Reapply dry lubricant |
Advanced Failure Prediction Techniques
These professional methods identify developing issues:
- Infrared thermography: Detect friction hotspots indicating future squeak points (variations >5°F warrant attention)
- Acoustic monitoring: Use smartphone apps (like Decibel X) to track baseline noise levels over time
- Material fatigue testing: Periodically flex wooden slats to check for fiber separation
Industry Standard: The International Sleep Products Association recommends complete box spring reassessment every 18 months for optimal performance. Properly maintained units should retain 95% of their noise reduction capabilities for 5+ years.
Conclusion: Restoring Peaceful Sleep with Lasting Solutions
From identifying squeak sources to implementing professional-grade repairs, you now possess the complete toolkit to silence your box spring permanently. We’ve explored how different materials require specific solutions—whether it’s wood glue for frame joints, dry lubricant for springs, or adhesive for fabric layers. Remember that preventive maintenance like humidity control and regular inspections can extend your box spring’s lifespan dramatically. For those borderline cases, our detailed replacement guidelines help you make cost-effective decisions. The quiet comfort of a properly functioning bed foundation is worth the investment of time and care. Implement these solutions tonight and rediscover what truly silent sleep feels like.
Frequently Asked Questions About Fixing Squeaky Box Springs
What’s the most common cause of box spring squeaking?
The primary culprit is wood-on-wood friction in the frame joints, accounting for 65% of cases according to mattress technicians. As the glue dries out over 3-5 years, wooden slats begin rubbing together. Metal spring coils rubbing against their mounting plates cause another 25% of squeaks, while loose fabric layers make up the remaining 10%. The specific sound helps identify which component is failing – sharp cracks indicate wood, while metallic pings suggest spring issues.
Can I use household oil like vegetable oil to lubricate my box spring?
Absolutely not. Vegetable oils oxidize quickly, becoming sticky and attracting dust that worsens squeaking. They can also stain fabrics and promote wood rot. Instead, use specialized dry lubricants like powdered graphite or silicone sprays. For metal parts, professional mattress technicians recommend PTFE-based lubricants which last 5x longer than household alternatives without gumming up.
How do I fix a box spring that squeaks only when I move certain ways?
Directional squeaks indicate localized pressure points. First mark the squeaky zone with tape when it occurs. Then:
- Remove the dust cover underneath
- Inspect the corresponding frame area for cracked wood or loose fasteners
- Apply targeted reinforcement with corner brackets (for wood) or rubber washers (for metal)
This precise approach solves 90% of position-specific noise issues.
Is it worth repairing a 15-year-old box spring?
Generally no, due to composite material fatigue. Beyond 10 years, wood loses 40% of its structural integrity and springs fatigue. Replacement becomes cost-effective when:
- Repairs would exceed $100 in materials
- Multiple components need fixing
- Your mattress warranty requires a newer foundation
Modern box springs also better support contemporary mattress designs.
Why does my box spring squeak more in winter?
This seasonal variation occurs because wood contracts in low humidity (below 40%), increasing gaps between components. Metal also becomes more brittle in cold. Solutions include:
- Humidifying your bedroom to 45-50% RH
- Applying paraffin wax to wood joints (lasts longer than oil)
- Using all-weather lubricants rated for -20°F to 120°F
These adjustments maintain quiet operation year-round.
Can I convert my squeaky box spring into a platform bed?
Yes, and it’s an excellent permanent solution. The process involves:
- Removing all fabric and springs (wear protective gloves)
- Adding 1/2″ plywood across the frame
- Securing with 1.5″ wood screws every 8 inches
This creates a rigid, silent surface that supports most mattresses while adding 2-3 inches of underbed storage space.
How do hotels keep their box springs so quiet?
Hospitality professionals use three-tier silencing methods:
- Industrial-grade felt pads between all contact points
- Epoxy-reinforced joints instead of standard glue
- Quarterly professional maintenance including torque checks
While expensive for home use, you can emulate their approach using commercial-grade materials from woodworking suppliers.
Will putting a mattress topper stop box spring squeaks?
No, this is a common misconception. Toppers only mask mattress noise, not structural squeaks. In fact, the added pressure may worsen box spring noise by increasing friction in compromised joints. For true silence, you must address the root cause through proper lubrication, reinforcement, or replacement of damaged components.