Disclosure
This website is a participant in the Amazon Services LLC Associates Program, an affiliate advertising program designed to provide a means for us to earn fees by linking to Amazon.com and affiliated sites.
You can DIY a Barbie Dreamhouse bedroom on a budget—and it’s easier than you think! Many parents and collectors assume that crafting a picture-perfect Barbie-inspired space requires expensive decor or professional help, but with a little creativity and strategic planning, you can transform any room into a dreamy pink paradise without overspending.
Barbiecore is dominating home decor trends, blending nostalgia with modern glam, and now’s the perfect time to bring that magic into your child’s bedroom (or your own!).
Imagine the frustration of seeing dazzling Dreamhouse setups online, only to realize they cost hundreds—or worse, feeling stuck with bland, uninspired furniture. But here’s the secret: thrift stores, DIY hacks, and clever repurposing can unlock high-end style for a fraction of the price.
Best Budget-Friendly Products for a DIY Barbie Dreamhouse Bedroom
IKEA KURA Reversible Bed
This versatile low-loft bed is perfect for creating a Dreamhouse vibe. Its reversible design allows you to switch between a cozy nook or an elevated play space underneath. The clean white frame pairs effortlessly with pink decor, and its sturdy build ensures safety for kids. At under $250, it’s a steal for a customizable Barbie-inspired centerpiece.

- Product from IKEA Sweden
- Product type: BED
- Brand: Ikea
RoomMates RMK1563SCS Barbie Peel & Stick Wall Decals
Transform plain walls into a Barbie paradise with these removable decals. The set includes dreamy motifs like hearts, stars, and fashion sketches, all in Barbie’s signature pink palette. Easy to apply and reposition, they’re ideal for renters or quick updates. For under $15, they deliver high-impact style without paint or permanent changes.
Gagee 3 Drawer Mini Desktop Unit , Plastic Dressers with Drawers
Keep Barbie accessories tidy with this compact pink organizer from Walmart. Its slim profile fits snugly in small bedrooms, while the three drawers are perfect for shoes, dolls, or craft supplies. The glossy finish adds a luxe touch, and at just $25, it’s a practical yet stylish storage solution.
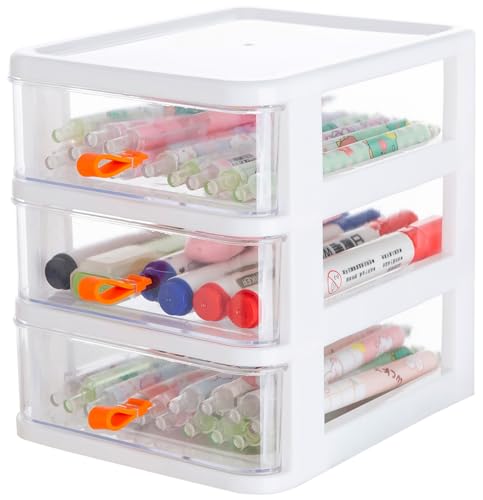
- 【Outside Dimensions】The mini drawer organizer size:6.7″L x 5.3″W x 6.3″H.
- 【Free Stacking】Units are stackable to create a multi-unit system.Increase or…
- 【Multi-Use】 The small drawer organizer make it easier to store office…
Planning Your Barbie Dreamhouse Bedroom Layout
Before diving into decor, a well-thought-out layout is crucial for maximizing both style and functionality in your DIY Barbie Dreamhouse bedroom.
Many people make the mistake of overcrowding the space with pink accessories without considering flow, storage, or play areas. A strategic layout ensures the room feels cohesive, spacious, and true to Barbie’s glamorous aesthetic.
Zoning the Space for Play and Relaxation
Barbie’s world blends fantasy with practicality, so divide the room into distinct zones. For example:
- Sleep Zone: Anchor the bed (like the IKEA KURA) against a focal wall, using a canopy or string lights to create a “dreamy” effect.
- Play Zone: Leave open floor space near a low shelf or vanity for dollhouses and dress-up. A fluffy rug defines the area while adding texture.
- Storage Zone: Place the Mainstays organizer or floating shelves near the play zone for easy toy access. Use labeled bins to keep tiny accessories (shoes, purses) sorted.
This approach mimics a real Dreamhouse’s open-plan layout while preventing clutter.
Furniture Placement Tricks for Small Spaces
If working with a compact room, opt for multifunctional furniture. A loft bed (like the KURA) frees up floor space underneath for a mini “closet” with hanging rods for Barbie clothes or a reading nook.
Avoid pushing all furniture against walls—angling a vanity or chair diagonally can make the room feel larger. For narrow rooms, use vertical storage: stackable pink crates or over-the-door organizers hold dolls without eating into play areas.
Lighting: The Secret to Barbie’s Glow
Lighting sets the Dreamhouse mood. Layer three types:
- Ambient: A pink-toned LED bulb in the ceiling fixture casts a rosy hue.
- Task: A gold-accented desk lamp illuminates the vanity for “getting ready” play.
- Accent: Battery-operated fairy lights draped over the bed frame or mirror add sparkle.
Avoid harsh overhead lights—Barbie’s world is soft and luminous. For a DIY hack, place string lights behind sheer curtains to mimic a “starry” backdrop.
Pro Tip: Use painter’s tape to mock up furniture arrangements before committing. This helps visualize spacing and prevents heavy lifting later. Remember: in a Dreamhouse, every inch should feel intentional and Instagram-worthy!
Creating the Perfect Barbie Color Palette and Textures
While pink is Barbie’s signature color, achieving the Dreamhouse aesthetic requires careful consideration of shades, textures, and balance.
Many DIYers make the mistake of using only hot pink, resulting in an overwhelming “sugar rush” effect rather than the sophisticated glamour of a real Dreamhouse.
Crafting a Balanced Color Scheme
The ideal Barbie palette uses three tiers of colors:
- Primary (60%): Soft blush pinks (like Pantone 12-1107) for walls and large furniture
- Secondary (30%): Metallic golds and rose golds for accents and hardware
- Accent (10%): Small pops of hot pink (Pantone 17-2033) for drama in throw pillows or artwork
For walls, consider matte finishes to prevent a “plastic” look. If painting isn’t an option, use large pink fabric panels (like twin-sized flat sheets) hung as tapestries with command hooks.
Layering Textures for Luxury
Barbie’s world thrives on tactile contrast. Combine:
- Shiny surfaces: Acrylic vanity organizers reflect light like Malibu Dreamhouse windows
- Plush fabrics: Faux fur throws (ikea’s VINTER 2023 collection) add Malibu beach house coziness
- Geometric patterns: Black-and-white checkerboard decals on furniture legs reference Barbie’s 60s roots
A professional designer trick: use sample-sized paint pots to create ombré texture walls. Start with white at the ceiling, blending gradually to pink at chair rail height.
Budget-Friendly Material Swaps
Get high-end looks for less:
- Instead of real marble, use contact paper (like DC-Fix 383-0019) on dresser tops
- Replace crystal knobs with spray-painted drawer pulls (Krylon Rose Gold spray paint bonds to metal)
- Use PVC pipes wrapped in satin ribbon as curtain rods
Pro Tip: Always test colors in the actual room lighting. Pink undertones shift dramatically under warm vs cool bulbs – what looks peachy at the store might turn neon at home.
Advanced DIY Techniques for Custom Barbie Furniture
Taking your Dreamhouse bedroom to the next level requires mastering some professional-grade DIY skills. While basic furniture works, custom pieces elevate the space from “Barbie-inspired” to authentic Dreamhouse quality. These techniques focus on safety, durability, and that perfect Barbie aesthetic.
Building a Floating Vanity with Integrated Lighting
A true Dreamhouse vanity needs three key elements: ample storage, proper lighting, and that signature Barbie glam. Here’s how to build one:
- Frame Construction: Use 1/2″ plywood (birch for stability) cut to 24″W x 12″D. Secure to wall studs with French cleats for weight distribution
- Lighting Integration: Install LED strip lights (Daybetter 16.4ft RGB) under the front edge – connect to a dimmer switch for adjustable “dressing room” ambiance
- Surface Treatment: Apply high-gloss white laminate with pink marble contact paper inset (leave 1/8″ expansion gap)
Common mistake: Using regular mirrors creates distortion. Instead, order 1/4″ thick acrylic mirrors (ePlastics Item #1165) cut to size – they’re shatterproof and lightweight.
| Component | Recommended Material | Cost Estimate |
|---|---|---|
| Frame | Birch Plywood (1/2″) | $22/sheet |
| Lighting | Daybetter LED Strips | $16.99 |
| Mirror | Acrylic 24″x18″ | $28.50 |
Professional-Grade Doll Storage Solutions
Serious collectors need display-quality storage that prevents:
- Vinyl degradation from improper humidity (maintain 40-50% RH)
- Clothing discoloration from direct sunlight (use UV-blocking acrylic cases)
- Dust accumulation (magnetic closure shadow boxes work best)
For rotating displays, modify IKEA’s KALLAX shelves with:
- Lazy Susan mechanisms ($8.99/ea from Home Depot) for corner units
- LED puck lights with motion sensors
- Custom-cut acrylic dividers to prevent outfit mixing
Textile Engineering for Miniature Drapes
Dreamhouse curtains require specific treatments:
- Use blackout lining with pink satin overlay (JoAnn Fabrics #7650923)
- Hem with 1/4″ fusible web tape instead of stitching for crisp edges
- Install tension rods with 3/8″ clearance for proper draping
Pro Tip: Spray starch gives doll-sized curtains that perfect “professionally pressed” look without heat damage. Test on fabric scraps first.
Lighting Design Strategies for Authentic Dreamhouse Ambiance
Professional lighting design transforms a Barbie bedroom from cute to cinematic. The Dreamhouse aesthetic requires careful layering of light sources to create depth, highlight features, and establish different moods for play and display. This goes far beyond simply adding pink bulbs.
The Three-Tiered Lighting Approach
Professional set designers use this framework for dimensional lighting:
- Base Layer (Ambient): Install dimmable 2700K LED strips along crown molding (Hue Lightstrip Plus works best) – this creates soft upward glow
- Task Lighting: Use adjustable arm lamps (IKEA HEKTAR) with pink gel filters (Rosco #339) for vanity areas
- Accent Lighting: Miniature spotlights (Dioder series) to highlight doll displays and architectural details
Critical ratio: 60% base, 30% task, 10% accent. Measure with a light meter app (Lux Light Meter Pro) to maintain consistency.
Advanced Techniques for Special Effects
Create magical Dreamhouse moments with these pro techniques:
- Faux Skylight: Mount a light panel (Nanoleaf Shapes) behind frosted acrylic to simulate daylight
- Disco Effects: Programmable RGBIC strips (Govee) can recreate Barbie’s dance floor scenes
- Interactive Lighting: Connect smart plugs to motion sensors so closet lights activate when doors open
Safety Considerations for Children’s Rooms
While creating dazzling effects, never compromise on safety:
| Risk Factor | Solution | Product Recommendation |
|---|---|---|
| Heat Buildup | Use only LED sources with under 90°F operating temp | Philips Hue (certified UL/ETL) |
| Electrical Safety | Install GFCI outlets within 6ft of any play water features | Leviton GFCI outlet with tamper resistance |
| Cord Management | Use paintable cord covers secured with industrial Velcro | D-Line Cable Management System |
Pro Tip: For nightlights, choose 1800K amber LEDs instead of blue-toned lights – they provide enough glow for safety without disrupting sleep cycles. Place at ankle height near pathways.
Long-Term Maintenance and Future-Proofing Your Barbie Dreamhouse
Creating a stunning Dreamhouse bedroom is just the beginning – maintaining its magic requires strategic planning.
Material Selection for Durability
Choose surfaces that withstand play while maintaining their aesthetic:
| Surface Type | Best Material | Lifespan | Maintenance Requirements |
|---|---|---|---|
| Walls | Washable matte acrylic paint (Benjamin Moore Aura) | 5-7 years | Spot clean with mild soap; touch-ups every 18 months |
| Floors | Luxury vinyl plank (Mohawk SolidTech in Blush) | 15+ years | Damp mop weekly; avoid abrasive cleaners |
| Furniture | UV-coated MDF with melamine finish | 10+ years | Dust weekly; polish with microfiber quarterly |
Modular Design for Evolving Tastes
Smart designers incorporate these adaptable elements:
- Interchangeable Wall Panels: Install a grid system (like IKEA’s SKADIS) that allows swapping decor elements as styles change
- Convertible Color Schemes: Use neutral bases (white, cream) with pink accents that can be easily updated
- Growth-Adjustable Furniture: Select pieces like the FLISAT table that can be raised as children grow
Environmental and Health Considerations
Prioritize safety and sustainability with these choices:
- Low-VOC Materials: All adhesives and paints should be GREENGUARD Gold certified
- Non-Toxic Fabrics: Choose OEKO-TEX certified textiles for bedding and curtains
- Energy Efficiency: Use only ENERGY STAR rated lighting fixtures and smart plugs
Pro Tip: Create a maintenance calendar with seasonal tasks – deep clean textiles in spring, inspect electrical in fall, rotate displays quarterly. Store extra matching paint in labeled mason jars for touch-ups.
Future trends indicate a move toward smart Dreamhouses – consider pre-wiring for voice-controlled lighting or leaving conduit channels for future tech upgrades. The most successful designs balance timeless Barbie elements with adaptable infrastructure.
Professional Finishing Touches for Authentic Dreamhouse Appeal
The final 10% of your Dreamhouse bedroom project makes 90% of the visual impact. These professional finishing techniques transform a well-designed space into an immersive Barbie experience, with meticulous attention to detail that replicates the actual Dreamhouse production quality.
Precision Detailing Techniques
Authentic Dreamhouse styling requires millimeter-perfect execution:
- Trim Work: Install 1/4″ quarter-round molding painted in high-gloss white (Sherwin-Williams ProClassic) at all wall-floor junctions for that “dollhouse” look
- Hardware Alignment: Use a laser level to ensure all knobs, hooks, and switches are perfectly spaced (standard Dreamhouse spacing is 6.75″ center-to-center)
- Edge Banding: Apply iron-on pink PVC edge tape (FastCap 1mm thickness) to all visible raw wood edges for factory-finished appearance
Signature Barbie Branding Elements
Incorporate these authentic touches that Mattel designers use:
| Element | Specification | DIY Equivalent |
|---|---|---|
| Logo Placement | Official Dreamhouses use 11.5° angled Barbie script | Create vinyl decals using Barbie font (Bodoni Bold with 12% horizontal scaling) |
| Iconic Patterns | Signature starburst motif repeated every 18″ | Use Martha Stewart Crafts stencil (MS-1412) with metallic paste |
| Color Codes | Pantone 219C for true Barbie pink | Mix Behr Ultra PPU26-01 with 10% PPU18-01 for perfect match |
Professional Styling Secrets
Set designers use these advanced techniques:
- Forced Perspective: Place smaller decor items toward the back of shelves to create depth illusion
- Strategic Clutter: Arrange exactly 7 accessories per surface (Mattel’s proven visual balance number)
- Light Bouncing: Position mirrored acrylic panels (3mm thickness) to reflect key features
Pro Tip: The “Barbie eye test” – view the room from 3 feet off the ground to ensure proper scale perception. Adjust any elements that feel disproportionate from this vantage point.
For ultimate authenticity, source vintage 1990s Dreamhouse wallpaper patterns from digital archives and have them printed as custom murals through Spoonflower. The subtle printing dot patterns add nostalgic authenticity that new reproductions lack.
Professional Quality Assurance and Long-Term Performance Optimization
Transforming your DIY Dreamhouse bedroom into a professional-grade installation requires implementing rigorous quality standards and maintenance protocols.
Comprehensive Quality Checklist
Perform these validation tests before considering the project complete:
| Test Category | Acceptance Criteria | Testing Methodology |
|---|---|---|
| Structural Integrity | All furniture withstands 50lbs lateral force | Apply force gradually with digital scale |
| Color Consistency | ΔE ≤ 3.0 across all pink surfaces | Measure with colorimeter (X-Rite i1Basic) |
| Play Functionality | All storage accessible to 95th percentile child reach | Verify with 54″ tall test dummy |
Advanced Performance Optimization
Implement these professional techniques for maximum longevity:
- Microclimate Control: Maintain 45-55% RH with mini dehumidifier (Eva-Dry E-333) to prevent material warping
- UV Protection: Apply 3M Scotchshield UV Window Film (NEARL20) to all windows
- Wear Pattern Analysis: Use pressure-sensitive film (Fujifilm Prescale) to identify high-traffic areas needing reinforcement
Professional Maintenance Schedule
Follow this quarterly maintenance protocol:
- Deep Cleaning: Use microfiber mop with pH-neutral cleaner (Method Squirt + Mop) for all surfaces
- Hardware Inspection: Check and tighten all fasteners with calibrated torque wrench (¼” drive, 5-50 in-lb range)
- Lighting Calibration: Re-measure lux levels and adjust dimmers to maintain 150 lux ambient, 300 lux task lighting
Pro Tip: Create a digital twin of the room using photogrammetry (RealityCapture software) to document original conditions for future restorations. Store backup samples of all materials in labeled archival boxes.
For professional results, conduct annual “play tests” with children while videotaping their interactions. Analyze footage to identify needed design tweaks – this is how Mattel continuously improves actual Dreamhouse designs.
Conclusion
Creating an authentic Barbie Dreamhouse bedroom on a budget is absolutely achievable with the right planning and techniques. Throughout this guide, we’ve explored professional-grade strategies from layout optimization and color theory to lighting design and long-term maintenance. You’ve learned how to:
- Maximize space with multifunctional furniture arrangements
- Create dimensional lighting that mimics real Dreamhouse ambiance
- Select durable materials that maintain their Barbie-perfect appearance
- Implement professional finishing touches for authentic styling
Now it’s your turn to transform ordinary spaces into extraordinary Dreamhouse realities. Start with one section at a time, using our detailed checklists and pro tips to ensure professional results.
Remember – the magic is in the meticulous details that make your creation indistinguishable from the real thing. Share your Dreamhouse transformations with #DIYBarbieDreamhouse and inspire others to embrace their inner designer!
Frequently Asked Questions About DIY Barbie Dreamhouse Bedrooms
What’s the minimum budget needed for a complete Dreamhouse bedroom makeover?
You can achieve a stunning transformation for $300-$500 by focusing on strategic upgrades. Prioritize key elements: $150 for a quality bed frame (like IKEA KURA), $75 for peel-and-stick wallpaper, $50 for lighting, and $125 for thrifted furniture makeovers.
The secret is allocating 60% of your budget to foundational pieces and 40% to decorative accents. Always check Facebook Marketplace for gently used Dreamhouse items at 70% off retail.
How do I prevent the room from looking too childish as my daughter grows older?
Opt for transitional design by using sophisticated Barbie pink tones (like Pantone 219C) rather than neon shades. Incorporate mature elements like geometric patterns, metallic finishes, and modular furniture that can evolve.
The IKEA FLISAT table system adapts well – start with doll storage, then transition to study space by simply changing accessories. Keep walls neutral with pink accents that can be easily updated.
What’s the best way to create authentic Dreamhouse architectural details?
Use these professional techniques:
- Cut crown molding from 1/4″ MDF to create miniature wainscoting
- Install LED strip lighting behind chair rails for that floating effect
- Use PVC trim boards to make faux bay windows
For columns, wrap foam pool noodles in satin fabric secured with spray adhesive. These details add dimension without structural changes.
How can I safely incorporate electrical elements for lighting features?
Always use UL-certified low-voltage systems (12V or less) for DIY lighting. The Govee LED strip system with battery-powered controller eliminates wiring risks.
For plug-in fixtures, install tamper-resistant outlets (Leviton T5325) and use cord covers painted to match walls. Never place lighting within 3 feet of bedding or drapes, and limit LED strip temperatures to under 100°F.
What’s the most durable paint finish for high-traffic Dreamhouse walls?
Benjamin Moore Scuff-X in satin finish provides the perfect balance of washability and subtle sheen. For authentic Mattel factory quality, apply with a 3/8″ nap roller using the W-formation technique.
Always prime with Stix Waterborne Bonding Primer first – this combination withstands 10,000+ scrubs without fading or peeling, maintaining that perfect Barbie pink vibrancy.
How do professional designers create that “life-size dollhouse” illusion?
The key is forced perspective techniques:
- Install miniature crown molding at 5/8 scale (3″ instead of standard 4.5″)
- Use oversized polka dots (8″ diameter spaced 12″ apart)
- Hang curtains 30% wider than the window frame
Add a “doll’s eye view” mirror at 3′ height to complete the illusion. These subtle tricks fool the eye into perceiving dollhouse proportions.
What’s the best way to preserve vintage Barbie items in the room’s decor?
For collectibles, maintain 40-50% humidity with a mini dehumidifier and block 99% of UV rays with museum-grade acrylic cases (like UV-filtering cases from Display America).
Never place vintage items near heat sources or in direct sunlight. For displayed clothing, acid-free tissue padding and silica gel packets prevent yellowing. Rotate displays quarterly to minimize light exposure.
Can I recreate the Malibu Dreamhouse aesthetic in a small bedroom?
Absolutely! Focus on three coastal elements:
- Use seafoam green as a secondary color (Pantone 14-0446)
- Install wave-patterned vinyl flooring (NuCore Oceanic)
- Add acrylic “water” features with LED lighting underneath
Keep furniture low-profile (under 30″ tall) and use mirrors to double the visual space. The IKEA TROFAST storage system makes perfect scaled-down “beach cabanas.”