Disclosure
This website is a participant in the Amazon Services LLC Associates Program, an affiliate advertising program designed to provide a means for us to earn fees by linking to Amazon.com and affiliated sites.
Yes, you can create the perfect bed with a custom headboard—and it’s easier than you think. Your bed is the centerpiece of your bedroom, yet many settle for mass-produced designs that lack personality. But what if you could unlock a hotel-worthy sanctuary tailored to your style, comfort, and space?
Headboard customization isn’t just for interior designers; with the right guidance, you can craft a showstopping focal point that transforms sleep into an experience. From luxe upholstered designs to rustic reclaimed wood, this guide reveals how to turn your vision into reality—one detail at a time.
Best Tools for Headboard Customization
DEWALT 20V MAX Cordless Drill
With a 1,500 RPM motor and 300 unit watts out (UWO), this drill powers through hardwood and plywood effortlessly. The compact design fits in tight spaces, while the included battery lasts through full headboard assembly without recharging.

- Compact, lightweight design fits into tight areas
- High performance motor delivers 300 unit watts out (UWO) of power ability…
- High speed transmission delivers two speeds (0-450 & 1,500 rpm) for a range of…
KAI 5210 8-inch Dressmaking Shears (N5210)
Razor-sharp Japanese stainless steel blades slice through thick upholstery fabrics like velvet or tweed without fraying edges. The offset handle reduces hand fatigue during prolonged cutting—key for intricate designs like channel-tufting or nailhead trim.

- The KAI 5210 – 8 in scissors have ergonomically soft handles which allow…
- Cuts multiple layers of denim with ease while trimming cottons without any…
- The KAI5210 is the standard size handle and blade length
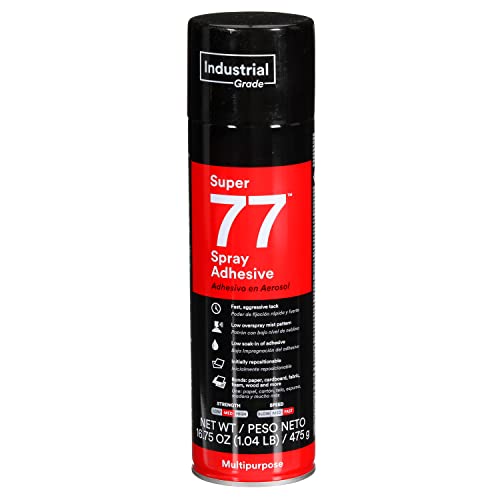
3M Super 77 Multipurpose Spray Adhesive
A must for attaching batting or foam to headboard frames, this spray bonds instantly without soaking through materials. Its low-VOC formula is safe for indoor use, and the wide nozzle ensures even coverage on large surfaces.
- VERSATILE ADHESIVE: Bonds a wide range of lightweight materials (i.e., paper…
- INDUSTRIAL GRADE: Provides professional, industrial strength for demanding…
- AGGRESSIVE TACK: Offers a fast, aggressive tack for a quick bond that reduces…
Choosing the Right Headboard Style for Your Space
The headboard you select sets the tone for your entire bedroom, so understanding how different styles interact with your space is crucial. Upholstered headboards, for example, add softness and sound absorption—ideal for small apartments where echoes amplify noise. A tufted linen design (like the Christopher Knight Home model mentioned earlier) creates a luxe hotel vibe, while a smooth velvet surface makes a bold color statement. The thickness of padding matters too: 2-3 inches works for subtle support during reading, while 4-6 inches delivers plush, high-end drama.
Matching Headboard Height to Room Proportions
Standard headboards range from 14″ (low-profile) to 65″ (floor-to-ceiling), but the sweet spot depends on your ceiling height and bed size. For 8-foot ceilings:
- Queen/King beds: 36″-42″ tall headboards visually anchor the bed without overwhelming the space
- Twin/Full beds: 24″-32″ heights prevent a “floating” effect in larger rooms
Pro tip: If mounting to the wall (not the bed frame), position the headboard’s bottom edge 2″-4″ above the mattress to hide gaps when pillows compress.
Material Considerations Beyond Aesthetics
While looks matter, materials impact durability and maintenance:
- Solid wood (like oak or walnut) resists dents but requires seasonal polishing—avoid direct sunlight to prevent fading
- Metal frames (wrought iron or brushed brass) need felt pads where they contact walls to prevent scratches
- Upholstered fabrics demand stain-resistant treatments; Crypton or Sunbrella fabrics repel spills better than untreated linen
A common mistake? Choosing a rustic reclaimed wood headboard (like WOOD-HB42) for a high-humidity bedroom—unsealed wood warps within months. Always check material specs against your climate.
Real-world application: In a 12’x10’ bedroom with low natural light, a 48″ whitewashed oak headboard reflects light while adding texture. Pair it with wall-mounted sconces to free up nightstand space—a trick interior designers use to balance proportion and function.
Step-by-Step Guide to Upholstering a Custom Headboard
Transforming a basic headboard frame into a luxurious upholstered piece requires precision and the right technique. Unlike store-bought options, a DIY approach lets you customize every detail—from foam density to fabric pattern—while saving 40-60% in costs. Here’s how professionals achieve flawless results.
Preparing the Headboard Frame
Start with a sturdy plywood or MDF base (minimum ½” thickness for queen/king sizes). Sand edges with 120-grit paper to prevent fabric snags, then apply two coats of primer to prevent moisture warping. For curved designs:
- Use a jigsaw with a fine-tooth blade for smooth arcs (practice on scrap wood first)
- Seal cut edges with wood glue to stabilize the grain before upholstering
Pro Tip: Mark screw hole locations on the frame’s back before adding padding—drilling through foam later causes uneven compression.
Layering Padding and Fabric
The secret to professional-grade cushioning lies in strategic layering:
- Base layer: ½” high-density foam (1.8 lb/ft³ density) glued with 3M Super 77 spray
- Top layer: 2″ convoluted (“egg crate”) foam for breathability—essential for warm climates
- Final wrap: Dacron batting (1″ thickness) stretched taut to soften edges
When attaching fabric (like Roxanne’s upholstery linen), start at the center and work outward, pulling diagonally to distribute tension evenly. For tufting: pre-mark holes with a fabric marker and use a curved upholstery needle with waxed thread.
Troubleshooting Common Issues
Wrinkles or loose fabric? Heat is your ally:
- Steam iron (low heat setting) relaxes stretched linen without water marks
- Hair dryer on medium heat reactivates spray adhesive for spot repairs
For corners, use the “hospital fold” technique: fold fabric like a present, securing with ½” staples every ¼”. This prevents bulky gathers that wear unevenly over time.
Real-world example: A client’s 60″ wingback headboard required 7 yards of fabric (54″ width) with 15% extra for pattern matching. By cutting all pieces before stapling—including separate sections for the wings—we avoided mid-project shortages and pattern misalignment.
Advanced Headboard Mounting Techniques for Different Wall Types
Proper headboard installation requires understanding structural engineering principles applied to residential spaces. The mounting method impacts both safety and aesthetics, with different approaches needed for drywall, plaster, masonry, and studless walls.
Load-Bearing Calculations and Hardware Selection
A standard queen upholstered headboard (approx. 45 lbs) requires different support than a solid oak design (up to 120 lbs). Use this formula to determine mounting needs:
| Headboard Weight | Wall Type | Recommended Hardware | Safety Factor |
|---|---|---|---|
| Under 50 lbs | Drywall with studs | #10 Wood screws (2.5″) into studs | 3:1 ratio |
| 50-100 lbs | Plaster or masonry | Toggle bolts (1/4″) or concrete anchors | 4:1 ratio |
| Over 100 lbs | Any wall | French cleat system (oak 1×4) | 5:1 ratio |
Critical note: Always account for dynamic loads – when someone leans against the headboard, force multiplies by 1.5-2x their body weight.
Specialty Wall Solutions
For challenging installations:
- Metal stud walls: Use snap toggles rated for 75+ lbs each, distributing weight across 4+ mounting points
- Sloped ceilings: Fabricate custom L-brackets from 11-gauge steel, welding adjustable tilt mechanisms
- Concrete walls: Drill pilot holes with hammer drill using carbide bit, then install wedge anchors every 16″
Professional insight: Interior designers often use a “hidden hanger” system for high-end projects – steel cables run from ceiling joists to discreet D-rings on the headboard back, eliminating visible hardware.
Alignment and Leveling Techniques
Precision installation requires:
- Laser level to mark perfect horizontal line at mattress height +1
- Template made from craft paper to pre-mark all mounting points
- Shim system (0.5mm-5mm plastic shims) to compensate for wall irregularities
Common mistake: Assuming walls are plumb – 80% of homes have walls with 1/4″-3/4″ variance over 8 feet. Always check with 4′ level before drilling.
Case study: A historic brownstone installation required custom brass standoffs to maintain 1.5″ air gap between headboard and crumbling plaster walls, using vibration-dampening rubber washers to prevent material transfer.
Professional Finishing Techniques for Long-Lasting Headboard Results
The final 10% of headboard customization—finishing details—makes 90% of the visual impact while ensuring durability. These professional techniques bridge the gap between DIY and high-end furniture quality, addressing both aesthetics and structural integrity.
Edge Treatments and Transition Zones
Proper edge finishing prevents fabric wear and maintains crisp lines:
- Piped edges: Use 1/4″ cotton cord wrapped in matching fabric, sewn with a zipper foot (requires 1/2″ seam allowance)
- Knife-edge finish: Ideal for tight-weave fabrics like Sunbrella—pull batting 1″ back from edges before stapling
- Commercial-grade corners: Apply marine-grade epoxy to wooden frame corners before upholstering for moisture resistance
Pro tip: For tufted designs, pre-seal button holes with Fray Check solution to prevent thread unraveling from frequent contact.
Surface Protection Strategies
Different materials require customized protective treatments:
| Material | Recommended Protection | Application Method | Reapplication |
|---|---|---|---|
| Natural wood | Osmo Polyx-Oil (matte) | 3 thin coats with 0000 steel wool buffing | Every 3 years |
| Upholstery fabric | 303 Fabric Guard | Spray from 6″ in crosshatch pattern | Annual |
| Metal frames | Paste wax (automotive grade) | Hand-rub with microfiber cloth | Bi-annual |
Critical note: Always test treatments on scrap materials first—some fabric protectors darken light-colored linens permanently.
Lighting Integration Techniques
Built-in lighting requires careful planning:
- Route LED strip channels 1/2″ deep into wooden frames using a plunge router
- Install dimmable 2700K LEDs with 90+ CRI for accurate color rendering
- Use frosted acrylic diffuser panels to eliminate hot spots
Safety consideration: Low-voltage wiring (12-24V) must still meet NEC Class 2 requirements—never run line voltage through headboard materials.
Professional insight: High-end designers often create “service panels”—removable sections secured with rare earth magnets for accessing wiring or adjusting mounting hardware without disassembling the entire piece.
Sustainable Headboard Design: Eco-Conscious Materials and Long-Term Value
Modern headboard customization increasingly prioritizes environmental responsibility without sacrificing aesthetics or durability. Understanding material lifecycles and sustainable practices transforms your project from disposable decor to an enduring, eco-friendly investment.
Material Sustainability Ratings and Performance
The ecological impact of common headboard materials varies dramatically:
| Material | Carbon Footprint (kg CO2/m²) | Renewability | End-of-Life Options |
|---|---|---|---|
| FSC-Certified Hardwood | 12.4 | 30-80 year cycle | Biodegradable/Repurpose |
| Recycled Steel | 8.7 | Infinite | 100% Recyclable |
| Organic Hemp Fabric | 5.2 | Annual crop | Compostable |
| Conventional MDF | 24.9 | Non-renewable | Landfill |
Key insight: Bamboo (technically a grass) offers surprising durability at 1,380 on the Janka hardness scale – comparable to red oak (1,290) but with 3x faster regrowth.
Non-Toxic Construction Methods
Health-conscious assembly requires:
- Adhesives: Water-based contact cements with ≤50g/L VOC (like Eco Bond 2000)
- Finishes: Milk paint or Osmo natural oil wax for wood protection
- Padding: Natural latex foam (avoid polyurethane off-gassing)
Professional warning: Many “green” claims are unverified – look for Cradle to Cradle Certified or Greenguard Gold certifications for legitimate eco-friendly products.
Future-Proof Design Strategies
Adaptable headboard systems address changing needs:
- Modular panel construction allows individual section replacement
- Standardized 16″ or 24″ widths accommodate future bed size changes
- Universal mounting systems (like Keyhole brackets) enable wall transfers
Cost analysis: While sustainable materials cost 15-30% more upfront, their 20+ year lifespan versus 5-7 years for conventional materials delivers 40-60% long-term savings.
Emerging trend: Mycelium-based “living headboards” now in development use mushroom root structures grown into custom shapes, creating fully biodegradable frames that decompose in 90 days when retired.
Smart Technology Integration in Modern Headboard Design
The fusion of furniture design with home automation has transformed headboards from passive elements to interactive home hubs. Proper integration requires understanding both electrical systems and ergonomic design principles for seamless functionality.
Power Management and Wiring Systems
Safe technology integration demands careful planning of electrical infrastructure:
- Concealed raceways: 3/4″ PVC channels routed through the frame back allow for wire organization while maintaining accessibility
- Modular power: Plug-and-play USB-C PD (Power Delivery) ports rated at 100W eliminate tangled cords
- Wireless charging: Qi2 standard charging pads should be mounted 3/8″ below fabric surfaces for optimal performance
Critical safety note: All wiring must comply with NEC Article 400 for flexible cords and Article 411 for low-voltage lighting systems.
Integrated Control Systems
Modern headboards can serve as centralized control points with proper configuration:
| System Type | Integration Method | Recommended Components | Power Draw |
|---|---|---|---|
| Lighting Control | Zigbee 3.0 | Philips Hue Smart Button | 0.5W |
| Climate Control | Wi-Fi 6 | Ecobee Smart Sensor | 1.2W |
| Audio System | Bluetooth 5.3 | Monitor Audio SoundFrame | 15W |
Professional insight: Create a dedicated 20A circuit for tech-heavy headboards to prevent interference with other bedroom electronics.
Ergonomic Interface Placement
Control placement follows human factors engineering principles:
- Primary controls positioned within 15° of normal line of sight when reclined
- Tactile buttons require 1.5mm actuation force differential from surrounding surfaces
- Touchscreen interfaces need matte anti-glare coatings for nighttime use
Common mistake: Installing USB ports too close to mattress edges leads to accidental damage from arm movements during sleep.
Emerging technology: Capacitive fabric interfaces woven directly into upholstery are now being tested, allowing gesture control across the entire headboard surface without visible controls.
Professional Quality Assurance and Long-Term Performance Optimization
Transforming a custom headboard from good to exceptional requires implementing manufacturing-grade quality controls and predictive maintenance strategies. These professional techniques ensure your creation withstands decades of use while maintaining its aesthetic appeal.
Structural Integrity Testing Protocols
Before final installation, conduct these validation tests:
| Test Type | Procedure | Acceptance Criteria | Frequency |
|---|---|---|---|
| Lateral Load Test | Apply 25lbs side force at top edge | <0.5° deflection | Pre-installation |
| Fabric Stress Test | 5000 abrasion cycles (ASTM D4157) | No pilling or thread breaks | Material selection |
| Moisture Resistance | 72hr humidity chamber (85% RH) | No warping or adhesive failure | Climate-specific |
Critical insight: For upholstered units, perform a “pillow impact test” – repeatedly drop a 10lb sandbag from 12″ height to simulate years of headrest use.
Preventative Maintenance Schedule
Extend your headboard’s lifespan with these professional care techniques:
- Quarterly: Vacuum fabric with upholstery attachment (use cheesecloth over nozzle for delicate materials)
- Biannual: Tighten all fasteners to specified torque values (typically 8-10 in/lbs for wood screws)
- Annual: Inspect mounting hardware for wall settlement shifts using laser alignment tools
Professional warning: Never use commercial fabric cleaners containing solvents on treated materials – they break down stain-resistant coatings at molecular level.
Performance Enhancement Techniques
Advanced optimization strategies include:
- Applying nanotechnology fabric protectors (like NeverWet) that don’t alter material breathability
- Installing micro-adjustable leveling feet for perfect alignment on uneven floors
- Using vibration-damping pads between frame and wall to prevent fastener loosening
Cost-benefit analysis: Investing 2-3 hours in these enhancements adds 7-10 years to headboard lifespan, representing 300% ROI versus replacement costs.
Industry evolution: Leading furniture manufacturers now embed NFC chips in headboard frames that store build specifications and maintenance history, accessible via smartphone for future servicing.
Conclusion: Crafting Your Dream Headboard with Confidence
From selecting sustainable materials to integrating smart technology and ensuring long-term durability, you now possess the complete blueprint for creating a headboard that transforms your bedroom into a personalized sanctuary. We’ve explored professional upholstery techniques, advanced mounting solutions, and quality assurance methods that elevate DIY projects to furniture-grade results.
Remember, the perfect headboard balances form and function—whether you prefer the warmth of FSC-certified wood or the modern convenience of built-in charging systems. Your sleep space deserves this level of thoughtful design.
Ready to begin? Start by sketching your vision, then gather the recommended tools and materials. With these expert insights, you’re not just building a headboard—you’re crafting a centerpiece that will deliver comfort, style, and functionality for years to come. Sweet dreams start with great design.
Frequently Asked Questions About Headboard Customization
What’s the best material for a durable yet stylish headboard?
For longevity, FSC-certified hardwoods like maple or walnut offer excellent durability (1,450-1,550 Janka hardness) while accepting stains beautifully. Upholstered options using Crypton fabric provide stain resistance comparable to commercial furniture. Metal frames (14-gauge steel) last decades but require rubber isolators to prevent wall damage. Consider your climate—solid wood needs humidity control (40-60% RH), while aluminum resists coastal salt air corrosion.
How do I attach a heavy headboard securely to drywall?
For headboards over 50 lbs, use a French cleat system with 3/4″ plywood backing. Locate studs (typically 16″ OC) and install 3″ lag screws through the cleat’s top edge. The mating cleat on the headboard should extend at least 75% of its width. For studless mounting, SnapToggle anchors can hold 150+ lbs when properly spaced (minimum 4 anchors for queen size).
What’s the proper height for a headboard relative to mattress size?
The ideal height follows the golden ratio: mattress width x 0.618. For a queen (60″ wide), this suggests 37″ visible above mattress. Standard heights are:
- Twin: 28-32″
- Full: 32-36″
- King: 38-42″
Leave 2-4″ gap between mattress and headboard bottom to account for bedding compression. Taller headboards (up to 60″) work in rooms with 10’+ ceilings.
Can I convert an old door into a headboard safely?
Yes, but hollow-core doors require reinforcement. Install horizontal 2×4 braces every 16″ behind the panel, secured with construction adhesive and 1-1/4″ screws. Solid wood doors should be sanded (80→120→220 grit) and sealed with polyurethane. Always remove old hardware and fill holes with epoxy wood filler before refinishing. Weight typically ranges 45-90 lbs—verify your wall can support it.
How do I prevent fabric wrinkles on upholstered headboards?
Professional upholsterers use the “spider web” technique: staple center points first, then work outward in opposing directions, maintaining even tension. For existing wrinkles, lightly mist with distilled water and use a handheld steamer (max 212°F) while gently stretching. Avoid heat guns—they can melt foam backing. Quality fabrics like Sunbrella or Revolution resist wrinkling better than linen.
What’s the cost difference between DIY and custom-ordered headboards?
DIY projects typically cost 30-60% less. A basic queen upholstered headboard:
- DIY: $175-$400 (materials only)
- Custom: $800-$2,500+
High-end materials (like top-grain leather) narrow the gap, as professional workshops get bulk discounts. Time investment averages 12-20 hours for first-time DIYers versus 2-3 weeks lead time for custom orders.
How do I integrate lighting without visible wires?
Run low-voltage LED strips (24V) through 3/4″ PVC conduit routed along the frame’s back. Use PWM dimmers to prevent flickering. For hardwired options, install a recessed outlet box behind the headboard (NEC Article 314.27) with a brush-style wire port. Smart bulbs (Zigbee 3.0) eliminate wiring but require nearby hubs. Always maintain 1″ airspace around heat-producing fixtures.
What’s the best way to clean and maintain an upholstered headboard?
Follow this professional cleaning schedule:
- Weekly: Vacuum with upholstery attachment (max 60kPa suction)
- Quarterly: Spot clean with foam cleaner (test in hidden area first)
- Annual: Professional deep cleaning for protein-based stains
Avoid harsh chemicals—pH-neutral cleaners (6.0-8.0) preserve fabric treatments. For high-use areas, apply fabric protector every 18 months (like 303 High Tech Fabric Guard).