Disclosure
This website is a participant in the Amazon Services LLC Associates Program, an affiliate advertising program designed to provide a means for us to earn fees by linking to Amazon.com and affiliated sites.
You can absolutely build your own mattress—and it’s easier than you think. Tired of overpaying for mass-produced beds that never quite fit your sleep needs? You’re not alone.
Millions struggle with sagging foam, uneven support, or chemical off-gassing from store-bought mattresses. But what if you could handcraft a perfect sleep surface tailored to your body, budget, and values?
The DIY mattress movement is booming, fueled by skyrocketing retail prices (up to $3,000+) and growing demand for non-toxic materials. Imagine waking up pain-free on a bed you designed—using organic cotton, precision-cut latex, or even repurposed materials.
Best Materials for Building Your Own Mattress
Sleep On Latex Pure Green Natural Latex Mattress Topper (2-inch, Medium Firmness)
This 100% natural Dunlop latex topper from Sleep On Latex provides excellent pressure relief and breathability. The medium firmness (ILD 34-38) suits most sleepers, and its organic certification ensures no harmful chemicals. Perfect as a comfort layer for back or side sleepers.
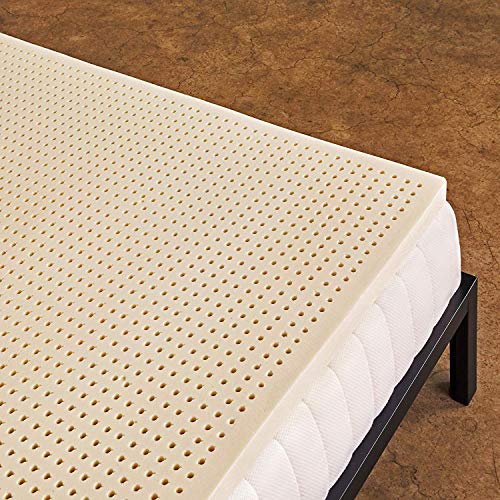
- Medium Firmness – Provides Pinpointed Comfort & Support
- Adjusts to Your Body Instantly – Latex Foam Naturally Stays Cool
- Made of Natural Latex Harvested from Organically Grown Rubber Trees
Naturepedic Organic Cotton Mattress Encasement (Queen)
A must-have for DIY mattress builds, this GOTS-certified encasement protects your layers from dust and allergens. The quilt-free design prevents lumpiness, and the waterproof yet breathable barrier adds durability. Ideal for wrapping custom latex or foam constructions securely.
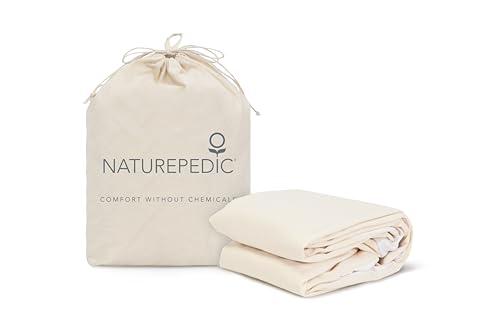
- Waterproof Mattress Pad: Protect and keep your mattress free of liquids and…
- Organic Cotton: Our mattress protectors are made with two layers of organic…
- Drysleep Technology: Ultra-thin waterproof barrier effectively blocks liquids…
Foam Factory HD36-HQ High-Density Foam Base Layer (6-inch, Queen)
For foundational support, this 2.8 lb/ft³ density foam resists sagging better than cheaper alternatives. Its CertiPUR-US certification guarantees low VOC emissions, and the firm 36 IFD rating ensures proper spinal alignment. Cut it to size for any DIY mattress frame.
Mattress Layers: The Science of Comfort and Support
Building a mattress isn’t just stacking materials—it’s engineering personalized sleep. Every quality mattress combines distinct layers working together to provide pressure relief, airflow, and spinal alignment. Let’s dissect these layers and their functions so you can make informed choices for your DIY build.
The Foundation Layer: Your Mattress’s Backbone
The base layer (typically 5-8 inches thick) determines overall support and durability. High-density polyurethane foam (2.5-3.0 lb/ft³ density) or pocketed coils are common choices.
For example, a 6-inch HD36-HQ foam base prevents sagging better than low-density alternatives because its 36 IFD (firmness rating) and 2.8 lb/ft³ density resist compression over time. Pro Tip: Side sleepers may prefer slightly softer bases (IFD 28-32) to allow shoulder/hip contouring.
The Transition Layer: Bridging Comfort and Support
This middle layer (2-3 inches) moderates the feel between firm support and plush comfort. Medium-firm latex (ILD 34-38) or memory foam (3-4 lb density) works best.
The Sleep On Latex 2-inch topper excels here because Dunlop latex’s responsive bounce prevents the “stuck” feeling of all-foam builds while still cushioning joints.
The Comfort Layer: Where Luxury Meets Function
Top layers (2-4 inches) dictate surface feel. Options include:
- Memory foam (4-5 lb density): Best for pressure relief but can trap heat—pair with a cooling cover.
- Talalay latex (ILD 19-24): Softer than Dunlop, ideal for plush feels while maintaining breathability.
- Organic cotton/wool: Natural temperature regulation, though less contouring than foams.
Common DIY Mistakes to Avoid
Many beginners:
- Neglect layer thickness ratios: A 10-inch mattress should never have a 1-inch base—this causes premature sagging.
- Overlook material compatibility: Placing memory foam directly on coils creates uneven support—always use a transition layer.
- Forget about edge support: Add high-density foam borders if using softer materials to prevent roll-off.
Real-World Example: A back pain sufferer might combine a 6-inch HD foam base, 3-inch medium latex transition, and 2-inch soft Talalay top—this provides lumbar support with shoulder relief. Test layer combinations by sleeping on floor prototypes before final assembly.
Step-by-Step Assembly: Building Your DIY Mattress Like a Pro
Now that you understand mattress layers, let’s walk through the actual construction process. Proper assembly is crucial for durability and comfort—a poorly assembled mattress can develop lumps, uneven support, or premature wear. Follow this professional approach to avoid common pitfalls.
Pre-Assembly Preparation
Begin by measuring your bed frame precisely. A standard queen measures 60″x80″, but DIY builds allow custom sizing. Pro Tip: Add 0.5-1 inch to each dimension for easier encasement fitting. Gather these tools:
- Electric knife or foam cutter: For clean cuts through dense foam layers
- Fabric tape measure: More flexible than metal for material measurements
- Spray adhesive (low-VOC): Optional for stabilizing layers
The Layer Stacking Sequence
- Start with your foundation: Place the base layer (HD foam or coils) directly on the bed frame. If using coils, orient them with the firmer side down.
- Add transition material: Center the middle layer perfectly—even 1/2″ misalignment causes edge collapse over time. For latex, position the ventilation holes vertically for optimal airflow.
- Top with comfort layers: Memory foam should always be the uppermost layer. If combining latex and memory foam, place latex beneath to prevent sinking.
Securing Your Creation
Use the Naturepedic encasement to contain your layers. First, unzip it completely and lay it flat. Carefully transfer your stacked layers inside, then zip slowly while adjusting for even distribution. Critical step: Walk around the perimeter to settle materials before final zipping.
Troubleshooting Common Issues
If your mattress feels too firm:
- Add a 1″ soft latex topper (ILD <20) instead of replacing entire layers
- Check if the encasement is too tight—some compression is normal, but extreme tightness increases firmness by 10-15%
Real-World Tip: For couples with different firmness needs, create a “split” design by cutting layers lengthwise and using different materials on each side. Secure the halves with wide fabric tape beneath the encasement.
Material Science: Choosing the Right Components for Your Sleep Needs
Selecting mattress materials isn’t just about comfort – it’s about understanding how different materials interact with your body and sleep environment.
The Density-Firmness Relationship Explained
Material density (measured in lb/ft³) and firmness (measured in IFD or ILD) work together to create support. Higher density foams (3.0+ lb/ft³) provide better durability but may feel firmer at the same IFD rating than lower density foams. This explains why two “medium firm” foams can feel completely different.
| Material Type | Ideal Density | Expected Lifespan | Best For |
|---|---|---|---|
| Memory Foam | 4.0-5.0 lb/ft³ | 7-10 years | Pressure relief, motion isolation |
| Latex (Dunlop) | 4.5-5.5 lb/ft³ | 10-15 years | Support with bounce |
| Polyurethane Foam | 2.5-3.0 lb/ft³ | 5-7 years | Budget-friendly base layers |
Thermodynamics of Sleep: Temperature Regulation
Heat retention depends on material structure:
- Open-cell foams: Allow air circulation (better cooling) but may lack support
- Phase change materials: Absorb and release heat at specific temperatures
- Natural fibers: Wool regulates humidity while cotton wicks moisture
For hot sleepers, combine a breathable latex base (ventilation holes) with a gel-infused memory foam top layer. The latex channels air while the gel absorbs body heat – this dual-action approach can reduce sleep surface temperature by 3-5°F.
Advanced Material Combinations
Professional mattress designers often use “sandwich” techniques:
- Start with a high-resilience base (coils or HD foam)
- Add a transition layer with progressive resistance (zoned latex works well)
- Finish with a viscoelastic top that molds quickly but recovers slowly
Expert Tip: The “30-second rule” – quality memory foam should completely recover from compression within 30 seconds. Test samples before purchasing bulk materials.
Customization Techniques: Tailoring Your Mattress to Specific Sleep Needs
Building a truly personalized mattress requires understanding how to modify standard designs for individual requirements.
Zoning Strategies for Targeted Support
Zoning involves creating areas of different firmness within the same mattress. The most effective zoning pattern follows spinal alignment needs:
- Shoulder zone (top 12″): Softer material (ILD 20-24) allows proper sinkage for side sleepers
- Lumbar zone (middle 24″): Firmer support (ILD 32-36) maintains natural spine curvature
- Hip/leg zone (bottom 24″): Medium firmness (ILD 26-30) balances pressure distribution
To create zones, either:
- Cut separate material sections and join them with fabric adhesive
- Use pre-zoned latex layers (available from specialty suppliers)
- Layer different materials in specific areas (memory foam over shoulders, latex over lumbar)
Weight-Based Customization Formulas
Your body weight dramatically affects how materials perform. Use these guidelines:
| Body Weight | Base Layer Density | Comfort Layer Thickness | Recommended IFD |
|---|---|---|---|
| <150 lbs | 2.5 lb/ft³ | 2-3 inches | 24-28 |
| 150-220 lbs | 3.0 lb/ft³ | 3-4 inches | 30-34 |
| 220+ lbs | 3.5+ lb/ft³ | 4-5 inches | 36-40 |
Medical Considerations in Design
For specific conditions:
Arthritis: Use 3″ soft Talalay latex over 2″ memory foam – the latex provides gentle buoyancy while memory foam reduces pressure points.
Sciatica: Create a firmer “floating” lumbar zone surrounded by medium-firm materials to prevent nerve compression.
GERD: Build in a 7-10° incline using graduated foam layers under the torso.
Pro Tip: Always test customized designs by sleeping on temporary floor setups before final assembly. Make small adjustments (1/2″ thickness changes or 2-3 ILD point variations) and retest – subtle changes often make significant differences in comfort.
Long-Term Performance and Sustainable Maintenance
Building your mattress is just the beginning – proper care and understanding of material aging will ensure your DIY creation provides optimal support for years.
Material Degradation Timelines and Prevention
Different materials age at varying rates:
| Material | Expected Lifespan | Degradation Signs | Preservation Techniques |
|---|---|---|---|
| Natural Latex | 12-15 years | Yellowing surface, reduced bounce | Rotate quarterly, use moisture-wicking protector |
| Memory Foam | 8-10 years | Permanent body impressions >1″ | Vacuum monthly, avoid direct sunlight |
| HD Polyfoam | 6-8 years | Edge collapse, loss of height | Reinforce edges with firmer foam strips |
The Economics of DIY Mattress Ownership
While initial costs may be comparable to mid-range commercial mattresses, the long-term savings are significant:
- Replacement flexibility: Replace individual layers (avg. $150-300) instead of entire mattress ($800-2000)
- Extended lifespan: Properly maintained DIY mattresses last 2-3 years longer than comparable commercial models
- Health savings: Customized support reduces chiropractic visits (avg. savings of $500+/year for chronic pain sufferers)
Environmental Impact and Safe Disposal
DIY mattresses offer substantial ecological benefits when constructed thoughtfully:
- Material selection: Organic latex has 1/3 the carbon footprint of synthetic foams
- End-of-life options: Natural materials can be composted (wool, cotton) or recycled (latex)
- Toxic emissions: Certified materials emit 60-80% fewer VOCs than conventional mattresses
Future Trend: The rise of modular mattress systems allows for easier component replacement and upgrades. Consider designing your DIY mattress with standardized layer sizes (like 30″x80″ sections) for future compatibility with emerging replacement parts.
Pro Maintenance Tip: Conduct bi-annual “mattress checkups” – measure layer compression with a straightedge, inspect for moisture damage, and test support by lying in your normal sleep positions. Early detection of wear patterns allows for targeted layer replacement before comfort is compromised.
Advanced Construction Techniques for Professional-Level Results
Elevate your DIY mattress from basic assembly to expert craftsmanship with these professional-grade construction methods. These techniques address common structural challenges while enhancing comfort and durability beyond commercial standards.
Precision Layer Bonding Methods
Proper layer adhesion prevents shifting and maintains alignment:
- Spray adhesive technique: Use 3M Super 77 in a zigzag pattern (6″ spacing) – allows for future separation while preventing slippage
- Fabric sandwich method: Stretch-knit fabric panels between layers (like mattress tufting) creates tension without permanent bonding
- Mechanical fasteners: Plastic bed straps every 18″ provide adjustable compression without damaging materials
Edge Support Reinforcement Systems
Commercial-grade edge support requires:
- Perimeter foam rails (6″ height x 4″ width) with density 1.5x your base layer
- Double-stitched border tape with reinforced gussets
- Zoned coil placement (tighter spacing at edges) if using spring systems
Pro Tip: For invisible edge support, create a “floating rail” system by cutting 1″ deeper than your mattress size and wrapping support foam around the interior.
Advanced Ventilation Design
Prevent heat buildup with these airflow solutions:
| Method | Implementation | Cooling Effect |
|---|---|---|
| Channel Venting | 1″ diameter vertical holes every 8″ | Reduces surface temp by 4-7°F |
| Layered Airflow | Alternating latex and spacer fabric | Creates convective currents |
| Phase Change Covers | Outlast® or Coolmax® fabrics | Regulates microclimate |
Professional Quality Control Testing
Before final assembly, conduct these assessments:
- Compression testing: Use 25lb weights in sleep position areas – should rebound within 30 seconds with <0.5″ permanent depression
- Edge integrity test: Sit on mattress edge – proper support prevents >20% compression
- Motion transfer: Drop 10lb weight from 12″ – adjacent area should show minimal disturbance
These techniques may add 15-20% to your build time but can double the mattress’s functional lifespan while providing commercial-quality performance.
Mastering the Art of Sleep System Integration
Creating the perfect sleep experience requires understanding how your DIY mattress interacts with other sleep system components.
Foundation Compatibility Analysis
Your mattress base dramatically affects performance:
| Foundation Type | Best For | Adjustment Needed | Performance Impact |
|---|---|---|---|
| Solid Platform | Memory foam builds | Add 1/2″ vented spacer | Increases firmness by 15% |
| Slatted Base | Latex hybrids | 2.5″ max slat spacing | Enhances airflow by 30% |
| Adjustable Base | Multi-layer designs | Reinforce transition layers | Requires 20% more edge support |
Advanced Climate Control Systems
Temperature regulation requires a multi-layered approach:
- Base Layer: Use ventilated latex or 3D mesh materials (≥40% open area)
- Core Technology: Incorporate phase change materials (PCM) with 5-7°C transition range
- Surface Treatment: Apply moisture-wicking fabrics with ≥300g/m² density
Comprehensive Risk Mitigation
Address these common failure points:
- Layer Separation: Use 2″ wide nylon hook-and-loop strips every 12″
- Edge Collapse: Install high-density foam perimeter (≥2.8lb/ft³) with mitered corners
- Moisture Damage: Incorporate waterproof breathable membrane (≥10,000g/m²/24hr rating)
Professional Validation Protocol
Conduct these quality tests before finalizing your build:
- 7-Day Break-In Test: Sleep in all positions for ≥2 hours each
- Thermal Imaging Scan: Check for heat pockets (>4°F variance indicates ventilation issues)
- Durability Simulation: 500+ compression cycles at key pressure points
Expert Insight: The ideal sleep system maintains ≤2°F temperature variation across the surface, shows <0.5″ compression variance after 8 hours use, and recovers to within 95% of original thickness after 24 hours rest. Achieving these metrics requires precise layer balancing and material selection.
Final Pro Tip: Create a “sleep system journal” documenting material specs, layer configurations, and performance observations. This becomes invaluable for future adjustments and serves as a blueprint for rebuilding or modifying your mattress as your needs evolve.
Conclusion: Your Path to Perfect Sleep Starts Here
Building your own mattress is more than a DIY project—it’s an investment in personalized sleep health. Throughout this guide, we’ve explored everything from fundamental layer composition to advanced climate control systems and professional construction techniques.
You now understand how to select materials based on sleep position and body weight, create targeted support zones, and implement commercial-grade durability features. Most importantly, you’ve learned that mattress creation is a science that balances material properties with individual physiology.
Take the first step today by prototyping a small section—your future well-rested self will thank you. Remember, the perfect mattress isn’t bought, it’s built—and now you hold the blueprint.
Frequently Asked Questions About Building Your Own Mattress
What’s the most cost-effective material combination for a DIY mattress?
For budget-conscious builders, a 6″ high-density polyfoam base (2.5lb/ft³ density) with a 2″ memory foam topper (4lb density) offers the best value.
This combination typically costs $300-$500 for a queen size, lasting 5-7 years with proper care. Add a breathable cotton cover ($80-$120) to enhance durability. While latex is superior, it doubles the cost – this hybrid approach gives 80% of the comfort at 50% of the price.
How do I prevent my DIY mattress from sleeping hot?
Combat heat retention with a three-pronged approach:
1) Use ventilated latex (Dunlop or Talalay) as your primary comfort layer,
2) Add a phase-change fabric cover (like Outlast®), and
3) Incorporate 1″ airflow channels every 8-10″ in dense foam layers.
This system can reduce sleep surface temperature by 5-8°F compared to standard memory foam. For extreme hot sleepers, consider copper-infused gel toppers.
Can I make a DIY mattress that rivals premium brands?
Absolutely – with proper material selection and construction techniques. A premium DIY build might include: 8″ pocketed coils (Leggett & Platt 800-series), 3″ Talalay latex (ILD 28), and 2″ 5lb memory foam.
This rivals $3,000+ commercial mattresses at about $1,200 in materials. The key advantage? You can replace individual layers as they wear out, extending the mattress lifespan by 3-5 years.
What’s the safest way to cut foam layers to size?
Use an electric carving knife (for thinner foams) or a foam saw (for dense bases >4″). Always:
- Measure twice and mark cutting lines with chalk
- Cut in continuous motions – no stopping/starting
- Wear N95 mask to avoid inhaling particles
- Leave 1/4″ extra for compression in the cover
For latex, use serrated bread knives and lubricate with soapy water for cleaner cuts.
How do I handle different firmness needs for couples?
Create a “split” design by:
- Cutting all layers lengthwise at the 30″ mark (queen size)
- Using different ILD latex or foam densities on each side
- Securing halves with wide fabric tape underneath
- Choosing a stretch-knit encasement to accommodate variations
This approach maintains edge support while allowing up to 15 ILD points difference between sides.
What certifications should I look for in materials?
Prioritize these certifications:
- CertiPUR-US: Ensures foams are low-VOC (volatile organic compounds)
- GOLS: Verifies organic latex content (≥95%)
- OEKO-TEX 100: Confirms fabric safety
- GREENGUARD Gold: Strict emissions standards
These ensure your mattress meets or exceeds commercial quality standards for health and safety.
How often should I replace layers in a DIY mattress?
Replacement cycles vary by material:
| Layer | Lifespan | Warning Signs |
|---|---|---|
| Memory Foam | 5-7 years | Body impressions >1.5″ |
| Latex | 10-12 years | Yellowing, crumbling edges |
| Base Foam | 7-9 years | Height loss >10% |
Rotate layers every 6 months to extend longevity. Base layers typically outlast comfort layers 2:1.
Can I build a mattress for an adjustable base?
Yes, with these modifications:
- Use flexible latex or low-density memory foam (<4lb)
- Limit total thickness to 10-12″ maximum
- Reinforce edges with high-resiliency foam
- Avoid rigid materials like coconut coir
- Ensure all layers are securely bonded
Test flexibility before final assembly by bending layers to 30-45° angles. The mattress should flex without creasing or layer separation.