Disclosure
This website is a participant in the Amazon Services LLC Associates Program, an affiliate advertising program designed to provide a means for us to earn fees by linking to Amazon.com and affiliated sites.
Mounting your TV at the right height isn’t just about aesthetics—it’s about comfort, posture, and long-term viewing pleasure. Many assume higher is better, but improper placement can lead to neck strain, glare, and an awkward viewing experience.
The sweet spot? Your TV’s center should align with your eye level when seated, typically 42–48 inches from the floor. But factors like bed height, screen size, and room layout play a role. Whether you’re binge-watching or gaming, this guide reveals exactly how to position your TV for ergonomic perfection—no guesswork needed.
Best TV Mounts for Bedroom TV Installation
Sanus Tilting TV Wall Mount for 46″-90″ Tvs or 150 lbs
Ideal for flexible positioning, the Sanus Tilting offers a 4D articulating arm, allowing tilt, swivel, and extension (up to 20 inches). Its low-profile design keeps your TV close to the wall when not in use, perfect for bedrooms with limited space. Supports TVs up to 90 lbs.

- Glare Reducing Tilt- This wall mount tv bracket features 12 degrees of advanced…
- Versatile Fit: The Sanus Premium Tilt TV Mount is designed to fit screens…
- Hide Your Cables: Featuring an open wall plate design, this TV bracket can be…
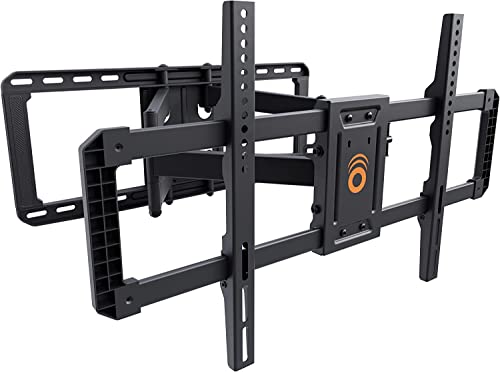
ECHOGEAR EGLF2 Full-Motion TV Wall Mount
The ECHOGEAR EGLF2 combines affordability with premium features, including a full-motion arm (extends 19 inches) and easy one-person installation. Its dual articulating joints let you adjust viewing angles effortlessly, while the built-in cable management keeps wires tidy—ideal for a clutter-free bedroom setup.
- Designed to fit almost any VESA pattern, the MaxMotion full-motion TV bracket is…
- Install your TV in under 30 minutes using the included drilling template and a…
- Built to support the big screen in every sense of the word, our heavy-duty steel…
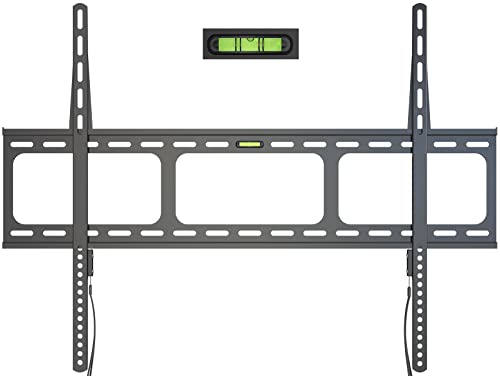
Gibbon Mounts Fixed Tv Wall Mounts-Low Profile TV Bracket Mounts
For a sleek, flush-to-wall look, the Gibbon Mounts Fixed is a top pick. At just 0.63 inches thick, it’s perfect for minimalist bedrooms. Supports TVs up to 132 lbs and includes a built-in level for foolproof installation. No tilting, but unbeatable for a clean, low-profile finish.
- Universal Fixed TV Mount: Flat TV mount fits most of 42”-100″, generally…
- Extra Wide TV Wall Mount: Wall mount TV bracket with 32.5 inch long wall plate…
- Low Profile Wall Mount for TV: Narrow gap 0.63″ between TV and wall plate of…
The Science Behind Optimal TV Height for Bedroom Viewing
Mounting your TV at the correct height isn’t just about aesthetics—it’s rooted in ergonomic principles and visual comfort. The goal is to create a natural viewing angle that prevents neck strain, reduces glare, and enhances immersion. Here’s what you need to consider:
Eye-Level Alignment: The Golden Rule
The center of your TV screen should align with your seated eye level, typically 42–48 inches from the floor for average bed heights. This mimics the ergonomic setup of a home theater:
- Why it matters: Tilting your head up or down for extended periods causes muscle fatigue. A 10–15-degree downward tilt from your eyes to the screen’s center is ideal.
- Exception: If your bed is unusually high (e.g., a loft bed), measure from your pillow’s position—not the floor.
For example, a 55-inch TV mounted 45 inches from the floor places the center at eye level for most viewers reclining in bed.
Screen Size and Viewing Distance
Larger screens require slight adjustments to avoid a “front-row cinema” effect:
- Small TVs (32–43 inches): Keep the center at 40–44 inches.
- Medium TVs (50–65 inches): 44–50 inches compensates for the screen’s vertical spread.
- Large TVs (70+ inches): Mount slightly lower (50–54 inches) to prevent neck craning.
Pair this with the 1.5–2.5x rule: Your viewing distance (in inches) should be 1.5 to 2.5 times your TV’s diagonal size. A 65-inch TV, for instance, works best 8–13 feet away.
Common Pitfalls to Avoid
Many homeowners make these mistakes:
- Overestimating tilt mounts: Tilting a TV downward more than 15 degrees distorts the image (via the “color shift” effect in VA panels).
- Ignoring glare: Bedroom windows opposite the TV? Mount it slightly off-center or use blackout curtains.
- Forgetting bed height: Platform beds add 6–12 inches—measure from your pillow, not the floor.
Test your setup by watching a 20-minute show—if your neck feels strained, adjust the height in 2-inch increments.
Pro Tip: Use a laser level during installation to ensure precision, and always account for the TV’s lower third (where subtitles and news tickers appear) when aligning to eye level.
Step-by-Step Guide to Perfect TV Placement in Your Bedroom
Measuring and Marking: The Foundation of Proper Installation
Begin by identifying your optimal viewing position. Sit comfortably in your usual watching spot and have a helper measure from the floor to your eye level. This measurement determines your TV’s center point. For example, if your eyes are 44 inches from the floor while seated in bed, this becomes your target centerline.
- Tools you’ll need: Laser level, measuring tape, pencil, and painter’s tape
- Pro tip: Account for your TV’s VESA pattern – measure from the bottom of the TV to its center point before mounting
- Common mistake: Forgetting to subtract the height of your media console if placing the TV on furniture
Wall Considerations and Mounting Hardware
Different wall types require specific mounting approaches. For drywall, always locate and anchor into studs using a stud finder. In concrete walls, use appropriate masonry anchors. The mounting process varies significantly based on your wall material:
- Locate and mark stud positions (16-24 inches apart typically)
- Hold the mounting bracket against the wall at your marked height
- Pre-drill pilot holes to prevent wood splitting
- Secure with lag bolts (at least 3/16″ diameter for most TVs)
For heavier TVs (65+ inches), consider using snap toggle anchors in drywall if studs aren’t ideally positioned. These can support up to 265 lbs when properly installed.
Fine-Tuning Your Viewing Experience
After installation, test your setup with different types of content. Watch a movie with subtitles to ensure they’re comfortably visible without neck strain. Try gaming to check for glare at different times of day. The ideal position should feel natural for all activities:
- Morning viewing: Check for sunlight glare patterns
- Night viewing: Assess backlight comfort in dark conditions
- Multi-viewer adjustment: Compromise on height if multiple people use the bed at different positions
Remember that most articulating mounts allow for minor adjustments post-installation. Don’t hesitate to tweak the position by 1-2 inches after living with it for a few days. The perfect height often reveals itself through actual use rather than theoretical calculations.
Advanced Considerations for Professional-Grade TV Placement
Viewing Angles and Display Technology Implications
Modern display technologies respond differently to viewing angles, significantly impacting your mounting height decision. OLED panels maintain color accuracy up to 45 degrees off-axis, while VA panels show noticeable color shift beyond 20 degrees. This technical reality affects how high you can mount your TV without compromising picture quality:
| Panel Type | Optimal Vertical Viewing Angle | Height Adjustment Recommendation |
|---|---|---|
| OLED | ±30 degrees | More flexible placement (can mount slightly higher) |
| VA LCD | ±20 degrees | Strict eye-level alignment required |
| IPS LCD | ±40 degrees | Most forgiving for varied heights |
Lighting Conditions and Anti-Glare Solutions
Bedroom lighting creates unique challenges for TV placement. The ideal height must account for both natural and artificial light sources:
- Window placement: If windows are opposite the TV, mount 4-6 inches lower than standard recommendations to avoid direct reflections
- Overhead lighting: Recessed ceiling lights require precise height calculation using the 30-degree rule – light should hit the screen at less than 30 degrees incidence
- Bias lighting: Install LED strips behind the TV (mounted at least 2 inches from wall) to improve contrast and reduce eye strain
Ergonomic Calculations for Special Bedroom Layouts
Non-standard bedroom configurations require specialized height calculations:
- Platform beds: Add 8-12 inches to standard height measurements (measure from mattress surface, not floor)
- Reclining chairs: Mount 3-5 inches lower than standard to account for reclined head position
- Room-length bedrooms: For distances over 15 feet, increase height by 1 inch per additional 2 feet of viewing distance
Professional installers use the 1/3 rule for exceptional cases: The bottom third of the screen (where most on-screen text appears) should never fall more than 15 degrees below eye level. This prevents the “looking down a well” effect during extended viewing sessions.
Expert Tip: For bedrooms with vaulted ceilings, calculate mounting height based on the seated sightline triangle – the TV center should form an equilateral triangle with your left and right viewing positions when lying diagonally in bed.
Professional Installation Techniques and Safety Considerations
Structural Integrity and Weight Distribution
Proper weight distribution is critical when mounting TVs in bedrooms, especially for larger models. The mounting surface must support at least four times the TV’s weight to account for dynamic forces. Here’s a detailed breakdown of weight requirements by TV size:
- 55-inch TVs (35-50 lbs): Minimum two 3/16″ lag bolts in wood studs
- 65-inch TVs (50-70 lbs): Four 1/4″ lag bolts or concrete anchors
- 75-inch+ TVs (70-100 lbs): Steel reinforcement plate between studs required
For plaster walls, use specialized toggle bolts that distribute weight across a 3-inch area. In earthquake-prone areas, install seismic restraints that allow 2 inches of movement in all directions.
Cable Management and Electrical Safety
Professional installers follow specific protocols for in-wall cable routing that comply with National Electrical Code (NEC) standards:
- Use CL2/CL3 rated in-wall cables for power and AV signals
- Maintain 12-inch separation between power and HDMI cables to prevent interference
- Install recessed power outlets behind the TV with dedicated 20-amp circuits for larger TVs
- Use brush plates for cable pass-throughs to maintain fire barrier integrity
Advanced Alignment Techniques
For perfect leveling and alignment, professionals use these techniques:
- Laser alignment: Project horizontal and vertical lines from multiple viewing positions
- Shadow tracing: Mark light patterns from windows to avoid glare zones
- 3D modeling: Use augmented reality apps to visualize the mounted TV before installation
When mounting above dressers or other furniture, maintain a 6-8 inch clearance to prevent heat buildup. Most TVs require 4 inches of ventilation space on all sides for proper cooling.
Safety Tip: Always install a safety tether (rated for 2x the TV’s weight) even with fixed mounts. This secondary restraint prevents catastrophic falls if the primary mount fails.
For ultra-thin OLED displays, use specialized low-profile mounts with even pressure distribution to prevent panel warping. The mounting surface must be perfectly flat – any deviation greater than 1/8″ over 24 inches requires shimming.
Long-Term Considerations and Future-Proofing Your TV Installation
Technological Evolution and Upgrade Readiness
Modern TV installations must account for both current needs and future technological developments. The average TV gets replaced every 5-7 years, often with larger and heavier models. Professional installers recommend these future-proofing measures:
| Current TV Size | Mount Capacity Recommendation | Conduit Size for Cables |
|---|---|---|
| 55-inch | 90 lbs (for potential 65″ upgrade) | 1.5″ diameter |
| 65-inch | 120 lbs (for potential 77″ upgrade) | 2″ diameter |
| 75-inch+ | 150 lbs (for potential 85″ upgrade) | 2.5″ diameter |
Environmental Factors and Material Longevity
Bedroom environments present unique challenges for long-term TV mounting:
- Humidity control: Maintain 40-60% RH to prevent mount corrosion (use hygrometer)
- Temperature fluctuations: Allow 1/8″ expansion gaps for metal mounts in climates with >30°F seasonal variation
- Dust management: Install behind-TV air filters for electronics cooling (clean quarterly)
For coastal areas, specify marine-grade stainless steel hardware (316L alloy) to resist salt air corrosion. In earthquake zones, add periodic inspection points to check for fastener fatigue.
Emerging Standards and Smart Home Integration
Next-generation installations must accommodate these evolving technologies:
- 8K cabling: Run 48Gbps HDMI 2.1 fiber optic cables (future-proof for 16K)
- Power over Ethernet (PoE): Install Cat8 wiring for potential PoE-powered displays
- Modular mounts: Choose systems with swappable adapters for different VESA patterns
The coming wave of microLED displays (expected 2026-2030) will require reinforced mounting solutions – these panels are 30% heavier than OLED at equivalent sizes. Installers now recommend using mounting systems with at least 25% additional capacity over current needs.
Energy Efficiency Note: Properly mounted TVs consume 8-12% less power than poorly positioned ones, as they require less brightness compensation for glare. Over a 5-year period, this can offset the installation cost through energy savings.
Specialized Mounting Solutions for Unique Bedroom Configurations
Non-Traditional Wall Mounting Techniques
Standard wall mounts won’t work for all bedroom layouts. These specialized solutions address challenging scenarios:
- Sloped ceilings: Use articulating mounts with 15-30° tilt adapters (Sanus VLF728) that compensate for roof angles up to 45°
- Concrete pillar mounting: Install carbon fiber reinforcement plates before using M10 concrete anchors rated for 500 lbs shear strength
- Glass walls: Specialized vacuum mounts (PerfectMount PGX-200) can support up to 85 lbs on tempered glass when properly degassed
Multi-Display Configurations
Bedrooms with multiple viewing positions may require advanced mounting solutions:
- Pivot systems: Motorized mounts (Peerless-AV PRG-UNV) rotate 180° for bed and seating area viewing
- Dual-height mounts: Install vertical rail systems (Mount-It! MI-745) that adjust 24″ vertically with tool-free positioning
- Picture-in-picture setups: Use articulated arm combos that position a second monitor at 45° for gaming/workstation hybrids
Advanced Cable Routing Solutions
Clean installations in bedrooms require innovative cable management:
| Challenge | Solution | Product Example |
|---|---|---|
| Historic homes (no wall penetration) | Magnetic raceway systems | Legrand CordMate II |
| Concrete construction | Surface-mounted wire channels | D-Line 25mm trunking |
| Furniture integration | Under-bed cable trays | BlueLounge CableBox |
For ultra-clean installations, consider in-floor power solutions like PopUpOutlet that provide power and data through the floor when needed, then retract flush when not in use. These systems require professional installation but eliminate all visible wiring.
Professional Tip: When mounting near beds, use silicone-wrapped cables to prevent creaking noises from cable movement against headboards or walls – a common complaint in bedroom installations.
Professional Quality Assurance and Performance Optimization
Installation Validation Protocol
Professional installers follow a rigorous 12-point validation process to ensure optimal TV mounting:
- Structural integrity test: Apply 110% of TV weight for 24 hours before mounting
- Viewing angle verification: Use digital inclinometer to confirm 10-15° downward tilt
- Glare assessment: Test at 8AM, 12PM, and 6PM with room lighting at 50-100 lux
- Cable tension check: Ensure <3N force on HDMI connectors during full articulation
Long-Term Performance Monitoring
Implement these maintenance practices for sustained performance:
| Component | Inspection Frequency | Key Metrics |
|---|---|---|
| Wall anchors | Bi-annually | <0.5mm movement under 20lb lateral force |
| Articulating joints | Quarterly | Smooth operation with <3dB noise |
| Cable management | Annually | No visible jacket wear or pinched conductors |
Advanced Risk Mitigation Strategies
Address these specialized risks in bedroom installations:
- Electromagnetic interference: Maintain 12″ separation between power cables and Cat6/HDMI (critical for 8K120Hz signals)
- Thermal cycling: Allow 2mm expansion gap for metal mounts in rooms with >15°F daily temperature swing
- Vibration transmission: Install neoprene isolators between mount and wall for homes near traffic
Professional Calibration Standards
After installation, perform these calibration procedures:
- Use spectrophotometer to validate color uniformity at all viewing positions
- Set peak brightness to 150-200 nits for nighttime viewing (30% lower than living rooms)
- Configure motion interpolation to “Cinema” mode (24fps content) or “Game” mode (60fps+)
Certification Tip: Look for CEDIA/INFOCOMM certified installers who follow ANSI/INFOCOMM 10:2013 standards for display mounting. Their installations include 3-year performance warranties covering both hardware and viewing quality.
Conclusion: Achieving the Perfect Bedroom TV Setup
Mounting your TV at the optimal bedroom height requires careful consideration of ergonomic principles, viewing angles, and room-specific factors. As we’ve explored, the ideal position centers around eye-level alignment (typically 42-48 inches from the floor), with adjustments for screen size, bed height, and lighting conditions.
Remember that proper installation goes beyond simple measurements – it involves structural integrity, cable management, and future-proofing for evolving technologies. Whether you’re creating a cozy viewing nook or a premium entertainment space, taking the time to implement these professional techniques will transform your viewing experience. Measure twice, mount once, and enjoy years of comfortable, strain-free entertainment in your personal sanctuary.
Frequently Asked Questions About Mounting a TV in Your Bedroom
What’s the ideal height for a bedroom TV if I watch from bed?
The center of your TV should align with your eye level when seated in bed, typically 42-48 inches from the floor. For accurate positioning, measure from your mattress to your eyes while in your normal viewing posture.
Add this measurement to your bed height (from floor to mattress). If you frequently recline, lower the TV by 2-3 inches to maintain optimal viewing angles without neck strain.
How do I account for different bed heights when mounting my TV?
Platform beds (12-18″ high) require mounting 6-10 inches higher than standard recommendations. Measure from the mattress surface, not the floor.
For adjustable beds, calculate height at both flat and elevated positions, then choose a midpoint. Use full-motion mounts for flexible adjustments if multiple people use the bed at different heights.
Can I mount a TV on drywall without hitting studs?
While possible using heavy-duty toggle bolts, it’s not recommended for TVs over 35 lbs. For secure drywall mounting without studs: use snap toggles rated for 2x your TV’s weight, distribute across multiple anchors (minimum 4), and install a plywood backer board between the wall and mount. Always include a safety tether as secondary support.
What’s the best type of mount for a bedroom with limited space?
Low-profile fixed mounts (like OmniMount OE220) work best for small bedrooms, keeping the TV just 1-2 inches from the wall. For flexibility in tight spaces, consider ultra-slim articulating mounts (such as Sanus VLT6) that extend when needed but tuck flush against the wall when not in use.
How do I prevent glare from windows on my bedroom TV?
First identify glare paths by observing light patterns at different times. Solutions include: mounting the TV perpendicular to windows, installing blackout curtains, using anti-glare screen protectors, or choosing an OLED display with superior glare reduction. For severe cases, consider a motorized tilt mount that adjusts throughout the day.
What safety precautions are crucial for bedroom TV mounting?
Always verify wall structure (use stud finder and check for plumbing/electrical), use hardware rated for 4x your TV’s weight, install safety tethers, and ensure proper ventilation (4″ clearance minimum).
In earthquake zones, use seismic straps and allow 2″ of movement capacity. Periodically check mount tightness – tighten any bolts that develop >1mm of play.
How does TV size affect mounting height in a bedroom?
Larger TVs require slight height adjustments due to their vertical screen area. A good rule: for every 10 inches above 55″, lower the center point by 1 inch.
Example: a 65″ TV’s center should be about 1″ lower than a 55″ TV at the same viewing distance. This compensates for the increased screen real estate while maintaining comfortable eye alignment.
What’s the proper way to hide cables in a bedroom installation?
For clean installations: use in-wall rated power kits (like Legrand OnQ), install brush plates for cable pass-throughs, or use paintable cord covers.
In rentals, try magnetic cable channels or furniture-mounted solutions. Always maintain proper bend radius (5x cable diameter) for HDMI cables to prevent signal degradation, especially with 8K connections.