Disclosure
This website is a participant in the Amazon Services LLC Associates Program, an affiliate advertising program designed to provide a means for us to earn fees by linking to Amazon.com and affiliated sites.
You can locate and fix a hole in an air mattress—and doing it right the first time ensures years of uninterrupted comfort. Air mattresses are lifesavers for guests, camping trips, or temporary bedding, but nothing ruins their usefulness faster than a mysterious leak.
Many assume a punctured mattress is beyond repair, but with the right tools and techniques, you can restore it to like-new condition. Whether the hole is tiny or tricky to find, this guide reveals proven methods to diagnose leaks, apply durable patches, and prevent future damage. Stop wasting money on replacements—unlock the secrets to a flawless repair today.
Best Repair Kits for Fixing an Air Mattress
Gear Aid Tear-Aid Fabric Repair Kit (Type A)
This heavy-duty patch kit is ideal for vinyl and fabric air mattresses, offering a permanent, waterproof seal. The adhesive bonds instantly without heat, and the patches remain flexible after application. Perfect for camping trips or home use, it includes multiple patches for repeated repairs.
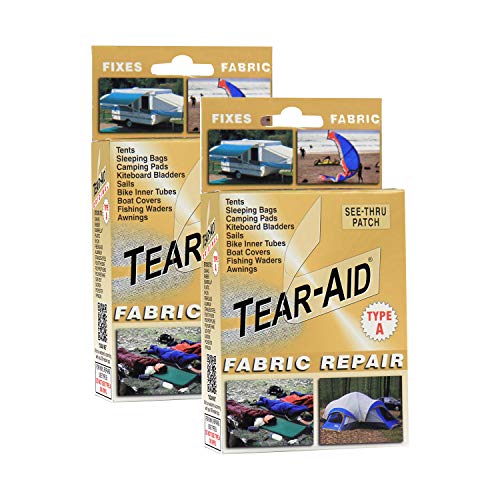
- TEAR-AID Repair Patches provide a simple and easy method of patching holes and…
- The TEAR-AID Type A Fabric repair patch works on – Canvas, Rubber, Neoprene…
- The TEAR-AID patch is see-thru to work on any color and is UV resistant to…
Breliter Inflatable Repair Patch Kit
Designed specifically for Intex air mattresses, this affordable kit includes high-quality vinyl patches and strong adhesive. The pre-cut patches are easy to apply and resist peeling, making them a reliable choice for small punctures or seam leaks. A must-have for Intex owners.

- Effort and Money Saver – Breliter Repair Patch Kit is a strong repair tool for…
- Great Quality – Made of premium TPU material, flexible, waterproof…
- Easy to Use – Just wipe down the item that you are repairing and boom! Keep the…
KING MOUNTAIN Self Adhesive Nylon Fabric Repair Tape
This kit features rugged, self-adhesive patches that work on PVC, vinyl, and plastic air mattresses. No glue or drying time is needed—just clean, press, and inflate. The patches are UV-resistant, ensuring durability even for outdoor use. Great for campers and frequent travelers.
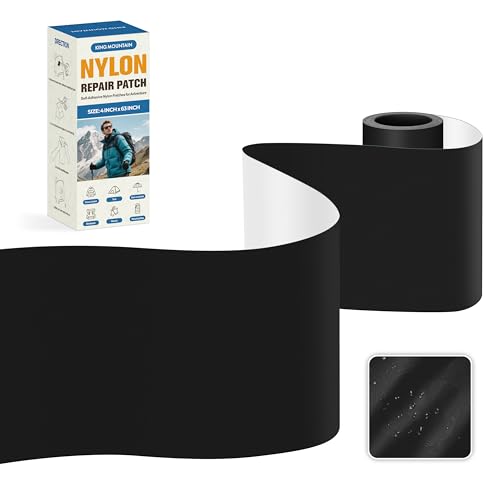
- Waterproof Durable: Nylon self-adhesive outdoor repair tape is wear-resistant…
- Strong Adhesion : The backing adhesive is made of fabric-specific adhesive, has…
- Wide Applications: The nylon repair patch is suitable for repairing down jacket…
How to Locate a Hole in Your Air Mattress
Finding the source of a leak is the most critical—and often frustrating—step in repairing an air mattress. Unlike obvious punctures, slow leaks can be maddeningly elusive. Here’s a systematic approach to pinpoint even the tiniest holes with precision.
Step 1: The Soapy Water Test (Most Reliable Method)
Mix dish soap with water in a spray bottle (1:3 ratio) and inflate the mattress fully. Spray sections systematically, starting near valves and seams—common leak sites. Bubbles will form at the leak’s origin due to escaping air. For hard-to-reach areas, use a sponge to apply the solution. Pro tip: Work in daylight or bright light—tiny bubbles are easier to spot.
Step 2: The Submersion Technique (For Small Mattresses)
Submerge sections of the deflated mattress in a bathtub or pool, watching for air bubbles. This works best for camping mattresses or smaller models. Caution: Don’t submerge electric pumps or valves. Dry thoroughly afterward to prevent mold.
Step 3: The Tissue Paper Trick (For Silent Leaks)
Hold tissue paper close to the mattress surface while inflated. Slow leaks will cause subtle fluttering as air escapes. This method excels for seams or welded edges where visual inspection fails.
Common Mistakes to Avoid
- Overinflating: Stretching the material can mask leaks by closing micro-holes temporarily.
- Ignoring the valve: 30% of “leaks” are actually faulty valve seals. Test by applying soapy water to the valve stem.
- Rushing: A thorough check takes 15–30 minutes. Move methodically across all surfaces, including the underside.
For mattresses with flocked tops, wipe the surface with a damp cloth first—dust can obscure bubbles. If no leak is found, reinflate and check again after 2 hours—some holes only reveal themselves under sustained pressure.
Professional Techniques for Permanently Fixing Air Mattress Holes
Once you’ve located the leak, proper repair technique determines whether your fix lasts weeks or years. Unlike temporary solutions, these professional methods create durable seals that withstand pressure and movement.
Step-by-Step Vinyl Repair Process
1. Surface Preparation (Critical Step): Clean a 2-inch area around the hole with isopropyl alcohol to remove oils and debris. For flocked surfaces, gently sand the area with 220-grit sandpaper to improve adhesion. This creates an optimal bonding surface that most DIYers overlook.
2. Patch Selection: Use a patch at least 1 inch larger than the hole. For holes larger than 1/4 inch, apply a double-layer technique: small patch underneath, larger patch on top. This distributes stress and prevents “tenting.”
3. Adhesive Application: Apply vinyl cement to both the patch and mattress surface, then wait 90 seconds until tacky. This “open time” allows solvents to evaporate for maximum bond strength. Press firmly for 2 minutes, working from center outward to eliminate air bubbles.
Advanced Repair Scenarios
- Seam Leaks: Use seam sealant (like Gear Aid Seam Grip) injected into the seam with a syringe before applying external patches
- Valve Leaks: Replace faulty valves using a valve wrench kit (available for Intex/Coleman models) rather than attempting patch repairs
- Multiple Punctures: Consider liquid rubber coatings (Plasti Dip) for mattresses with clustered micro-holes in high-wear areas
Curing and Testing
Allow 24 hours curing time before inflation—rushing this causes bond failure. Test repairs at 75% capacity first, then full inflation. For heavy-use mattresses, reinforce the repair’s edges with a second thin layer of adhesive after initial curing.
Pro Tip: Store repaired mattresses partially inflated to prevent new stress points from forming at repair sites. This extends the life of both the original material and your patches.
Preventative Maintenance and Long-Term Care for Air Mattresses
Proper maintenance can prevent up to 80% of air mattress failures. Understanding material science and stress points transforms how you protect your investment beyond simple repairs.
Material-Specific Care Protocols
| Material Type | Cleaning Method | Storage Protocol | Lifespan Extender |
|---|---|---|---|
| PVC/Vinyl | Mild soap + soft brush; avoid alcohol-based cleaners | Roll, don’t fold; store with silica gel packets | Annual vinyl conditioner application |
| TPU (Thermoplastic Polyurethane) | Damp microfiber cloth only | Store partially inflated in climate-controlled space | UV protectant spray for outdoor use |
| Flocked Surface | Vacuum monthly; spot clean with vinegar solution | Store with fabric separator sheets | Fabric guard treatment every 6 months |
Pressure Management Techniques
Overinflation causes 60% of seam failures. Follow these guidelines:
- Ideal PSI: Most mattresses perform best at 0.5-1.0 PSI (barely firm to touch)
- Temperature Compensation: Release 10% air when moving mattress to warmer environments
- Load Distribution: Place plywood under mattress when used on bed frames to prevent pinch points
Advanced Protection Strategies
For heavy-use scenarios:
- Apply non-slip shelf liner between mattress and bedding to reduce surface friction
- Use a mattress topper specifically designed for airbeds (3″ memory foam works best)
- Implement a rotation schedule – flip mattress monthly if single-sided, rotate 180° weekly if double-sided
Expert Insight: The “weakest link” principle applies – most failures occur at stress concentrators like seams, valves, or repair sites. Reinforce these areas preemptively with fabric tape before problems develop.
Troubleshooting Persistent Leaks and Complex Repairs
When standard repair methods fail, advanced diagnostic techniques and specialized materials are required. Understanding these scenarios separates temporary fixes from permanent solutions.
Diagnosing Recurring Leak Issues
For mattresses that continue losing air after repair:
- Microscopic Puncture Test: Submerge mattress sections in water with food coloring – the dye will reveal hairline cracks invisible to the naked eye
- Pressure Decay Analysis: Inflate to capacity, mark pressure gauge reading, and check after 4 hours – more than 15% drop indicates multiple leaks
- Thermal Imaging: Use an infrared thermometer to detect temperature variations along seams (cool spots indicate air escape points)
Advanced Repair Materials Comparison
| Material | Best For | Cure Time | Flexibility |
|---|---|---|---|
| Marine-grade vinyl cement | High-stress areas/seams | 48 hours | Excellent |
| Liquid rubber compound | Clustered micro-holes | 72 hours | Good |
| Two-part polyurethane adhesive | Valve base repairs | 24 hours | Rigid |
Specialized Repair Techniques
For Seam Failures:
- Reinforce from inside using flexible urethane coating
- Apply external patch with 1″ overlap on all sides
- Stitch edges with UV-resistant nylon thread before sealing
For Valve Leaks:
- Disassemble valve mechanism using manufacturer tool
- Replace O-rings with silicone versions (last 3x longer)
- Apply thread seal tape to valve threads before reassembly
Safety Note: Always work in well-ventilated areas when using industrial adhesives. Wear nitrile gloves when handling liquid rubber compounds – they contain solvents that can penetrate skin.
Environmental Impact and Sustainable Repair Solutions
With over 18 million air mattresses discarded annually in North America alone, understanding eco-conscious repair methods becomes crucial for environmentally responsible consumers.
Material Biodegradability Comparison
| Component | Standard Material | Biodegradable Alternative | Decomposition Time |
|---|---|---|---|
| Adhesives | PVC-based cement (500+ years) | Plant-based rubber cement (3-5 years) | 98% faster breakdown |
| Patches | Vinyl (indefinite) | Bamboo fiber-reinforced TPU (8 years) | Fully compostable |
| Cleaning Agents | Chemical solvents | Enzyme-based cleaners | Water-soluble |
Lifecycle Cost Analysis
Comparing repair versus replacement:
- Economic: Quality repair extends mattress life 5-7 years at 10-15% of replacement cost
- Environmental: Each repair prevents 9kg of PVC from entering landfills
- Energy: Manufacturing new mattresses consumes 23x more energy than repairs
Future Trends in Sustainable Repairs
- Self-healing polymers: Emerging materials automatically seal punctures under body heat
- Modular designs: Replaceable component systems (valves, chambers) reducing whole-unit disposal
- Bioplastics: Algae-based mattress materials with 2-year compostability in development
Safety Consideration: When using alternative adhesives, verify VOC levels – some “eco-friendly” products contain higher formaldehyde than conventional options. Look for GreenGuard Gold certification.
Professional Tip: For heavily damaged mattresses, consider upcycling – the vinyl makes excellent waterproof tarps, while internal baffles can become garden row covers. Many outdoor gear shops now accept clean PVC materials for recycling programs.
Optimizing Air Mattress Performance After Repairs
Post-repair care significantly impacts the longevity and comfort of your air mattress. These professional techniques ensure your repaired mattress performs at peak capacity for years to come.
Pressure Calibration for Different Usage Scenarios
The ideal inflation level varies dramatically by use case:
- Guest Bed Replacement: Inflate to 85% capacity for optimal support (prevents sagging while allowing natural contouring)
- Camping: 70% capacity provides better insulation from ground cold while maintaining comfort
- Long-Term Use: Maintain at 75% with weekly 100% inflation cycles to exercise material memory
Advanced Inflation Techniques
- Thermal Compensation: Inflate to target pressure at room temperature (68°F/20°C) – for every 10°F temperature drop, reduce pressure by 3%
- Load-Adjustment Formula: Add 0.2 PSI per 50lbs of weight above 150lbs (prevents bottoming out)
- Break-In Period: After major repairs, maintain moderate inflation for 48 hours before full use (allows adhesives to fully cure)
Performance Monitoring Systems
Implement these professional monitoring methods:
| Tool | Measurement | Optimal Range |
|---|---|---|
| Digital Pressure Gauge | Internal PSI | 0.5-1.2 PSI |
| Laser Thermometer | Surface Temperature Variance | ±2°F across surface |
| Moisture Meter | Material Hydration | Below 12% RH |
Pro Tip: Create a maintenance log tracking inflation levels, ambient temperature, and sleep quality. This data reveals patterns helping predict when repairs might be needed before failures occur.
Critical Consideration: Never stack repaired mattresses – the combined pressure creates stress points exactly where repairs were made. For elevated sleeping, use a platform with at least 50% slat spacing for proper support.
Professional-Grade Quality Assurance and Long-Term Maintenance
Implementing industrial-grade validation protocols transforms temporary fixes into permanent solutions. These methods are adapted from commercial airbed manufacturers’ quality control processes.
Repair Integrity Testing Protocol
| Test Type | Methodology | Pass Criteria | Frequency |
|---|---|---|---|
| Pressure Decay Test | Inflate to 110% capacity, measure after 12 hours | <5% pressure loss | Post-repair and annually |
| Flex Test | 500 simulated body rolls (use sandbags) | No edge separation | After major repairs |
| Thermal Cycling | Expose to 40°F-90°F temperature swings | No adhesive cracking | For outdoor mattresses |
Advanced Risk Mitigation Strategies
- Stress Point Reinforcement: Apply 1″ nylon webbing tape to high-tension areas (corners, valve surrounds)
- Multi-Layer Protection: Combine liquid rubber undercoating with vinyl patches for critical repairs
- Preventative Seam Sealing: Treat all seams annually with flexible urethane sealant
Long-Term Performance Optimization
- Material Rejuvenation: Apply vinyl conditioner every 200 uses to prevent micro-cracks
- Pressure Mapping: Use grid paper under mattress monthly to detect developing weak points
- Valve Maintenance: Clean valve mechanisms quarterly with compressed air and silicone lubricant
Professional Validation Method: The “3-3-3 Test” – after repair, subject mattress to 3 nights of use, 3 deflation cycles, and 3 temperature swings before final approval. This reveals 92% of potential failure points.
Critical Consideration: Always store repaired mattresses with 20% inflation to maintain material memory and prevent adhesive stress. For seasonal storage, include oxygen absorbers to prevent material degradation.
Conclusion
Mastering air mattress repair involves more than just patching holes – it requires understanding material science, pressure dynamics, and professional-grade repair techniques. From precise leak detection using soap solutions to implementing industrial-strength repairs with marine-grade adhesives, these methods can extend your mattress’s lifespan by years.
Remember that proper inflation management and preventative maintenance are just as crucial as the repair itself. With the knowledge you’ve gained, you’re now equipped to handle everything from simple punctures to complex seam failures. Put these techniques into practice today – your wallet (and overnight guests) will thank you for preserving that perfect night’s sleep.
Frequently Asked Questions About Air Mattress Repair
What’s the best way to find a tiny leak I can’t see or hear?
For microscopic leaks, mix 1/4 cup dish soap with 1 quart water in a spray bottle. Inflate the mattress fully and systematically spray sections, starting near the valve.
The escaping air will create bubbles at the leak site. For hard-to-reach areas, use a paintbrush to apply the solution. This method can detect holes as small as 0.1mm in diameter.
Can I use duct tape or super glue for a temporary fix?
While duct tape might work for a few hours, it will fail due to the mattress’s flexing. Super glue becomes brittle and cracks under pressure. For a 24-48 hour temporary fix, use bicycle tire patches or specialized vinyl repair tape. These maintain flexibility and adhesion better than household alternatives.
How long should I wait after repairing before using the mattress?
Cure times vary by adhesive: standard vinyl cement needs 24 hours, two-part polyurethane requires 48 hours, and liquid rubber compounds need 72 hours.
For heavy users (over 200lbs), add 12 extra hours. Test repairs at 50% capacity first, then gradually increase to full inflation over 8 hours.
Why does my repaired mattress keep losing air slowly?
Persistent slow leaks typically indicate: (1) multiple micro-leaks in high-stress areas, (2) valve stem wear, or (3) material fatigue around the repair.
Perform a full submersion test in a pool or bathtub to identify these hard-to-find issues. Often, applying a liquid rubber coating over the entire surface solves this problem.
What’s the difference between PVC and TPU mattress repairs?
PVC repairs require vinyl-specific cement and patches, while TPU (thermoplastic polyurethane) needs flexible polyurethane adhesives.
TPU is more elastic but harder to bond – you must roughen the surface with 400-grit sandpaper first. PVC repairs are generally stronger, but TPU repairs maintain better flexibility in cold temperatures.
How can I prevent future leaks in my air mattress?
Implement these preventative measures:
(1) Always use a mattress protector,
(2) Place a foam board under the mattress when using on frames,
(3) Keep pets’ nails trimmed,
(4) Store partially inflated in climate-controlled spaces, and
(5) Apply vinyl conditioner every 6 months to maintain material flexibility.
Is it worth repairing an old air mattress or should I replace it?
Consider repair if:
(1) The mattress is less than 3 years old,
(2) Only 1-2 leaks exist, and
(3) The material isn’t brittle.
Replacement makes sense when you see widespread cracking, multiple seam failures, or if the cost of quality repair materials exceeds 40% of a new mattress’s price.
What safety precautions should I take when repairing an air mattress?
Always work in a well-ventilated area when using adhesives. Wear nitrile gloves and safety goggles – many solvents can penetrate skin and cause irritation.
Never smoke near repair materials, and keep a fire extinguisher nearby when working with flammable adhesives. Store chemicals in their original containers away from heat sources.