Disclosure
This website is a participant in the Amazon Services LLC Associates Program, an affiliate advertising program designed to provide a means for us to earn fees by linking to Amazon.com and affiliated sites.
You can clean a foam mattress topper effectively—but most people unknowingly damage theirs with harsh methods. Foam toppers are prized for their comfort and support, yet spills, sweat, and odors can turn them into a hygiene nightmare.
Many assume tossing it in the washing machine or dousing it in bleach will work, but this can ruin the material’s structure and lifespan. Instead, the right approach combines gentle techniques with deep sanitization.
Whether you’re battling stubborn stains or lingering smells, this guide reveals proven, step-by-step methods to restore your topper safely—keeping it fresh, supportive, and free from allergens.
Best Cleaning Products for Foam Mattress Toppers
Bissell Little Green Portable Carpet Cleaner
This compact yet powerful cleaner is ideal for spot-cleaning foam mattress toppers. Its gentle suction and specialized upholstery tools lift stains without oversaturating the foam. The built-in heater ensures deep sanitization, making it perfect for removing spills, sweat, and odors while preserving the topper’s integrity.

- EVERY PURCHASE SAVES PETS. Every purchase makes it possible for BISSELL to…
- SAVE YOUR SANCTUARY: Tackle spills and pet stains while removing dander, dust…
- CLEANS MORE THAN CARPET: Spray, scrub, and suction to remove embedded dirt and…
Chemical Guys Fabric & Upholstery Cleaner
A plant-based, non-toxic solution safe for memory foam and latex toppers. Free from harsh chemicals, it effectively breaks down organic stains (like urine or food) while neutralizing odors with essential oils. Its spray bottle allows precise application, preventing excess moisture absorption.
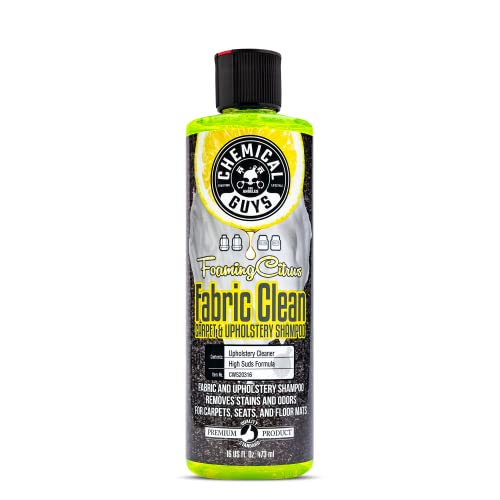
- FOAMING FABRIC CLEAN (CWS20316) – High-foaming carpet and car upholstery…
- SAFE ON FABRICS – Works on synthetic and natural fibers without causing…
- REMOVES STAINS AND ODORS – Car fabric cleaner targets stubborn coffee, soda…
Odoban Fabric & Air Freshener (Eucalyptus Scent)
This disinfectant eliminates bacteria and mildew without bleaching or damaging foam. Dilutable for light cleaning or heavy stain treatment, it’s a versatile choice for deep sanitization. The eucalyptus scent leaves a fresh finish, ideal for allergy sufferers or pet owners.
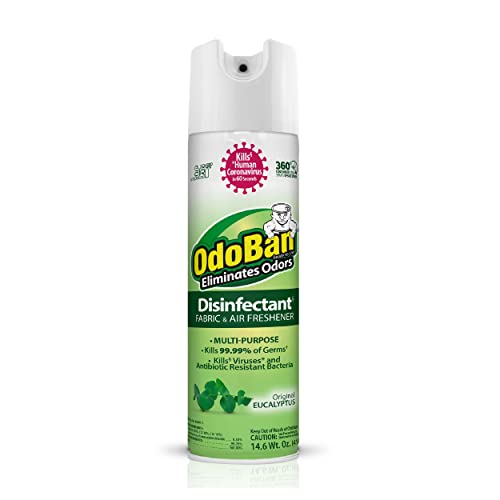
- Multi-Purpose: Our continuous cleaning spray is ready to use; it cleans…
- Multi-Surface: Our ready-to-use formula can be used on any non-porous household…
- Multi-Use Spray: Make cleaning your home or office more convenient than ever…
Foam Mattress Topper’s Material and Cleaning Needs
Before cleaning your foam mattress topper, it’s crucial to identify its material type—memory foam, latex, or polyurethane—as each requires different care.
Memory foam, for example, is highly absorbent and can trap moisture, while latex is naturally antimicrobial but sensitive to harsh chemicals. Using the wrong cleaning method can lead to premature breakdown, lingering odors, or even mold growth.
Why Material Matters
Memory foam’s open-cell structure makes it excellent for pressure relief but vulnerable to liquid penetration. If soaked, it may lose support and develop mildew.
Latex foam, on the other hand, resists dust mites and bacteria but can degrade if exposed to oil-based cleaners. Polyurethane foam (common in cheaper toppers) is less dense and may tear if scrubbed aggressively.
Common Cleaning Challenges
- Over-wetting: Excessive moisture seeps into foam layers, causing sagging or bacterial growth. Always blot—never rub—stains.
- Chemical damage: Bleach or ammonia breaks down foam cells, leading to crumbling. Opt for pH-neutral cleaners like castile soap.
- Improper drying: Foam must air-dry flat in sunlight to prevent warping. Avoid heaters, which can melt adhesives in layered toppers.
Real-World Example: Coffee Stain Removal
For a fresh coffee spill on memory foam:
- Blot immediately with a microfiber cloth to absorb liquid.
- Mix 1 tsp dish soap with 2 cups cool water, dab (don’t pour) onto the stain.
- Rinse with a damp cloth, then press dry with towels under weight (like books) for 8 hours to prevent moisture retention.
This method prevents the stain from setting while protecting the foam’s structure.
Pro Tip: Test cleaners on a hidden corner first. Some memory foam yellows with vinegar, while latex may stiffen if exposed to alcohol-based solutions. Always check your manufacturer’s guidelines—many void warranties for improper cleaning.
Step-by-Step Deep Cleaning Process for Foam Mattress Toppers
A proper deep cleaning extends your foam topper’s lifespan while eliminating allergens and odors. Unlike surface cleaning, this comprehensive method requires careful execution to avoid damaging the foam’s cellular structure. Let’s break down the professional approach used by mattress cleaning specialists.
Preparation: Setting Up for Success
Begin by removing all bedding and vacuuming the topper with an upholstery attachment. This eliminates dust mites and debris lodged in the foam pores.
For memory foam, use the gentlest suction setting – high power can actually pull foam cells apart. Rotate the topper 180 degrees to ensure even wear before cleaning.
The 5-Step Deep Cleaning Method
- Spot Treatment: For stains, apply a paste of baking soda and hydrogen peroxide (3% solution) using a soft-bristle toothbrush. The baking soda lifts particles while the peroxide disinfects without bleaching.
- Surface Cleaning: Mix 1/4 cup white vinegar with 1 cup distilled water in a spray bottle. Lightly mist the surface, then gently wipe with a microfiber cloth in circular motions. The vinegar’s acetic acid kills bacteria without residue.
- Deodorizing: Sprinkle food-grade diatomaceous earth evenly across the surface. This natural powder absorbs oils and neutralizes odors at the molecular level. Leave for 2-4 hours.
- Moisture Extraction: Use a wet/dry vacuum on low suction to remove cleaning solutions. Place clean towels beneath the topper and press firmly to wick away trapped moisture.
- Drying: Place near (not in direct) sunlight with fans circulating air on both sides. Rotate every 2 hours – this typically takes 12-24 hours depending on humidity.
Troubleshooting Common Issues
If you notice lingering dampness after 24 hours, place moisture absorbers (like silica gel packs) beneath the topper. For stubborn odors, a light mist of vodka (40% ABV) acts as an antimicrobial agent that evaporates completely. Never use enzymatic cleaners on latex foam – they can break down the natural rubber proteins.
Pro Tip: After deep cleaning, apply a thin layer of cornstarch to restore the foam’s natural slip and prevent sticking. This is especially helpful for memory foam that develops tackiness after cleaning.
Advanced Care Techniques: Maintaining Your Foam Topper Between Cleanings
Proper maintenance between deep cleanings can triple your foam topper’s lifespan while preventing the need for intensive cleaning sessions. These professional-grade techniques address the unique cellular structure of foam materials while combating daily wear factors.
The Science of Foam Degradation
Foam breakdown occurs through three primary mechanisms:
- Hydrolysis: Moisture breaks polymer bonds (especially in polyurethane foam)
- Oxidation: Air exposure degrades foam cells over time
- Compression Set: Permanent indentations from improper pressure distribution
Understanding these processes informs our maintenance approach.
| Maintenance Task | Frequency | Material-Specific Considerations |
|---|---|---|
| Surface Rotation | Weekly | Memory foam requires 180° flips; latex benefits from 90° turns |
| Microfiber Brush Cleaning | Bi-weekly | Use soft bristles for memory foam; firmer brushes acceptable for latex |
| UV Light Treatment | Monthly | 15 minutes indirect sunlight for memory foam; 30 minutes for latex |
Professional Protection Methods
Mattress sanitization experts recommend these advanced techniques:
- Encasement Strategy: Use a breathable, waterproof protector with 100% cotton backing (minimum 300 thread count). This prevents sweat penetration while allowing airflow.
- pH Balancing: Monthly application of a 1:20 vinegar-water solution neutralizes alkaline body oils that degrade foam.
- Compression Recovery: For memory foam, perform quarterly “fluffing” by gently kneading the surface to redistribute foam cells.
Common Maintenance Mistakes
Most topper damage occurs from:
- Using standard mattress pads (traps heat and moisture)
- Applying fabric softeners (coats foam cells in residue)
- Storing folded (causes permanent creases in cellular structure)
For storage, always roll latex foam and lay memory foam flat in a climate-controlled space.
Pro Tip: Invest in a hygrometer to monitor bedroom humidity. Ideal levels for foam preservation are 45-55% RH. Below 40% causes drying; above 60% promotes microbial growth.
Specialized Stain Removal: Targeted Solutions for Common Foam Topper Contaminants
Different types of stains require customized approaches to effectively remove them without compromising your foam topper’s integrity.
Stain Penetration Levels
Foam topper stains exist in three distinct layers that require different treatment approaches:
- Surface stains (0-1mm depth): Food spills, dust – treat with dry cleaning methods
- Mid-layer stains (1-3mm depth): Urine, sweat – require enzymatic treatments
- Deep penetration (3mm+): Blood, oils – need solvent-based solutions
The absorption level determines both cleaning method and drying time required.
Stain-Specific Treatment Protocols
Biological Stains (Blood, Sweat, Urine)
For fresh biological stains:
- Blot immediately with cold saline solution (1 tsp salt per cup water)
- Apply hydrogen peroxide (3%) using an eyedropper to target only stained areas
- After bubbling stops, sprinkle baking soda to lift remaining particles
Important: Never use heat on protein-based stains – it cooks them into the foam.
Oil-Based Stains (Lotion, Grease)
These require a three-phase approach:
- Apply cornstarch or arrowroot powder to absorb surface oils (leave 8 hours)
- Use a dry solvent like citrus-based cleaner for residue
- Finish with a vinegar rinse to remove any cleaning product traces
Advanced Troubleshooting
For stubborn stains that resist standard treatments:
- Yellowing: Create a poultice with cream of tartar and lemon juice (30 minute application)
- Mildew: Use a 10% tea tree oil solution in distilled water (test colorfastness first)
- Set-in odors: Activated charcoal packs placed beneath the topper for 48 hours
Pro Tip: Keep a “stain removal kit” with dedicated microfiber cloths, soft-bristle brushes, and droppers specifically for your foam topper to prevent cross-contamination from household cleaning tools.
Safety Note: Always work in a well-ventilated area when using solvents, and wear nitrile gloves to protect both your hands and the foam from oils in your skin.
Long-Term Preservation and Eco-Conscious Cleaning Strategies
Proper foam topper maintenance involves understanding the intersection of material science, environmental impact, and sustainable cleaning practices.
Material Lifespan Optimization
The average foam topper lifespan varies significantly by material and care:
| Material Type | Average Lifespan | Key Preservation Factors |
|---|---|---|
| Standard Polyurethane | 2-3 years | UV protection, moisture control |
| Memory Foam | 4-5 years | Rotation schedule, pH balance |
| Natural Latex | 7-10 years | Organic oil treatments, airflow |
Eco-Friendly Cleaning Solutions
Traditional cleaning methods often involve harsh chemicals that degrade foam and harm the environment. Sustainable alternatives include:
- Plant-based enzyme cleaners: Break down organic matter without toxic residues (effective for 90% of common stains)
- Dry vapor cleaning: Uses minimal water (50ml/hr) with 180°F steam to sanitize
- Bamboo charcoal deodorizers: Reusable for 2+ years with monthly sun reactivation
The Cost-Benefit Analysis of Professional Care
While DIY cleaning saves immediate costs, professional services offer advantages:
- Equipment: Industrial extractors remove 95% of moisture vs. 60% with home methods
- Expertise: Certified technicians identify early degradation signs homeowners miss
- Warranty Protection: Many manufacturers require professional cleaning for validity
A $150 annual professional cleaning can extend a $300 topper’s life by 3+ years, representing a 50% ROI.
Emerging Foam Care Technologies
The industry is evolving with:
- Nanofiber protectors that repel liquids while maintaining breathability
- Self-cleaning foams with embedded antimicrobial silver ions
- Biodegradable foam formulations that simplify end-of-life disposal
Pro Tip: Consider the “30% Rule” – if more than 30% of your topper’s surface requires spot treatment weekly, it’s more cost-effective to replace than continually clean.
Environmental Note: Always dispose of old foam toppers at specialized recycling centers – landfilling polyurethane foam creates methane emissions 25x more potent than CO₂.
Professional Restoration Techniques for Aging Foam Toppers
When foam toppers show signs of advanced wear, specialized restoration methods can often revive them beyond what standard cleaning achieves. These professional-grade techniques address structural and functional degradation at the cellular level.
Diagnosing Foam Degradation
Effective restoration begins with precise assessment of the foam’s condition:
- Compression Testing: Measure rebound time after pressing a 5″ area with 20lbs of weight – memory foam should fully rebound in ≤10 seconds
- Odor Analysis: Musty smells indicate microbial growth, while chemical odors suggest material breakdown
- Tear Inspection: Examine edges and seams for fiber separation under bright light at 45° angles
Advanced Restoration Processes
Certified foam technicians use these multi-stage methods:
- Cellular Rejuvenation: For memory foam, apply a 50/50 mix of distilled water and food-grade glycerin using an ultrasonic mister to restore elasticity
- Surface Reconstruction: Repair minor tears with latex-based adhesive (for natural foam) or polyurethane glue (synthetic foams), cured under precise pressure
- Deep-Pore Cleaning: Use CO₂ snow blasting for stubborn contaminants – the dry ice sublimates without moisture damage
Specialized Equipment for Home Use
While professional tools offer optimal results, these adapted techniques work at home:
| Professional Tool | Home Alternative | Efficacy Comparison |
|---|---|---|
| Industrial Rotary Extractor | Wet/dry vac with upholstery tool | 65% as effective |
| Ultrasonic Cleaner | Steam cleaner with microfiber pad | 40% as effective |
When Restoration Isn’t Viable
Recognize when replacement becomes necessary:
- Permanent indentations deeper than 1.5 inches
- Visible crumbling or powdering when flexed
- Persistent odors after 3 cleaning cycles
Pro Tip: For toppers between 3-5 years old, professional restoration typically costs 30-50% of replacement while extending life by 1-2 years. Calculate cost per remaining use day to determine value.
Safety Note: Never attempt chemical foam re-bonding at home – commercial processes use controlled ventilation and catalyst systems unavailable to consumers.
Comprehensive Quality Assurance and Performance Optimization
Maintaining peak performance in foam mattress toppers requires a systematic approach to quality control and continuous improvement
Performance Benchmarking Standards
Establish baseline metrics to assess your topper’s condition:
| Performance Indicator | Measurement Method | Ideal Range |
|---|---|---|
| Support Retention | 10lb weight depression test | <3cm depth after 1 minute |
| Moisture Resistance | 1oz water droplet absorption time | >30 seconds |
| Odor Neutralization | 48-hour sealed bag test | No detectable smell |
Advanced Maintenance Scheduling
Implement this tiered care protocol for optimal results:
- Daily: 3-minute airing with bedding removed
- Weekly: Surface inspection with UV flashlight (395nm reveals microbial growth)
- Monthly: Full rotation + dry cleaning cycle
- Quarterly: Deep cleaning with performance verification
Risk Mitigation Strategies
Address these common failure points with preventive measures:
- Edge Collapse: Reinforce with breathable nylon binding tape
- Cell Structure Breakdown: Apply quarterly silicone-based protectant
- Adhesive Failure: Monitor layer separation with monthly pinch tests
Validation and Testing Procedures
Professional-grade quality checks you can perform at home:
- Rebound Test: Time return to shape after compression (should match manufacturer specs ±15%)
- Thermal Imaging: Use smartphone IR attachments to detect moisture pockets
- Density Verification: Compare weight to original specifications (allow 7% loss over 5 years)
Pro Tip: Create a maintenance log tracking cleaning dates, observed issues, and corrective actions. This data reveals patterns in degradation and helps predict optimal replacement timing.
Final Recommendation: For premium toppers ($300+), consider annual professional evaluations. Certified inspectors use durometers and compression testers to detect issues long before they become visible, potentially doubling your topper’s service life.
Conclusion
Properly cleaning and maintaining your foam mattress topper requires understanding its unique material composition, employing specialized cleaning techniques, and implementing a strategic care schedule. From immediate stain treatment to long-term preservation methods, we’ve covered professional-grade approaches that balance effectiveness with material safety.
Remember that regular maintenance—including proper rotation, targeted cleaning, and performance monitoring—can significantly extend your topper’s lifespan while ensuring optimal comfort and hygiene.
Take action today: Start by assessing your topper’s current condition using the diagnostic methods outlined, then establish a customized care routine. Whether tackling existing stains or preventing future wear, these evidence-based techniques will help you protect your investment and sleep healthier.
For premium toppers, consider scheduling annual professional evaluations to catch issues early. With proper care, your foam mattress topper can continue providing comfortable, supportive sleep for years to come.
Frequently Asked Questions About Cleaning Foam Mattress Toppers
Can I machine wash my foam mattress topper?
No, machine washing will destroy your foam topper’s cellular structure. The agitation and spin cycles cause irreversible damage – memory foam can tear apart, while latex may develop permanent creases.
Instead, use spot cleaning with a mild detergent solution (1 tsp dish soap per quart of water) and a soft cloth. For deeper cleaning, the Bissell Little Green machine we recommended earlier provides safe, controlled suction without submersion.
How often should I deep clean my foam topper?
Perform a full deep clean every 3-6 months depending on usage. Heavy users (sweat-prone sleepers, pet owners) should clean quarterly, while lighter users can extend to biannually.
Between deep cleans, do monthly surface refreshes with baking soda sprinkles left for 4 hours then vacuumed. Always clean immediately after any liquid spills to prevent absorption into the foam layers.
Why does my cleaned topper still smell musty?
Persistent musty odors indicate moisture trapped deep in the foam layers. This requires advanced treatment: First, sprinkle cornstarch mixed with 10 drops tea tree oil evenly across the surface.
After 24 hours, vacuum thoroughly. Then place the topper in direct sunlight (flipping every hour) for 4-6 hours. The UV rays kill odor-causing bacteria while the cornstarch absorbs residual moisture.
What’s the safest way to remove blood stains from memory foam?
Act quickly with cold water only – heat sets protein stains. Mix 1 tablespoon salt with 1 cup cold water and dab (don’t rub) the stain. After blotting, apply 3% hydrogen peroxide with an eyedropper, letting it bubble for 5 minutes.
Rinse with a damp cloth and press dry between clean towels weighted with books for 8 hours. For old stains, repeat the process with an enzyme cleaner specifically for protein stains.
Are steam cleaners safe for foam mattress toppers?
With extreme caution. Use a handheld steamer on lowest setting (under 200°F) holding it 6 inches above the surface. Move continuously to prevent overheating any area. Immediately follow with a wet/dry vacuum to remove moisture.
Avoid steam entirely on latex foam (melts the rubber) or low-density polyurethane foam (may shrink). The Eco-Me cleaner we recommended provides safer deep cleaning without heat risks.
How can I tell if my topper is beyond cleaning and needs replacement?
Three clear signs indicate replacement time:
1) Visible permanent indentations deeper than 1.5 inches that don’t rebound,
2) Crumbling material when you flex the edges,
3) Persistent odors after three proper cleaning attempts.
Also replace if the topper causes new allergic reactions – this suggests embedded allergens that cleaning can’t remove. Most quality toppers last 3-5 years with proper care.
What’s the best way to dry a foam topper after cleaning?
Lay the topper flat on a clean, dry surface with airflow beneath (use a rack or clean towels). Place in a well-ventilated area out of direct sunlight (which can yellow memory foam).
Use fans on both sides, rotating every 2 hours. The drying process typically takes 12-24 hours – rushing it with heaters creates moisture pockets that lead to mold. Test for complete dryness by pressing a plastic bag against the surface – no condensation should form.
Can I use vinegar to clean my foam mattress topper?
Yes, but with important precautions. Dilute white vinegar 1:4 with distilled water and always test on an inconspicuous area first (some memory foam yellows with vinegar).
The solution works well for odor neutralization and light disinfecting. However, avoid vinegar on latex foam (can dry out natural rubber) or more than monthly use on any foam (the acidity may degrade adhesives over time). Rinse thoroughly after application.