Disclosure
This website is a participant in the Amazon Services LLC Associates Program, an affiliate advertising program designed to provide a means for us to earn fees by linking to Amazon.com and affiliated sites.
You can make your DIY wooden bed look stylish—and it’s easier than you think. Many assume handmade furniture lacks polish, but with the right techniques, your bed can rival high-end designer pieces.
Whether you’re a beginner or a seasoned woodworker, unlocking the secrets to aesthetics elevates functionality into artistry.
DIY wooden beds often start as raw, utilitarian structures—but they don’t have to stay that way. Trends like rustic farmhouse charm, minimalist Scandinavian lines, or industrial edge prove that style lies in the details. The problem? Without guidance, your project might fall flat.
Best Finishes and Tools for DIY Wooden Beds
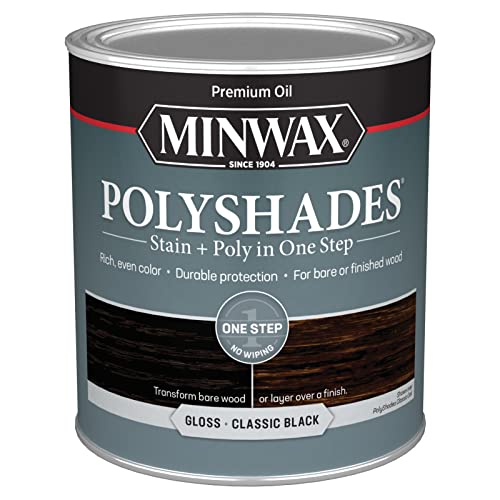
Minwax Polyshades Classic Black Stain & Polyurethane
This 2-in-1 stain and polyurethane combo delivers rich, even color while protecting your bed from scratches. Its oil-based formula enhances wood grain, making it ideal for achieving a modern or rustic look. The satin finish adds subtle sheen without overpowering natural textures.
- POLYSHADES WOOD STAIN – Minwax PolyShades is an oil-based wood stain and poly…
- REDUCE FINISHING TIME – This one-step wood finish can be used over…
- BEAUTIFUL RESULTS – This beautiful wood stain provides a dark finish with a…
General Finishes Milk Paint in “Linen” (GFM-01)
Perfect for farmhouse or Scandinavian styles, this water-based paint provides a velvety matte finish with zero brush marks. It’s self-leveling and low-VOC, making it safe for bedroom use. The “Linen” shade offers a warm, neutral base for layered bedding decor.

- This paint is self-sealing and does not require a topcoat
- Do not apply clear topcoats over bright white paint, as yellowing may occur due…
- Extremely durable premium furniture paint with high adhesion rated for interior…
DeWalt DWE6423K Random Orbit Sander
A smooth finish starts with flawless sanding. This 5-inch sander reduces swirl marks with its variable-speed control (8,000–12,000 OPM) and efficient dust collection. Its ergonomic grip minimizes fatigue during large projects like bed frames.

- 3.0-amp motor of the orbital sander spins the pad at 8,000 – 12,000 OPM
- Shorter height of the hand sander allows the user to get closer to work piece
- Separate counterweight design reduces vibration for improved comfort of the…
Choosing the Right Wood for Your DIY Bed Frame
The foundation of a stylish wooden bed starts with selecting the perfect wood type. While many beginners assume all lumber works equally well, different species offer unique grain patterns, durability levels, and staining characteristics that dramatically impact your final result.
Hardwoods vs. Softwoods: Strength and Aesthetics
Hardwoods like oak, maple, or walnut are premium choices for bed frames due to their density and longevity. For example, red oak (Janka hardness rating: 1,290 lbf) resists dents better than pine (690 lbf), making it ideal for active households. However, softwoods like Douglas fir offer a more affordable option with distinctive grain patterns that stain beautifully for rustic designs.
Wood Grain Considerations
The direction and prominence of wood grain affect both structural integrity and visual appeal:
- Open-grain woods (e.g., ash, mahogany) absorb stains unevenly, creating dramatic contrast perfect for industrial styles
- Closed-grain woods (e.g., maple, cherry) provide smooth surfaces that suit modern minimalist designs
Moisture Content and Stability
Kiln-dried lumber (6-8% moisture content) prevents warping—a critical factor for bed frames that must maintain precise joinery. Green wood may shrink up to 10% as it dries, causing joints to loosen over time. For reference, most hardware stores sell construction-grade lumber at 15-19% moisture, requiring additional drying time.
Cost vs. Quality Tradeoffs
While exotic woods like teak offer natural weather resistance, domestic black walnut provides similar richness at half the price ($8-12/board foot vs. $20+). Budget-conscious builders can use plywood for hidden structural components while reserving premium boards for visible headboard panels.
Pro Tip: Visit local sawmills for “live edge” slabs—untrimmed boards with natural bark edges that create stunning organic headboards when paired with metal hairpin legs.
Mastering Wood Finishing Techniques for Professional Results
The difference between an amateur-looking bed and a showpiece lies in the finishing process. Proper finishing enhances wood grain, provides protection, and creates the desired aesthetic – whether you want a glossy modern look or a weathered farmhouse charm.
Surface Preparation: The Foundation of a Flawless Finish
Begin with thorough sanding using progressively finer grits:
- 80-100 grit for removing saw marks and leveling surfaces
- 150 grit for smoothing the wood surface
- 220 grit as the final prep before finishing
Always sand with the grain to avoid visible scratches. For hardwoods, use a damp rag to raise the grain after initial sanding, then lightly sand again with 220 grit to prevent roughness when finishes are applied.
Choosing and Applying Stains
Oil-based stains penetrate deeper for richer color but require mineral spirits for cleanup. Water-based stains dry faster and emit fewer fumes. For consistent results:
- Apply pre-stain conditioner to softwoods like pine to prevent blotching
- Wipe on stain with a lint-free cloth, working in 2-3 foot sections
- Wait 5-15 minutes (depending on desired darkness) before wiping off excess
Test stains on scrap wood first – the same stain looks dramatically different on oak versus maple.
Protective Topcoats: Polyurethane vs. Lacquer vs. Wax
Polyurethane (3-4 coats) provides the most durable protection for beds, with satin finishes hiding minor imperfections better than gloss. Lacquer (sprayed) dries faster but requires proper ventilation. Beeswax offers a natural matte look but needs reapplication yearly. Between coats, lightly sand with 320 grit for optimal adhesion.
Pro Tip: For contemporary beds, try rubio monocoat – a hardwax oil that provides protection and color in one step while maintaining the wood’s tactile feel.
Advanced Joinery Techniques for Sturdy, Long-Lasting Beds
The structural integrity of your DIY bed depends on selecting and executing proper joinery methods. While basic butt joints secured with screws might seem sufficient, advanced techniques prevent squeaking, wobbling, and eventual joint failure under years of use.
Mortise-and-Tenon vs. Dowel Joinery
| Method | Strength | Difficulty | Best For |
|---|---|---|---|
| Mortise-and-Tenon | Extremely strong (500-800 lbs shear strength) | Advanced (requires precise chiseling) | Headboard posts, frame corners |
| Dowel | Good (300-400 lbs with proper glue) | Intermediate (needs alignment jigs) | Side rails, slat supports |
For mortise-and-tenon joints, make the tenon 1/3 the thickness of your workpiece (e.g., 1/2″ tenon for 1.5″ thick boards). Always cut the mortise first, then fit the tenon to it for perfect alignment.
Reinforcing Critical Stress Points
Bed frames endure dynamic loads from movement, requiring special reinforcement at:
- Side rail connections: Use bed bolt systems with barrel nuts for disassembly capability
- Center supports: Install steel angle brackets (at least 3/16″ thick) under mid-span joints
- Headboard attachment: French cleats distribute weight better than direct screw mounting
Wood Movement Considerations
Solid wood expands/contracts across the grain with humidity changes. Prevent splitting by:
- Using elongated screw holes (allow 1/8″ movement per foot of width)
- Orienting grain direction consistently in frame components
- Leaving 1/4″ gaps between slats for expansion
Pro Tip: For platform beds, glue only the center 60% of panels to perimeter frames – this creates “floating” panels that won’t crack when expanding.
Design Principles for Creating Visually Stunning Bed Frames
Beyond structural integrity, the aesthetic design of your wooden bed determines its visual impact in your bedroom. Professional furniture makers follow key design principles that balance form and function while creating cohesive style statements.
Proportion and Scale Fundamentals
Proper proportions ensure your bed complements both the room and mattress size:
- Headboard height: Should be 24-30″ above mattress for queen/king beds (18-24″ for twins)
- Footboard clearance: Maintain 6-8″ between mattress and footboard for comfortable movement
- Post thickness: Bed posts should be 3-5% of the bed’s length for visual balance
For small bedrooms, consider low-profile platform beds (under 12″ total height) to maximize perceived space.
Style-Specific Design Elements
Different design aesthetics require distinct approaches:
- Modern: Clean lines with minimal ornamentation (1-2″ thick slabs, hidden joinery)
- Rustic: Reclaimed wood with visible joinery (dovetails, through-tenons)
- Industrial: Mixed materials (wood with blackened steel accents)
Visual Weight Distribution
Create balanced compositions by:
- Using darker stains or thicker elements at the base for stability
- Incorporating negative space in headboard designs (slatted patterns, cutouts)
- Aligning grain direction vertically in posts for height emphasis
Pro Tip: The “Golden Ratio” (1:1.618) works perfectly for headboard dimensions – a 55″ wide queen headboard looks best at 34″ tall. Use painter’s tape on your wall to test proportions before building.
Long-Term Care and Maintenance of Wooden Bed Frames
Proper maintenance ensures your DIY wooden bed remains beautiful and structurally sound for decades. Unlike manufactured furniture, handcrafted beds require specific care routines that account for wood’s natural characteristics and your local environment.
Humidity Control and Seasonal Adjustments
| Humidity Level | Wood Behavior | Preventative Measures |
|---|---|---|
| Above 60% RH | Expansion, possible joint pressure | Use dehumidifier, wax finishes |
| 30-50% RH | Ideal stability range | Maintain with hygrometer |
| Below 30% RH | Shrinkage, potential cracking | Humidifier, oil treatments |
Check all joints annually before heating season. Tighten bed bolts with a 1/4 turn if gaps appear – over-tightening can cause splits.
Finish Maintenance Schedule
Different finishes require specific upkeep:
- Polyurethane: Lightly buff with 0000 steel wool and re-coat every 5-7 years
- Oil finishes: Reapply every 12-18 months (more often in dry climates)
- Wax finishes: Refresh every 6 months with beeswax-carnauba blends
Always clean with pH-neutral wood cleaners – vinegar solutions can degrade finishes over time.
Structural Reinforcement Over Time
Common wear points and solutions:
- Slat supports: Replace nylon webbing every 8-10 years
- Joint reinforcement: Add corner blocks after 5 years for aging joints
- Hardware upgrades: Switch to brass fittings if steel screws show rust
Pro Tip: Keep original wood scraps for future repairs – they’ll age identically to your bed. Store in the same room to maintain matching moisture content.
Advanced Lighting and Accent Integration for Bed Frames
Modern wooden beds can be transformed into stunning focal points with integrated lighting solutions that combine functionality with dramatic ambiance. These installations require careful planning to maintain structural integrity while achieving professional-grade results.
Low-Voltage LED Lighting Systems
For safe, energy-efficient illumination:
- Channel routing: Cut 1/2″ deep × 3/4″ wide channels in headboard panels using a router with edge guide
- Diffuser options: Frosted acrylic strips (3mm thickness) provide even glow without visible diodes
- Power requirements: 12V systems need 18AWG wiring; calculate total LED strip length × wattage per foot
Always use UL-listed transformers and install accessible service panels for future maintenance.
Wire Management Solutions
Conceal wiring without compromising safety:
- Route cables through pre-drilled 3/4″ holes in bed posts with grommets
- Use magnetic cable clips along underside of side rails for clean appearance
- Install wireless control modules in hollow headboard compartments
Ambient Lighting Techniques
Professional lighting designers recommend:
- Up-lighting: 2700K LED strips under floating headboards create warm halo effects
- Task lighting: Dimmable reading lights at 45° angles from centerline
- Accent lighting: RGBW strips in footboard channels for adjustable mood lighting
Pro Tip: For platform beds, install motion-activated toe-kick lighting using low-profile 6mm LED strips – position sensors 18″ above floor level to prevent pet-triggered activation.
Professional Quality Assurance and Final Inspection Protocols
Before declaring your DIY wooden bed complete, implementing rigorous quality checks ensures both immediate satisfaction and long-term durability. These professional-grade validation procedures catch potential issues while they’re still easily correctable.
Structural Integrity Testing
| Test | Method | Acceptance Criteria |
|---|---|---|
| Lateral Stability | Apply 50 lbs side force at headboard top | ≤1/4″ deflection at center |
| Vertical Load | 300 lbs concentrated at center | No audible creaking |
| Joint Inspection | Magnified examination of glue lines | Continuous squeeze-out visible |
Perform tests on carpeted surface to simulate real-world conditions. Document results with photos for future reference.
Finish Quality Assessment
Professional finishers recommend this 4-point inspection:
- Light test: Shine 500-lumen flashlight at 45° angle to reveal missed sanding spots
- Fingertip test: Run bare fingers across all surfaces feeling for roughness
- Cloth drag test: Pull white cotton rag across surfaces checking for snags
- Moisture test: Apply 1 drop water to finish – should bead for 5+ minutes
Long-Term Performance Optimization
Extend your bed’s lifespan with these pro techniques:
- Seasonal adjustment: Create summer/winter tightening schedules for bed bolts
- Preventative maintenance: Apply paste wax to metal hardware annually
- Monitoring system: Install humidity sensors in bed frame cavities
Pro Tip: Keep a “birth certificate” for your bed documenting wood species, joinery methods, and finish products used – invaluable for future repairs or refinishing projects.
Conclusion
Building a stylish DIY wooden bed requires careful consideration at every stage – from selecting the right wood species and mastering joinery techniques to applying professional finishes and integrating design elements.
We’ve explored how proper material selection, structural reinforcement, and thoughtful design principles combine to create beds that are both beautiful and built to last. Remember that quality craftsmanship comes from patience and attention to detail at each step of the process.
Now it’s your turn – take these professional techniques and transform your vision into a handcrafted centerpiece for your bedroom. Start with simple projects to build confidence, then gradually incorporate more advanced methods as your skills develop. Your perfect bed isn’t just furniture; it’s a testament to your growing craftsmanship.
Frequently Asked Questions About DIY Wooden Beds
What’s the best wood for a beginner’s first bed frame project?
Pine is ideal for first-time builders due to its affordability and workability. While softer than hardwoods, select #2 common grade pine with straight grain patterns for stability.
For slightly more advanced beginners, poplar offers better paint adhesion and moderate hardness (540 Janka rating) at reasonable cost. Avoid exotic woods initially – their density requires specialized tools and techniques that can frustrate newcomers.
How do I prevent my wooden bed from squeaking?
Squeaks develop from wood-on-wood friction at joints. Apply these professional solutions:
1) Use beeswax or paraffin wax on all contact surfaces before assembly
2) Install felt pads between slats and side rails
3) Secure all joints with bed bolts and washers rather than screws alone
4) Apply threadlocker to metal fasteners. For existing squeaks, inject wood glue into joints using a syringe, then clamp for 24 hours.
What’s the proper spacing between bed slats?
For optimal mattress support and airflow:
1) Standard spacing is 2-3 inches between slats
2) Reduce to 1.5 inches for memory foam mattresses
3) Increase to 4 inches for latex mattresses.
Use 1×4 or 1×6 lumber for slats, oriented with the 3.5″ or 5.5″ side down for maximum stiffness. Center supports should be placed every 30-36 inches for queen/king sizes.
Can I build a bed frame without power tools?
Yes, but with limitations. Essential hand tools include: a coping saw for joinery, chisels for mortises, a hand plane for smoothing, and a mallet. Expect to spend 3-5x longer on construction.
Focus on simpler designs like platform beds using pre-cut lumber. Japanese pull saws provide cleaner cuts than Western push saws for hand tool work. Always use sharpening stones to maintain tool edges.
How much weight can a DIY wooden bed safely support?
Properly constructed beds support 600-800 lbs distributed weight. Critical factors:
1) Use hardwood (oak/maple) for frames over 500 lbs capacity
2) Minimum 4×4 posts for king beds
3) Reinforce corners with 3/4″ plywood gussets
4) Add center support legs for sizes above full.
For heavier requirements, consult engineering tables – a 800 lb capacity requires 2×6 side rails with mid-span deflection under L/360.
What’s the most durable finish for high-use beds?
Conversion varnish provides the hardest commercial-grade protection (3H+ pencil hardness) but requires spray equipment. For brush application, use a 3-part system:
1) Sanding sealer
2) Oil-modified polyurethane (3 coats)
3) Paste wax topcoat. High-traffic areas need annual wax reapplication.
Avoid water-based polyurethanes for children’s beds – they lack the elasticity to withstand frequent impacts.
How do I fix wood movement issues in my existing bed frame?
Seasonal movement causes three common problems:
1) Gaps at joints – install threaded inserts for adjustable tension
2) Sticking drawers – plane 1/16″ off sides and wax runners
3) Split panels – butterfly keys across cracks.
Prevent future issues by: allowing 1/8″ expansion space per foot of width, using floating panel construction, and maintaining 40-50% relative humidity in the bedroom.
What safety precautions are essential when building a bed?
Critical safety measures include:
1) Secure all headboard/footboard connections with through-bolts and safety washers
2) Round over all edges with 1/8″ radius router bit
3) Ensure 9″ minimum clearance between floor and mattress base
4) Use low-VOC finishes in sleeping areas
5) Install anti-tip brackets for tall headboards
6) Test for splinters with pantyhose drag test before final assembly.