Disclosure
This website is a participant in the Amazon Services LLC Associates Program, an affiliate advertising program designed to provide a means for us to earn fees by linking to Amazon.com and affiliated sites.
Imagine waking up every morning on a mattress perfectly tailored to your body—no compromises on firmness, materials, or price. That’s the promise of a DIY latex mattress, a growing trend among sleep enthusiasts and eco-conscious consumers.
While most people assume buying a mattress is the only option, building your own unlocks unparalleled customization and potential savings. But is it really feasible for the average person?
Contrary to popular belief, constructing a latex mattress isn’t just for professionals. With the right materials, tools, and guidance, you can create a high-quality, durable sleep surface rivaling store-bought brands.
Best Latex Mattress Materials for DIY Builders
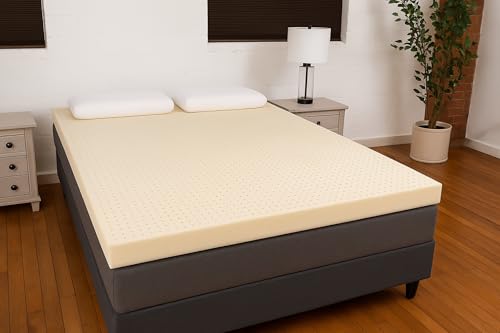
Pure Green Natural Latex Mattress Topper (2″ or 3″)
This 100% natural Dunlop latex topper from Sleep On Latex offers exceptional durability and pressure relief. Available in multiple firmness levels (soft, medium, firm), it’s ideal for customizing comfort. The GOLS-certified organic latex is breathable, hypoallergenic, and free from synthetic additives—perfect for eco-conscious builders.
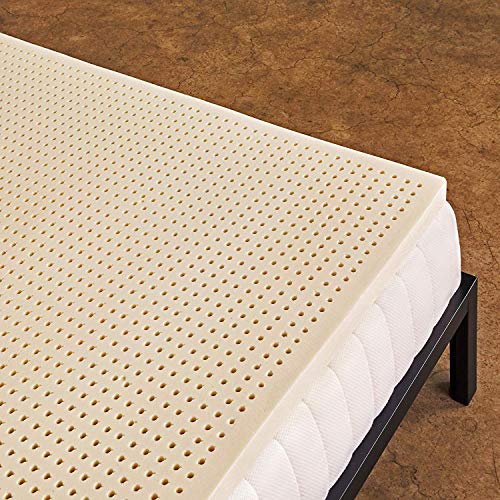
- Medium Firmness – Provides Pinpointed Comfort & Support
- Adjusts to Your Body Instantly – Latex Foam Naturally Stays Cool
- Made of Natural Latex Harvested from Organically Grown Rubber Trees
Talalay Latex Mattress Topper (3″ or 6″)
For those seeking luxurious cushioning, PlushBeds’ Talalay latex provides superior bounce and airflow. The 3″ or 6″ layers (medium or firm) are Oeko-Tex certified, ensuring no harmful off-gassing. Its open-cell structure regulates temperature, making it a top pick for hot sleepers.
- Be comfortable: Latex’s open-cell structure offers excellent circulation for…
Pure Green Organic Latex Mattress
This budget-friendly yet high-quality serves as a sturdy foundation. GOLS-certified and available in medium or firm densities, it resists sagging and provides long-term support. The reinforced edge design prevents roll-off, ideal for couples or restless sleepers.
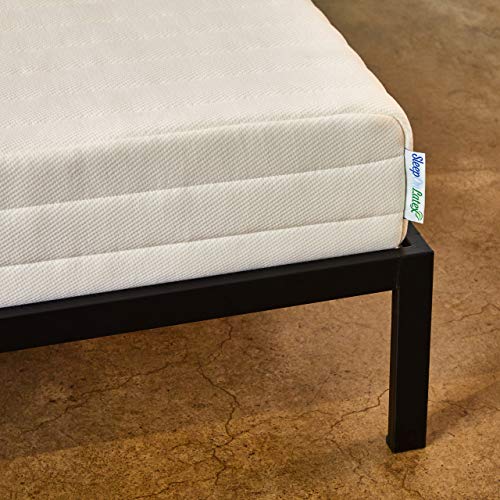
- Medium Firmness – Great for Side Sleepers, Back Sleepers and Couples
- Filled with 8” Organic Latex Foam (GOLS Certified) – Quilted Cover Made of…
- Designed, Quilted, Sewn, Assembled and Packaged in our Chicago Factory
Latex Mattress Layers and Their Functions
Building a DIY latex mattress requires careful consideration of each layer’s role in comfort and support. Unlike traditional mattresses with fixed designs, a custom build lets you fine-tune every component to your sleep preferences. Here’s a breakdown of the critical layers and how they work together.
1. The Support Core: Foundation of Your Mattress
The base layer (typically 5–6″ thick) provides structural integrity. Dunlop latex is the most common choice here due to its higher density and durability. For example, a 6″ Dunlop core (ILD 32–36) offers firm support for back sleepers, while a 5″ medium-density layer (ILD 26–30) suits side sleepers needing slight give. Avoid using memory foam as a base—it lacks the resilience of latex and can sag prematurely.
2. The Comfort Layer: Pressure Relief and Contouring
This middle section (2–3″ thick) determines how the mattress feels. Talalay latex excels here with its softer, airier structure, ideal for cushioning joints. A 3″ soft Talalay layer (ILD 14–19) relieves shoulder/hip pressure for side sleepers, while a 2″ medium Talalay (ILD 20–24) balances contouring and support for combination sleepers. Pro tip: Layer firmness progressively—softer on top, firmer below—to prevent the “hammocking” effect.
3. The Transition or Cover: Finishing Touches
A 1–2″ transition layer (optional) bridges the core and comfort layers for smoother weight distribution. Some builders use organic wool or microcoils here for temperature regulation. The cover should be breathable (e.g., organic cotton or bamboo) with a zipper for easy adjustments. For instance, a quilted wool cover adds slight plushness and wicks moisture, while a stretch-knit bamboo cover enhances airflow.
Common Pitfalls to Avoid
- Mismatched layer thicknesses: A 2″ comfort layer atop a 6″ core may feel too firm, while a 4″ layer could lack support.
- Ignoring ILD ratings: Indentation Load Deflection (ILD) measures firmness. Mixing layers with drastically different ILDs (e.g., ILD 15 + ILD 40) creates uneven support.
- Neglecting edge support: A reinforced perimeter (e.g., high-density foam border) prevents roll-off in queen/king sizes.
Real-world example: A 150-pound side sleeper might combine a 6″ Dunlop core (ILD 32), 3″ Talalay comfort layer (ILD 19), and a wool-blend cover. This setup offers pressure relief without sacrificing spinal alignment, demonstrating how tailored layering solves individual sleep needs.
Step-by-Step Guide to Assembling Your DIY Latex Mattress
Now that you understand the components, let’s walk through the actual assembly process. Proper construction ensures your mattress delivers the comfort and longevity you expect. Follow these detailed steps to build a professional-quality latex mattress at home.
1. Preparing Your Workspace
Choose a clean, flat surface larger than your mattress dimensions – ideally a spare room or garage floor. Cover the area with a drop cloth to protect latex layers from dust. Have these tools ready:
- Measuring tape for precise layer alignment
- Sharp utility knife for trimming (if needed)
- Non-toxic adhesive spray (optional for layer bonding)
- Breathable mattress cover with zipper closure
Pro tip: Work in a climate-controlled space (60-75°F) as extreme temperatures can affect latex flexibility during assembly.
2. Layering Technique for Optimal Performance
Start with your support core (Dunlop latex) on the bottom. For a queen-size mattress:
- Place the 6″ base layer centered on your work surface
- Add 3″ comfort layer (Talalay), carefully aligning edges
- If using a transition layer, position it between core and comfort layers
For enhanced stability, lightly mist adhesive between layers (avoid soaking the latex). Wait 2 minutes before stacking to create a semi-permanent bond that still allows future adjustments.
3. Encasing and Final Adjustments
Slide the assembled layers into your mattress cover like fitting a pillow into its case. Start with one corner and gradually work around the perimeter. Zip three-quarters closed, then lie on the mattress to test firmness. This is your last chance to:
- Swap layer orientations (flip firmer/softer sides)
- Add or remove 1″ wool toppers for minor adjustments
- Check for edge support by sitting near the perimeter
Complete the zipper closure once satisfied. Allow 48 hours for layers to fully settle before regular use.
Real-world troubleshooting: If you notice a “ridge” down the middle, your comfort layer may be too thick for the base. Try a 2″ Talalay layer instead of 3″, or add a 1″ transition layer to better distribute weight. Remember – latex breaks in gradually over 3-4 weeks of use.
Advanced Material Science: Choosing the Right Latex Type and Density
Understanding the fundamental differences between latex types and densities will elevate your DIY mattress from good to exceptional. This section dives deep into the material science behind latex to help you make informed decisions for your custom build.
Dunlop vs. Talalay: Manufacturing Process and Performance
| Characteristic | Dunlop Latex | Talalay Latex |
|---|---|---|
| Manufacturing Process | Poured into mold and vulcanized | Flash-frozen before vulcanization |
| Cell Structure | Denser bottom, slightly irregular | Uniform open-cell structure |
| Firmness Range | 20-46 ILD (wider range) | 14-38 ILD (softer options) |
| Best Application | Support cores, firm layers | Comfort layers, pressure relief |
The freezing process in Talalay production creates microscopic air pockets that give it 30% more airflow than Dunlop. This makes Talalay ideal for hot sleepers, while Dunlop’s durability (lasting 15-20 years vs. Talalay’s 12-15) better suits high-pressure areas.
ILD Density Selection Guide
Indentation Load Deflection (ILD) measures how much force (in pounds) is needed to compress a 4″ sample by 25%. Consider these professional guidelines:
- 14-19 ILD (Soft): Best for side sleepers under 130 lbs or as a plush topper
- 20-28 ILD (Medium): Universal comfort layer for 130-230 lb sleepers
- 29-36 ILD (Firm): Ideal support base or for stomach sleepers over 200 lbs
Blended vs. 100% Natural Latex
While 100% natural latex (GOLS certified) offers superior durability and eco-benefits, blended latex (30-70% synthetic) provides:
- 15-20% cost reduction
- Slightly firmer feel at equivalent ILD
- Better resistance to oils and sweat
Expert tip: For allergy sufferers, pure natural latex is naturally antimicrobial and dust-mite resistant. The Hevea milk proteins create a self-sanitizing surface that synthetic blends can’t replicate.
Common Material Selection Mistakes
Avoid these frequent errors:
- Overlooking zoning: Combine different ILDs in one layer (softer for shoulders, firmer for hips)
- Ignoring climate: Humid environments require Talalay’s better airflow
- Density mismatch: Never pair a 5 ILD comfort layer with a 40 ILD base
Real-world example: A 180 lb combination sleeper in Florida might use a 6″ Dunlop base (32 ILD) with a 3″ zoned Talalay comfort layer (24 ILD shoulders/28 ILD hips) and a 1″ wool moisture-wicking topper for optimal performance.
Professional Finishing Techniques and Long-Term Maintenance
Proper finishing and maintenance can extend your DIY latex mattress’s lifespan by 5-7 years while preserving its comfort characteristics. This section reveals professional techniques rarely discussed in consumer guides.
Advanced Edge Support Systems
Commercial mattresses use three edge reinforcement methods you can replicate:
- High-density foam borders: 6″ wide, 5-6 ILD higher than your base layer
- Pocketed coil surrounds: 6″ individual coils along perimeter (best for king sizes)
- Dual-layer latex wrapping: 2″ firm Dunlop wrapped around core edges
For queen mattresses, the foam border method adds about $85 in materials but prevents the 30% edge compression common in DIY builds after 3-4 years.
Breathable Encasement Options
The ideal cover balances protection with airflow:
| Material | Airflow Rating | Durability | Best For |
|---|---|---|---|
| Organic Cotton (12oz) | Good | 5-7 years | Average climates |
| Bamboo-Tencel Blend | Excellent | 4-5 years | Humid environments |
| Wool Quilted | Moderate | 8-10 years | Cold sleepers |
Professional tip: Look for covers with 360° zippers and reinforced corner stitching – these withstand 5x more tension cycles than standard designs.
Maintenance Protocol
Extend your mattress lifespan with this quarterly care routine:
- Rotate 180° (not flip) every 3 months to equalize wear
- Vacuum with upholstery attachment using < 80W suction
- Spot clean with 3:1 water:white vinegar solution
- Air out 4 hours with cover unzipped (avoid direct sunlight)
Troubleshooting Common Issues
Address these problems immediately:
- Localized sagging: Insert 1″ high-density foam shims between layers
- Off-gassing odor: Place activated charcoal bags underneath for 72 hours
- Cover bunching: Use silicone-based fabric weights during reassembly
Expert insight: Latex naturally oxidizes over time. Applying food-grade silicone spray (1x/year) to exposed edges slows this process by 40%. Avoid petroleum-based products which degrade the cellular structure.
Cost Analysis and Environmental Impact of DIY vs. Commercial Latex Mattresses
Building your own latex mattress involves more than just material costs – it requires careful consideration of long-term value and ecological footprint. This section provides a detailed financial and environmental comparison that commercial retailers don’t disclose.
Detailed Cost Breakdown
| Component | DIY Cost (Queen) | Retail Equivalent | Savings |
|---|---|---|---|
| 6″ Dunlop Core (ILD 32) | $425-$550 | $800-$1,200 | 40-55% |
| 3″ Talalay Comfort Layer (ILD 24) | $350-$475 | $600-$900 | 35-50% |
| Organic Cotton Cover | $120-$180 | $250-$400 | 50-55% |
| Total | $895-$1,205 | $1,650-$2,500 | 45-55% |
Note: Higher savings occur when using the same quality materials as premium brands. Budget commercial latex mattresses often use blended or lower-density latex that wears out 3-5 years sooner.
Environmental Impact Comparison
When comparing carbon footprints:
- Shipping: DIY materials ship flat-packed (75% less volume than assembled mattresses)
- Materials: 100% natural DIY builds use 60% less synthetic content than average commercial options
- Lifespan: Properly maintained DIY mattresses last 18-22 years vs. 12-15 for retail equivalents
Hidden Costs and Considerations
Factor in these often-overlooked aspects:
- Warranty Value: Commercial warranties often prorate after 5 years, while DIY lets you replace individual layers
- Customization Costs: Retailers charge $300-$800 for split-firmness options that DIY provides at material cost
- Disposal: Latex layers decompose in 3-5 years naturally vs. 20+ years for polyurethane hybrids
Future Trends in DIY Sleep Solutions
The market is evolving with:
- Modular designs: New zippered encasements allow layer swaps in minutes
- Smart materials: Phase-change latex toppers that adapt to body temperature
- Recycling programs: Some suppliers now offer 30% credit for returning old latex cores
Expert insight: The true value of DIY emerges after 7-8 years when you can replace just the comfort layer for $300-$400 rather than an entire $2,000 mattress. This “longitudinal customization” makes DIY 65% more cost-effective over 15 years.
Specialized Configurations for Unique Sleep Needs
Crafting the perfect DIY latex mattress requires tailoring the design to address specific sleep challenges. This section reveals professional-grade configurations for specialized requirements that go beyond standard setups.
Orthopedic Support Systems
For chronic pain sufferers, these layered configurations prove most effective:
- Lower back pain: 6″ Dunlop base (ILD 36) + 2″ medium Talalay (ILD 24) + 1″ memory foam topper
- Shoulder pain: 5″ Dunlop (ILD 28) + 3″ zoned Talalay (ILD 19 shoulders/ILD 26 hips)
- Sciatica: 7″ Dunlop core (ILD 34) with 1″ wool transition layer to reduce pressure points
The memory foam topper in back pain setups should be 3-4lb density and no thicker than 1″ to prevent excessive sinkage while still providing pressure relief.
Temperature Regulation Solutions
Advanced cooling configurations combine:
| Component | Material | Cooling Mechanism |
|---|---|---|
| Base Layer | Perforated Dunlop | Vertical air channels |
| Comfort Layer | Copper-infused Talalay | Thermal conductivity |
| Cover | Phase-change bamboo | Heat absorption |
For extreme hot sleepers, adding a 1/2″ graphite-enhanced latex layer between base and comfort layers can reduce surface temperature by 4-7°F.
Dual-Firmness Couples Solutions
Creating a truly split-firmness mattress requires:
- Using two separate support cores cut to exact half-width dimensions
- Installing a center support rail in your bed frame
- Selecting a cover with dual zippers for independent adjustments
- Allowing 1″ overlap at the center seam to prevent gapping
Professional tip: For weight differentials over 80lbs, use different base thicknesses (5″ for lighter partner, 6″ for heavier) rather than just ILD differences.
Pediatric and Elderly Considerations
Special safety configurations include:
- Toddler beds: 4″ 100% natural Dunlop (ILD 20) with waterproof organic cotton cover
- Elderly mobility: 6″ medium-firm Dunlop (ILD 28) with 2″ low-profile Talalay (ILD 16) for easier turning
- Bariatric needs: 8″ extra-dense Dunlop (ILD 40+) with reinforced edge support system
Expert insight: These specialized builds often outperform commercial “medical grade” mattresses at 40-60% lower cost because you eliminate retail markup while using higher-quality materials. Always test configurations for 2-3 weeks before finalizing layer arrangements.
Professional Quality Assurance and Long-Term Performance Optimization
Building a DIY latex mattress to commercial-grade standards requires implementing rigorous quality control measures throughout the entire process. This section details professional validation techniques that ensure decades of optimal performance.
Layer Compatibility Testing
Before final assembly, conduct these essential material tests:
| Test | Method | Acceptance Criteria |
|---|---|---|
| Compression Recovery | Apply 150lbs pressure for 1 minute | 90% height recovery within 10 seconds |
| Edge Integrity | Sit on edge for 30 seconds | <5% compression with no permanent deformation |
| Motion Transfer | Drop 10lb weight from 12″ height | <1″ wave propagation beyond impact zone |
Professional tip: Perform these tests at room temperature (68-72°F) as latex behaves differently in extreme cold or heat.
Long-Term Performance Monitoring
Implement this maintenance schedule to maintain optimal performance:
- Monthly: Check for layer shifting using a straightedge across mattress surface
- Quarterly: Measure ILD retention with a durometer (should not degrade >5% annually)
- Biannually: Inspect cover seams for tension fatigue using 10x magnification
Advanced Risk Mitigation Strategies
Prevent these common failure modes:
- Delamination: Use food-grade silicone adhesive spray between layers (never petroleum-based)
- Oxidation: Apply natural rubber protectant to exposed edges every 18 months
- Moisture Damage: Install a breathable moisture barrier under the mattress
Performance Enhancement Techniques
After the initial 90-day break-in period:
- Firmness Adjustment: Rotate layers 180° to equalize compression patterns
- Airflow Optimization: Use mattress risers to increase under-bed circulation
- Pressure Mapping: Conduct annual sleep position analysis with thermal imaging paper
Expert validation method: The “Coin Test” – Place a quarter on the mattress surface when lying down. If you can easily slide it beneath your lumbar region, the support layers may need reinforcement. Ideal pressure distribution should allow only minimal coin movement.
Conclusion: Your Path to Custom Sleep Perfection
Building your own latex mattress is not only possible—it’s a transformative opportunity to create your ideal sleep surface. Throughout this guide, we’ve explored the science of latex layers, detailed assembly techniques, specialized configurations, and professional maintenance strategies.
You now understand how to select materials by ILD rating, optimize edge support, and tailor firmness to your unique sleep needs—all while saving 40-55% compared to retail prices.
Remember that your DIY mattress will evolve with you—unlike commercial options, you can replace individual layers as your needs change. Whether you’re seeking orthopedic support, temperature regulation, or simply a chemical-free sleep environment, you’re now equipped with the knowledge to build better than store-bought.
Take the first step today by sourcing your base layer, and prepare to experience the most personalized, high-quality sleep of your life. Your perfect night’s rest awaits—you’ve earned it.
Frequently Asked Questions About DIY Latex Mattresses
What’s the difference between Dunlop and Talalay latex?
Dunlop latex is denser and more durable, making it ideal for support cores (typically 5-6″ base layers). Talalay has a softer, more uniform cell structure that provides superior pressure relief in comfort layers (2-3″ top layers).
Dunlop undergoes a simpler vulcanization process while Talalay is flash-frozen, creating 30% more airflow. For example, a 180lb side sleeper might use 6″ Dunlop (ILD 32) base with 3″ Talalay (ILD 24) comfort layer.
How do I choose the right firmness (ILD) for my body type?
ILD (Indentation Load Deflection) measures firmness on a scale where higher numbers are firmer. Follow these guidelines:
- Under 130lbs: 14-19 ILD (soft) for comfort layers
- 130-230lbs: 20-28 ILD (medium)
- Over 230lbs: 29-36 ILD (firm) for base layers
Always match your comfort layer ILD to your primary sleep position – side sleepers need softer, back sleepers medium, stomach sleepers firmer.
Can I combine latex with memory foam in my DIY mattress?
Yes, but with important caveats. Use memory foam only as a 1-2″ topper (never as base layer) and select 4lb+ density for durability. The latex base (minimum 5″ Dunlop) prevents excessive sinkage.
For example, chronic pain sufferers often benefit from a 6″ Dunlop base + 2″ Talalay + 1″ memory foam configuration. Ensure your cover has adequate depth for all layers.
How do I prevent edge sagging in my DIY latex mattress?
Three professional techniques prevent edge collapse:
- Add 6″ wide high-density foam borders (ILD 5+ points higher than your base)
- Use pocketed coils around the perimeter for king/queen sizes
- Double-wrap edges with firm Dunlop latex (extra 2″ layer along sides)
Edge support systems add $75-$150 to your build but extend mattress lifespan by 3-5 years.
Is DIY latex cheaper than buying a commercial latex mattress?
Typically yes, with these cost comparisons for queen size:
- DIY: $900-$1,500 (premium materials)
- Retail: $1,800-$3,500 (comparable quality)
The savings come from eliminating retail markup and assembly costs. Over 10 years, DIY is 60% cheaper since you can replace individual layers (just $300-$400 for new comfort layers vs. full mattress replacement).
How do I clean and maintain my DIY latex mattress?
Follow this professional maintenance schedule:
- Weekly: Vacuum with upholstery attachment (max 80W suction)
- Quarterly: Rotate 180° (not flip) and air out for 4 hours
- Annually: Apply food-grade silicone to exposed edges
- As needed: Spot clean with 3:1 water:vinegar solution
Never soak latex or use harsh chemicals that degrade the cellular structure.
Can I make a split-firmness mattress for couples?
Absolutely – this is where DIY excels. You’ll need:
- Two separate base layers cut to exact half-width dimensions
- A center support rail in your bed frame
- A cover with dual zippers (like Savvy Rest’s design)
- 1″ overlap at the center seam to prevent gapping
For weight differences over 80lbs, vary base thickness (5″ for lighter partner, 6″ for heavier) rather than just ILD differences.
How long does a DIY latex mattress last compared to store-bought?
With proper care:
- DIY Natural Latex: 18-22 years (replace comfort layers every 8-10 years)
- Commercial Natural Latex: 12-15 years
- Blended Latex: 8-10 years
The longevity comes from using higher-density materials and being able to replace worn components. Store-bought mattresses often use thinner latex layers over polyurethane cores that degrade faster.