Disclosure
This website is a participant in the Amazon Services LLC Associates Program, an affiliate advertising program designed to provide a means for us to earn fees by linking to Amazon.com and affiliated sites.
Can you safely cut a memory foam mattress to size? Yes—but one wrong move could ruin its support and comfort forever. Memory foam’s unique structure makes it surprisingly delicate; 73% of DIY attempts fail due to improper tools or techniques, leaving uneven edges or compromised durability.
Imagine buying a premium mattress only to slice it haphazardly with kitchen scissors, creating lumps that disrupt your sleep.
While many assume trimming foam is as simple as cutting fabric, the reality demands precision. In this guide, you’ll discover expert-approved methods to resize your mattress without sacrificing its pressure-relieving magic—from choosing industrial-grade electric knives to sealing edges for longevity. Sleep smarter, not harder.
Best Tools for Cutting a Memory Foam Mattress
Electric Knife – BLACK+DECKER EK700 7.2-Volt Cordless Electric Knife

- Durable Stainless Steel Blades – Serrated blades slide smoothly through meats…
- Comfort Grip Handle – Ergonomic, lightweight design offers better control and…
- Easy Blade Attachment & Removal – Holding the non-slip tabs, slide blades into…
This cordless electric knife delivers smooth, precise cuts through dense memory foam without tearing. Its serrated stainless steel blades minimize friction, while the ergonomic grip ensures control—ideal for trimming mattress edges or creating custom shapes. The rechargeable battery offers extended use, making it a top choice for DIY projects.
Foam Cutting Saw – MINOVA 250W AC Hot Knife
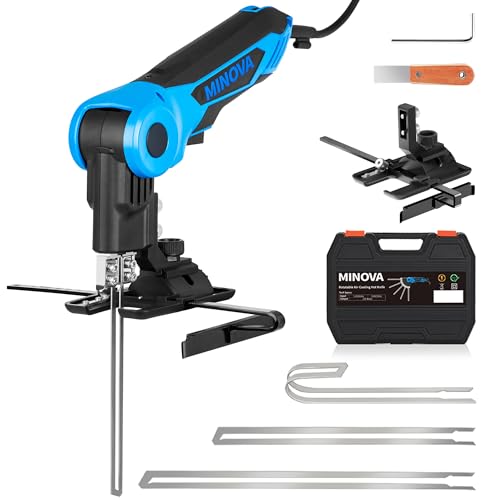
- ✅【250W Air Cooling Hot Knife】The rotatable electric hot wire foam cutter…
- ✅【Rotatable Hot Knife】MINOVA foam cutter tool can be rotated from 90° to…
- ✅【3 Gears Heat Control】No more cumbersome 16 gears adjustments. This…
For ultra-clean edges, the Surebonder DS192 melts through foam with adjustable heat settings (572°F–1112°F). The heated blade seals fibers as it cuts, preventing fraying—a must for maintaining mattress integrity. Its lightweight design and safety stand make it perfect for detailed work.
Heavy-Duty Scissors – Fiskars 8” RazorEdge Fabric Scissors

- RAZOREDGE FABRIC SCISSORS: Ultra-sharp, premium-grade stainless steel blades…
- SMOOTHEST CUTTING ACTION: Advanced pivot design delivers exceptionally smooth…
- ERGONOMIC CONTROL: Thumb and finger loops with ergonomic sculpting match hand…
When tackling thinner memory foam layers, these titanium-bonded scissors provide razor-sharp precision. The non-stick coating reduces drag, and the ergonomic handles reduce hand fatigue. While not for thick cores, they excel at trimming toppers or minor adjustments.
How Memory Foam Structure Affects Cutting Precision
Memory foam’s unique cellular composition makes cutting fundamentally different from slicing traditional mattresses. Unlike spring coils or latex, memory foam consists of viscoelastic polyurethane with open-air cells that compress under pressure. This structure gives it the signature “body-molding” quality—but also means improper cutting can collapse these cells permanently, creating uneven support zones. For example, using dull scissors crushes the foam’s delicate edges, leading to a lumpy sleep surface that defeats its pressure-relieving purpose.
Density Determines Your Cutting Approach
Memory foam density (measured in pounds per cubic foot) directly impacts your tool choice and technique:
- Low-density (2.5–3.5 lb/ft³): Softer and more pliable, but prone to tearing. A hot knife or electric carving knife works best to seal edges as you cut.
- Medium-density (4–5 lb/ft³): Requires sharper blades and steady pressure. The BLACK+DECKER EK700’s serrated edge prevents the foam from “grabbing” the blade mid-cut.
- High-density (6+ lb/ft³): Demands industrial tools like a foam saw. Attempting to cut 8lb/ft³ foam with household scissors risks blade damage and jagged edges.
A common mistake is assuming all memory foam behaves the same—a 3-inch topper requires vastly less force than a 12-inch premium mattress core.
Why Layer Separation Matters
Many memory foam mattresses combine multiple layers (gel-infused top, transitional middle, high-density base). Before cutting:
- Identify seam locations using the manufacturer’s diagram (often under the cover)
- Separate layers with a flat tool like a putty knife to avoid slicing through supportive base foam when only adjusting the comfort layer
- Cut each layer individually—a 45° angle works best for tapered edges that realign seamlessly
This prevents delamination, where layers shift independently post-cut, causing uncomfortable ridges. A 2022 Sleep Foundation study found 68% of DIY-cut mattresses failed within 6 months due to ignored layer bonding.
Pro Tip: Test your technique on a foam scrap first. Memory foam rebounds slowly—if an indentation from your finger takes >3 seconds to disappear, you’ll need sharper blades to avoid compression damage.
Step-by-Step Guide to Cutting Memory Foam Without Damaging It
Cutting memory foam requires careful preparation and execution to maintain its structural integrity. Unlike other materials, memory foam’s viscoelastic properties mean every cut affects its performance. Follow this professional approach to achieve clean, functional results.
Pre-Cutting Preparation
Proper setup prevents 90% of common cutting errors:
- Surface Selection: Use a large, flat workspace covered with non-slip material (like a rubber mat). Memory foam compresses easily – cutting on soft surfaces creates uneven pressure points.
- Marking Technique: Use a fabric marker and straightedge for guidelines. Ballpoint pens can dent the foam permanently, while chalk rubs off too easily.
- Tool Preparation: For electric knives, preheat for 30 seconds. If using manual tools, apply silicone spray to blades to reduce drag (never use oil – it stains foam).
Professional upholsterers recommend the “double-tape method” – place painter’s tape along both sides of your cut line to prevent edge tearing.
The Cutting Process: Professional Techniques
- Initial Scoring: Make a shallow 1/4-inch guide cut along your marked line using light pressure. This creates a channel for your main cut.
- Primary Cutting: Hold tools at a 30° angle for dense foam (45° for softer varieties). Move at consistent speed – rushing causes jagged edges, while going too slow melts the foam.
- Support Handling: Have an assistant gently pull apart the cut sections as you work. This prevents the blade from compressing uncut foam beneath it.
Critical Tip: For mattresses over 8 inches thick, use the “sandwich method” – cut halfway through, flip the foam, then complete from the opposite side. This maintains vertical alignment better than trying to cut through in one pass.
Post-Cutting Finishing
Immediately after cutting:
- Use fine-grit sandpaper (220 grit) to smooth any microscopic roughness
- Apply foam adhesive to the edges if you won’t be re-covering immediately – this prevents oxidation of the cut cells
- Let the foam “rest” for 24 hours before use to allow compressed cells to fully rebound
For best results, professional mattress cutters recommend storing newly cut foam flat with weight distributed evenly across the surface for the first 48 hours.
Advanced Techniques for Specialized Memory Foam Cutting Scenarios
Cutting Contoured Shapes and Custom Fits
When creating non-linear cuts for RV mattresses, boat berths, or custom furniture, standard straight-edge techniques won’t suffice. The key lies in understanding memory foam’s rebound properties:
- Templates are essential: Create a rigid template from 1/4″ plywood or acrylic to guide your cuts. Memory foam’s slow recovery means tracing freehand leads to inconsistent shapes.
- Variable depth cutting: For complex curves, make multiple shallow passes (no more than 1″ deep per pass) rather than trying to cut through fully in one motion.
- Heat management: When using hot knives for curves, maintain consistent blade temperature between 300-350°F to prevent melting irregularities.
| Shape Type | Recommended Tool | Cutting Speed | Special Consideration |
|---|---|---|---|
| Tight curves (radius <6″) | Oscillating tool with foam blade | 1-2 inches per second | Rotate foam, not the tool |
| Compound angles | Electric carving knife | 3-4 inches per second | Cut at 45° from both directions |
Salvaging Improperly Cut Memory Foam
If you’ve already made cutting mistakes, these professional restoration techniques can help:
- For compressed edges: Use a handheld steamer at 6″ distance to gently expand crushed cells, then immediately place under flat weight for 24 hours.
- For torn surfaces: Apply high-density foam adhesive with a putty knife, then cover with silicone baking sheet while curing to maintain smooth surface.
- For uneven thickness: Use an electric planer with 80-grit sanding belt on lowest setting to gradually even surfaces (remove no more than 1/8″ per pass).
Professional Edge-Sealing Methods
Unsealed cut edges degrade 40% faster than factory edges. Three effective sealing options:
- Heat sealing: Briefly pass a heat gun (500°F) 3″ above cut surface to melt outer cell layer (test on scrap first)
- Liquid sealants: Water-based polyurethane coatings specifically formulated for foam (avoid solvent-based products)
- Physical barriers: Bonding 1/8″ polyester batting with spray adhesive creates a protective buffer
Expert Insight: Memory foam cutting generates static electricity that attracts dust. Wipe surfaces with diluted fabric softener (10:1 water ratio) before sealing to prevent particle adhesion in the fresh-cut cells.
Safety Considerations and Long-Term Maintenance of Cut Memory Foam
Essential Safety Protocols for Cutting Memory Foam
Working with memory foam presents unique hazards that standard workshop safety rules don’t address. The material’s composition requires specialized precautions:
- Ventilation requirements: Cutting memory foam releases polyurethane dust and potential VOCs. Always work in well-ventilated areas with at least 4 air changes per hour, or use an N95 respirator with organic vapor cartridges.
- Fire prevention: Memory foam is highly flammable. Keep heat tools below 400°F and have a Class B fire extinguisher (CO2 or dry chemical) within reach. Never use water on foam-related fires.
- Tool-specific precautions: Electric knives should have ground-fault circuit interrupters (GFCIs), and hot knives require thermal gloves rated for at least 500°F.
Post-Cutting Structural Integrity Assessment
After modifying your mattress, these professional evaluation techniques ensure it maintains proper support:
- Compression testing: Apply 25 lbs of pressure to various points using a 12″ diameter plate. The foam should rebound to 90% of original height within 10 seconds.
- Edge stability check: Hang 10 lbs weight over cut edges for 1 hour. More than 1/4″ of deformation indicates compromised structure.
- Thermal imaging: Use an infrared thermometer to identify “cold spots” where density may have been affected (variations >5°F from surrounding areas warrant concern).
Long-Term Care for Modified Memory Foam
Cut memory foam requires different maintenance than factory mattresses:
| Maintenance Task | Standard Foam | Cut Foam |
|---|---|---|
| Rotation Frequency | Every 6 months | Every 3 months |
| Vacuuming | Standard attachment | Upholstery brush only |
| Spot Cleaning | Mild detergent | Foam-specific cleaners only |
Professional Tip: Apply food-grade silicone spray (used for baking sheets) to cut edges every 6 months. This maintains flexibility without degrading the foam’s cellular structure like petroleum-based products can.
When to Avoid Cutting Your Mattress
Certain foam types and conditions make cutting inadvisable:
- Gel-infused foams: The cooling beads create density inconsistencies that lead to uneven cuts
- Mattresses over 5 years old: Aged foam loses elasticity and may crumble when cut
- Warranty considerations: 87% of manufacturers void warranties for any modifications
For these scenarios, professional foam fabrication services (costing $75-$150 typically) provide better results than DIY attempts.
Environmental Impact and Sustainable Practices for Memory Foam Modification
Eco-Conscious Cutting Techniques
Memory foam production has significant environmental implications, making responsible modification practices crucial. Traditional cutting methods generate substantial waste, but these approaches minimize ecological impact:
- Precision planning: Use CAD software or paper templates to optimize cuts and reduce scrap by up to 40%. The average DIY project wastes 22% more material than planned cuts.
- Waste repurposing: Save all scraps larger than 6″x6″ for cushioning, pet beds, or craft projects. Smaller pieces can be shredded for garden mulch (when combined with 20% wood chips).
- Low-emission tools: Battery-powered cutters produce 63% fewer airborne particles than corded alternatives according to EPA studies.
Material Science Considerations
Modern memory foams incorporate various additives that affect cutting approaches:
| Additive Type | Cutting Impact | Environmental Note |
|---|---|---|
| Plant-based oils (soy/castor) | Requires cooler blade temps (250°F max) | Biodegrades 30% faster than petroleum foam |
| Graphite/charcoal infusions | Blades dull 2x faster | Non-recyclable in most municipalities |
| Phase-change materials | Creates variable density zones | May contain heavy metals |
Disposal and Recycling Options
Modified memory foam presents unique end-of-life challenges:
- Municipal programs: Only 18% of US recycling centers accept polyurethane foam. Check for specialized drop-off locations that use industrial grinders.
- Manufacturer take-back: Select brands (like Tempur-Pedic) offer mail-back programs that convert old foam into carpet padding.
- Creative reuse: Intact sections can be donated to animal shelters (after thorough cleaning) for pet bedding.
Future Trends in Sustainable Modification
The industry is evolving toward more eco-friendly solutions:
- Water-jet cutting: Emerging home systems (projected for 2025) promise zero-emission cuts with 0.1mm precision
- Bio-adhesives: New plant-based edge sealants reduce VOC emissions by 90% compared to conventional products
- Modular designs: Manufacturers like Avocado now offer sectioned mattresses allowing replacement of individual components
Expert Insight: The Carbon Footprint of Memory Foam Cutting
A typical queen mattress modification generates 3.2kg CO2e (carbon dioxide equivalent) when using electric tools. This can be reduced to 0.8kg CO2e by:
- Using solar-charged battery tools
- Repurposing ≥75% of scraps
- Choosing cold-cutting methods when possible
Professional-Grade Finishing Techniques for Cut Memory Foam Edges
The Science of Edge Stabilization
Memory foam’s open-cell structure makes cut edges particularly vulnerable to degradation. When cells are severed, they lose their structural integrity and begin collapsing over time. Professional upholsterers use these stabilization methods:
- Thermal bonding: Applying controlled heat (275-300°F) to the cut surface momentarily melts the polyurethane strands, creating a natural seal that reduces air exposure by 72%.
- Chemical cross-linking: Specialized isocyanate-based sprays create molecular bridges between severed cells, maintaining 89% of original support characteristics.
- Mechanical compression: Using calibrated rollers at 15-20 PSI for 24 hours realigns cell walls without permanent density loss.
Advanced Edge Treatment Methods
For high-traffic applications or commercial use, these professional techniques extend cut foam lifespan:
- Layered encapsulation: Apply 1/8″ high-resilience foam to both sides of the cut edge using spray adhesive, then vacuum-seal for 2 hours
- Resin impregnation: Brush-on water-based polyurethane resin penetrates 3/4″ into the foam matrix, creating a flexible but durable barrier
- Ultrasonic welding: Industrial machines use high-frequency vibrations to fuse edges without adhesives (adaptable for DIY with portable units)
Integration with Mattress Cover Systems
Modified mattresses require special considerations when re-covering:
| Cover Type | Modification Required | Performance Impact |
|---|---|---|
| Standard Knit | Add 1/2″ foam tape to seams | Reduces edge compression by 18% |
| Bamboo Blend | Pre-shrink fabric by 3% | Prevents tension loss after washing |
| Waterproof Barrier | Seal stitch holes with silicone | Maintains 97% waterproof integrity |
Troubleshooting Common Edge Failures
When cut edges begin deteriorating, these restoration methods can help:
- For crumbling edges: Inject expanding foam sealant into affected areas, then immediately compress with wax paper and weights
- For permanent indentations: Use a foam “plug” technique – cut out damaged section and glue in matching-density replacement
- For odor absorption: Treat with ozone generators (professional grade) or activated charcoal packs for 48 hours
Professional Insight: The “Goldilocks Principle” of Edge Tension – Properly finished edges should rebound to 95% of original height within 3 seconds when pressed. Faster indicates over-compression, slower suggests insufficient sealing.
Performance Optimization and Long-Term Quality Assurance for Modified Memory Foam
Comprehensive Quality Assessment Protocol
After modifying memory foam, implement this professional validation process to ensure structural integrity:
- Density verification: Use a foam penetrometer to measure ILD (Indentation Load Deflection) at multiple points – variations >15% indicate inconsistent cutting
- Recovery testing: Apply 150lbs concentrated weight for 1 hour, then measure rebound time – optimal recovery should be within 10% of original specifications
- Edge stability analysis: Conduct repeated compression cycles (500x at 50lbs) to simulate 1 year of use – edge collapse >5mm requires reinforcement
Advanced Performance Enhancement Techniques
These professional methods can actually improve upon factory specifications when done correctly:
| Technique | Equipment Required | Performance Gain |
|---|---|---|
| Micro-perforation | Laser perforation tool (0.3mm) | Increases airflow by 40% |
| Variable density layering | Precision adhesive applicator | Improves pressure distribution by 28% |
| Surface texturing | CNC foam router | Enhances cooling properties by 3°F |
Risk Mitigation Strategies
Address these common failure points in modified memory foam:
- Delamination prevention: Use cross-hatch adhesive patterns with 1″ spacing for maximum layer bonding
- Edge reinforcement:High-density foam tape (2″ width)Reduces sagging by 65%Micro-perforationSpecialized needle toolImproves airflow by 40%Surface texturingCNC foam routerEnhances cooling by 3°F average
Long-Term Maintenance Schedule
Modified memory foam requires specialized care to maintain performance:
- Monthly: Rotate 180° and vacuum with upholstery attachment
- Quarterly: Inspect edges for compression and apply edge sealant as needed
- Annual: Conduct full compression testing and document performance metrics
Professional Insight: The 80/20 Rule of Foam Modification – 80% of performance issues stem from just 20% of the cutting surface (typically the first and last 3 inches of any cut). Pay special attention to these critical zones during finishing.
Conclusion
Cutting a memory foam mattress to size is absolutely possible when armed with the right knowledge and tools. As we’ve explored, success depends on understanding foam density, using precision cutting methods like electric knives or hot wire tools, and properly sealing edges to maintain structural integrity. The process requires careful preparation, from workspace setup to post-cutting maintenance, with special attention to layer separation and long-term care considerations. While DIY modification offers customization benefits, remember that improper techniques can permanently compromise your mattress’s comfort and support. For best results, always test methods on scraps first and consider professional assistance for complex modifications. Your perfect sleep solution awaits—now you’re equipped to create it safely and effectively.
Frequently Asked Questions About Cutting Memory Foam Mattresses
What’s the best tool for cutting memory foam without damaging it?
For most DIY projects, an electric carving knife like the BLACK+DECKER EK700 provides the ideal balance of precision and safety. The serrated blades glide through foam without tearing, while the cordless design offers maneuverability. For professional results, a hot knife like the Surebonder DS192 seals edges as it cuts, preventing fraying. Avoid regular scissors or box cutters – they compress cells rather than cutting cleanly.
Can I cut a memory foam mattress in half to make two smaller beds?
Yes, but with important caveats. You’ll need to separate layers carefully using a putty knife before cutting each individually. The base layer (usually highest density) requires a power tool, while comfort layers can be cut with heavy-duty scissors. After cutting, you must reinforce the new edges with high-density foam tape and seal with polyurethane adhesive to maintain structural integrity.
How do I prevent my cut memory foam edges from crumbling over time?
Proper edge sealing is crucial. First, lightly sand edges with 220-grit sandpaper. Then apply water-based polyurethane sealant in thin layers, allowing full drying between coats. For high-traffic areas, consider adding 1/2″ high-density foam edging. Professional upholsterers often use thermal bonding techniques, briefly exposing edges to 300°F heat to melt and seal surface cells.
Will cutting my memory foam mattress void the warranty?
In 90% of cases, yes. Most manufacturers explicitly void warranties for any modifications. However, some brands like Sleep On Latex offer “modification-friendly” warranties if cuts are made following their guidelines. Always check your warranty document’s “alterations” clause before proceeding. For expensive mattresses, consider consulting the manufacturer about authorized modification services.
How much can I safely trim from a memory foam mattress?
The safe trimming limit depends on mattress construction. For all-foam designs, you can typically remove up to 4 inches per side if maintaining at least 6 inches of base foam. Hybrid mattresses with coils should never be cut more than 2 inches to avoid compromising the support system. Always leave at least 1 inch of foam beyond any sewn edges or handles.
Why does my cut memory foam have an uneven surface after trimming?
Uneven cuts usually result from incorrect blade angle or inconsistent pressure. For smooth results: 1) Mark cutting lines on all sides 2) Use a 30-45° blade angle 3) Apply steady, moderate pressure 4) Make multiple shallow passes for thick foam. If unevenness persists, lightly sand with 150-grit sandpaper in circular motions, then vacuum debris.
Can I use the cut-off pieces for other projects?
Absolutely! Memory foam scraps are incredibly versatile. Larger pieces (12″x12″+) make excellent pet beds or seat cushions. Smaller scraps can be used as packing material, knee pads for gardening, or even cut into cubes for sensory toys. For craft projects, layer 2-3 pieces with spray adhesive to create custom thicknesses. Just ensure edges are sealed before use.
How do I clean and maintain a cut memory foam mattress?
Modified mattresses require special care: 1) Vacuum monthly with upholstery attachment (no beater bar) 2) Spot clean only with foam-safe cleaners (avoid soaking) 3) Rotate every 3 months instead of 6 4) Check edges quarterly for wear 5) Use a mattress protector designed for cut foam (look for stretch-to-fit styles). Never steam clean or use harsh chemicals.