Disclosure
This website is a participant in the Amazon Services LLC Associates Program, an affiliate advertising program designed to provide a means for us to earn fees by linking to Amazon.com and affiliated sites.
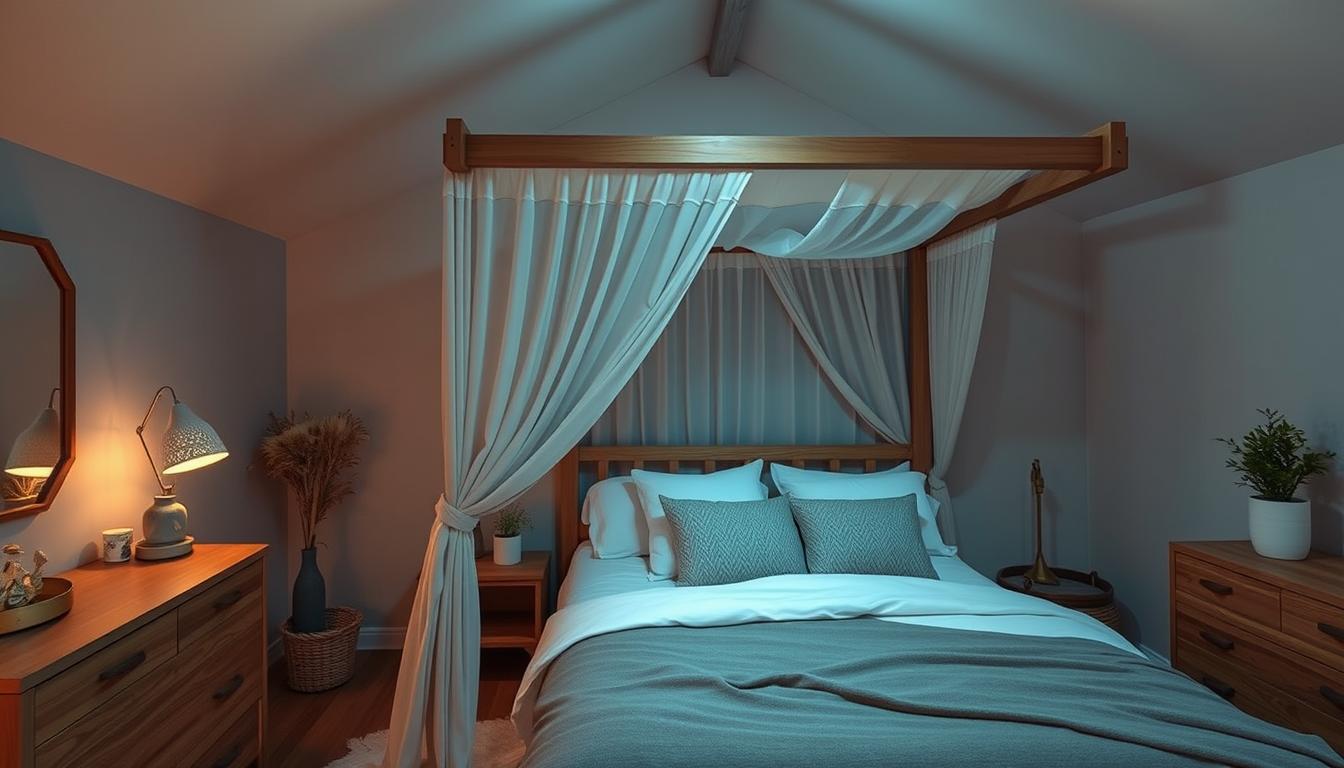
Canopy beds are all the rage in modern bedrooms. Designers like Emily Henderson and Amber Interiors love them. They make a room look grand by drawing the eye up.
But, finding the right canopy bed can be tough if you have low ceilings. That’s where DIY canopy bed frames come in. They let you design something that fits your space and style perfectly.
Key Takeaways
- DIY canopy bed frames offer a customizable solution for bedrooms with low ceilings
- Canopy beds are a popular modern bedroom design trend, embraced by top designers
- Building your own canopy bed can save money compared to purchasing a pre-made model
- Properly measuring your space and selecting the right materials are key for a DIY success
- Trying out different canopy designs can make your bedroom stand out
Introduction to DIY Canopy Bed Frames
Canopy beds add luxury and privacy to any bedroom. They create a cozy, romantic feel. Making your own canopy bed lets you design it just for you. This way, you save money and get a bed that’s perfect for your space.
Why Choose a Canopy Bed?
Canopy beds have changed from being practical to being stylish bedroom pieces. They can make any room feel more romantic or regal. You can choose from many styles, like wall-mounted or freestanding, to match your room and taste.
Benefits of Going DIY
Doing a DIY canopy bed project has many perks. You can make it fit your room and style exactly. This is great for rooms with low ceilings, where you can find the perfect size. Plus, making your own bed is rewarding and adds a personal touch to your room.
Think about your room’s size, ceiling height, and your style when picking a canopy bed design. With DIY skills and creativity, you can make your bedroom a unique, luxurious space that shows off your style.
Materials Needed for Your Project
Building your own bed frame needs the right materials and tools. It doesn’t matter if you want a traditional or modern look. The steps are the same. Let’s look at what you need for your bed frame construction and bed woodworking plans.
Essential Tools for Building
Here’s what you’ll need for your canopy bed frame project:
- Saws (hand saw, jigsaw, or power saw) for cutting wood to size
- Drills and screwdrivers for assembling the frame
- Measuring tape, pencil, and level to ensure precise measurements and alignments
- Sandpaper or an electric sander for smoothing the wood surface
- Clamps to hold pieces in place during the construction process
Suggested Wood Types for Frames
Choosing the right wood for your bed frame construction is important. Here are some options:
- Pine Wood: A lightweight and affordable choice, pine is great for DIY bed frames. It’s perfect for rooms with lower ceilings because it doesn’t add too much bulk.
- MDF (Medium-Density Fiberboard): Another lightweight material, MDF is stable. It can be painted or stained to match your style.
- Flat Iron Pipes: For a modern look, metal frames from flat iron pipes are strong. They are slim, making them good for rooms with lower ceilings.
Choose wood that’s sturdy and fits your mattress and bedding well. With the right tools and materials, you can make a beautiful canopy bed frame.
Design Options for Canopy Beds
Choosing the right canopy bed design is exciting. You can pick from many styles, from classic to modern. Whether you love the elegance of a four-poster headboard or a sleek, modern design, you have many choices.
Traditional vs. Modern Styles
Traditional canopy beds have fancy details and carved wood. They look very elegant. Modern designs, on the other hand, are simple and light. They work well in rooms with low ceilings, making them feel bigger.
How to Choose Your Design
Think about your bedroom’s style when picking a canopy bed. Do you want it cozy or open? Consider your room’s size and ceiling height. Also, think about what materials and finishes will match your decor.
| Style | Characteristics | Best Suited For |
|---|---|---|
| Traditional | Ornate details, intricately carved wood, and timeless elegance. | Bedrooms with high ceilings and a formal look. |
| Modern | Clean lines, simple design, and a light feel. | Rooms with low ceilings, making them feel bigger. |
Your canopy bed should show your style and bedroom vision. With so many choices, you can make a unique and cozy sleep space.
Step-by-Step Guide to Building a Canopy Bed
Building your own canopy bed frame is rewarding and saves money. With the right tools and planning, you can make a beautiful bedroom centerpiece. Let’s start the step-by-step guide to making a canopy bed frame.
Preparing Your Workspace
First, make sure you have a big, bright workspace. Get all your tools ready, like a circular saw and drill. Measure your bedroom to figure out the best size for your bed frame.
Constructing the Frame
Begin by cutting wood to the right lengths. For a king-size bed, you need four 88-inch posts and two 80-inch rails. Drill holes and screw the frame together with 2.5-inch screws. Make sure the side rails are straight and level.
Adding the Canopy
After the frame is built, add the canopy. Measure the space between the posts for your fabric size. Pick a fabric that looks good with your room. Use staples or clips to attach the canopy to the posts.
Success in making a canopy bed comes from careful details and precise measurements. Follow these steps to create a beautiful, unique piece for your bedroom.
| Bed Size | Post Length | Side Rail Length | End Rail Length |
|---|---|---|---|
| Twin | 84 inches | 76 inches | 39 inches |
| Full | 86 inches | 54 inches | 75 inches |
| Queen | 88 inches | 60 inches | 80 inches |
| King | 88 inches | 76 inches | 80 inches |
| California King | 90 inches | 72 inches | 84 inches |
Finishing Touches
As you near the end of your DIY canopy bed project, it’s time for the final touches. These steps will make your bedroom a true sanctuary. You’ll focus on sanding, painting, and picking the right fabrics.
Sanding and Painting Your Bed
Start by sanding your wooden bed frame carefully. Use coarse grit sandpaper first, then move to finer grit. This makes your bed ready for paint or stain.
Think about light colors for your paint. They make rooms with low ceilings look taller and airier. Metal beds might look great with a modern, sleek finish.
Choosing the Right Fabrics
The fabrics for your canopy bed are key to the look. Choose light or sheer materials for small spaces. They won’t make the room feel too full.
Use curtain rods or light frames for support. Add color or patterns with throw pillows and valances. This makes your DIY decor pop.
With these final touches, your canopy bed will be a stunning centerpiece. It will show off your style and make your bedroom cozy and inviting.
Safety Tips for DIY Projects
When you start a DIY project to make your own bed frames, safety is key. Make sure your bed is strong and won’t fall over. Also, watch out for common mistakes to have a fun and successful project.
Ensuring Stability and Strength
First, measure your space and bed frame parts carefully. This ensures a good fit. Check your measurements to avoid problems with the ceiling or lights.
Use strong joints and extra support for your homemade bed frames. If your ceiling is low, choose designs that don’t need to be attached to it. This keeps your bed frame construction stable.
Avoiding Common Mistakes
- Test the weight of adhesives or mounting hardware before using them. This is important for heavy objects like the canopy fabric.
- Spread the weight of the canopy evenly. This keeps your structure balanced and safe.
- Be careful when using ladders or step stools. Always have someone with you to prevent falls.
- Check that all joints and connections are tight. Look for any looseness or wobble.
By following these safety tips, you can make a beautiful and safe DIY canopy bed. It will be the highlight of your bedroom for many years. Remember, focus on stability, strength, and detail in your homemade bed frames and bed frame construction work.

Customizing Your Canopy Bed
DIY bedroom decor lets you create your dream canopy bed. You can make it simple or fancy. It’s all about making your bedroom a special place.
Ideas for Unique Canopy Designs
Think differently for a cool canopy bed. For small rooms, try a partial canopy. It makes the room feel taller.
Use creative lighting like LED strips. They add height and make the room cozy. You can choose from many styles, from modern to traditional.
Incorporating Storage Solutions
Adding storage to your canopy bed is smart. You can put drawers or shelves inside. This keeps your room tidy.
Match your storage with your bed’s style. Choose drawers that look good or wooden shelves. This makes your room look neat and organized.
Customizing your canopy bed is about showing your style. Be creative and use different materials. Make your bedroom a cozy, personal space.
Budgeting for Your DIY Canopy Bed
Creating your dream DIY canopy bed needs careful budgeting. The good news? DIY canopy bed frames can be affordable or luxurious. It all depends on what you like and how skilled you are. You can refresh your bedroom or make it cozy and romantic without spending too much.
Estimated Costs Breakdown
The cost of making a DIY canopy bed varies a lot. Here’s a rough idea of what you might spend:
- Wood or metal for the frame – $50 to $500, depending on the type and quality
- Fabric for the canopy – $20 to $200, depending on the fabric and amount needed
- Hardware (screws, brackets, etc.) – $10 to $50
- Optional accessories (curtains, lights, etc.) – $20 to $200
Tips to Save Money
Here are some ways to save money on your DIY canopy bed:
- Think about using materials you already have, like wood from old furniture or fabric from old curtains.
- Choose simple designs that need less material and are good for small ceilings.
- Compare the cost of buying a pre-made canopy bed frame versus making your own to see what’s cheaper.
- Check for sales, discounts, or secondhand items at local stores or online.
By planning your budget and finding creative ways to save, you can make your bedroom beautiful without spending a lot.
Maintaining Your Canopy Bed
Having a DIY canopy bed is a joy. But, keeping it in good shape is important. You need to dust and clean the fabrics and frames often. This keeps your cozy spot looking great.
If your room has low ceilings, make sure you can easily get to the canopy. This is important for keeping it clean.
Cleaning Tips for Longevity
Cleaning your DIY canopy bed is a bit different than a regular bed. Vacuum or wipe down the fabric and wood every month. This stops dust from building up.
For deeper cleanings, check the fabric’s care label. Or, ask a pro if you’re not sure. Taking good care of it keeps your bed looking elegant for years.
When to Make Repairs
Even the strongest canopy bed can wear out over time. Check the frame and supports often. Look for loose parts or weak spots.
Fix any problems right away to keep the bed stable and looking good. You can do small fixes yourself. But, for big repairs, get a pro to make sure it’s safe and lasts long.
By taking care of your DIY canopy bed, you’ll enjoy its beauty for years. With the right care, your bed will always be a source of pride and comfort in your home.
Inspiring DIY Canopy Bed Ideas
Make your bedroom look amazing with DIY canopy bed tutorials. You can choose from simple, modern styles or something fancy. These ideas will help you make your bedroom a cozy dream spot.
Minimalist Canopy Beds
Simple designs are the best for DIY canopy beds. Look for designs that fit well with your room’s style. Designers like Mia de Groot and Amber Interiors have great ideas.
Canopy bed tutorials with metal or simple wood frames are perfect for small rooms. They make the room feel bigger and more open.
Luxury Canopy Inspirations
For a fancy look, check out bedroom makeover ideas with fancy canopy beds. Use flowing fabrics, fancy headboards, and decorations to make your bed area special. Try styles like Bali Wood, Caged, or Eva for a fancy feel.

There are many DIY canopy bed tutorials and ideas out there. You can make a unique bedroom that shows off your style. Whether you like it simple or fancy, you can turn your bedroom into a cozy dream spot.
Troubleshooting Common Issues
Building your own DIY canopy bed frames is rewarding but comes with challenges. You might face a wobbly frame or struggle with fabric hanging. But, there are solutions to these common problems.
How to Fix Wobbly Frames
Wobbly frames are a common issue with DIY canopy beds. First, check all joints and connections. Tighten any loose screws or bolts. If it’s not fixed, add cross-bracing or corner supports.
Ensuring a sturdy, stable frame is key. It will make your bed last longer.
Dealing with Fabric Hang-ups
Getting the perfect drape for your canopy bed curtains can be hard. If the fabric sags, tighten the suspension points. Or, use a lighter fabric that won’t weigh it down.
With some trial and error, you’ll find the right balance. Your homemade bed frames will look great and work well.
Conclusion and Encouragement
Starting your DIY canopy bed project is exciting. You can make a cozy space even with low ceilings. With creativity and planning, you can have a canopy bed without losing space.
The best part of DIY is making it your own. You can tailor it to fit your style and needs perfectly.
Celebrate Your DIY Success
Finishing your canopy bed shows you’re clever and skilled. Take a step back and look at what you’ve done. You’ve turned a simple room into a cozy retreat.
Feeling proud of what you’ve made is special. Enjoy the pride of creating something beautiful by yourself.
Sharing Your Creation with Others
Don’t hide your hard work! Show off your DIY canopy bed to friends, family, and the DIY bedroom decor world. Post pictures online or join forums to inspire others.
Your project might spark new ideas. It could help others find bedroom makeover ideas that fit their homes.

