Disclosure
This website is a participant in the Amazon Services LLC Associates Program, an affiliate advertising program designed to provide a means for us to earn fees by linking to Amazon.com and affiliated sites.
Your adjustable bed remote not responding is a common but frustrating issue. This problem can leave you stuck in an uncomfortable position and disrupt your sleep routine. Our complete guide provides expert troubleshooting steps to restore control quickly.
We’ll help you diagnose the root cause, from simple fixes to more complex solutions. You’ll learn proven methods to get your bed’s functionality back without immediate service calls.
Best Replacement Remotes for Adjustable Beds
ZWP HJH13D Replacement Adjustable Bed Remote
ZWP HJH13D Replacement Adjustable Bed Remote is a universal, programmable remote compatible with many major bed brands. It features clear backlit buttons and memory presets. This is the best overall choice for most users seeking a reliable, plug-and-play replacement that eliminates compatibility headaches.
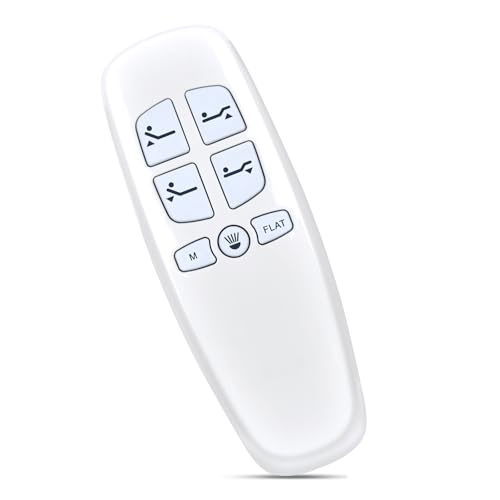
- Compatible with Models:for Richmat HJH13D Adjustable Bed base for LUCID L…
- How to pairing: Step1: Plug the base into your outlet. Step2: Simultaneously…
- This remote is only for milemont and Lucid adjustable bed, not universal bed…
Reverie R-5000 Bluetooth Remote Control
Ideal for tech-savvy users, the Reverie R-5000 pairs with a smartphone app via Bluetooth. It offers advanced features like sleep tracking and programmable positions. This is the best option for those who want modern connectivity and data integration with their sleep system.
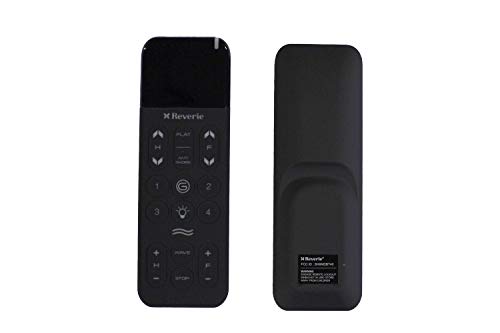
- Replacement remote for the Reverie R550 adjustable base
- Suitable replacement for any remote with part number RC-WM-111.2
Leggett & Platt 500 Series Replacement Remote
This is the official OEM replacement for many Leggett & Platt powered bases. It ensures perfect, guaranteed compatibility and retains all original functions. This model is the ideal, hassle-free solution for owners of beds with this specific manufacturer’s control system.

- Leggett & Platt Replacement remotes for all Models
- This is a genuine OEM replacement remote for the Leggett and Platt S-Cape 1.0 or…
How to Troubleshoot a Non-Responsive Adjustable Bed Remote
When your adjustable bed remote stops working, a systematic approach is key. Start with the simplest solutions before moving to complex fixes. This method saves time and often resolves the issue quickly.
Step 1: Perform Basic Power and Connection Checks
First, eliminate the most frequent and easily fixed problems. A lack of power is the number one reason for remote failure. Ensure both the remote and the bed base have a working power source.
- Check Remote Batteries: Replace the old batteries with new ones, even if they seem fine. Ensure they are inserted with the correct polarity (+/-).
- Verify Bed Power: Confirm the bed’s power cord is firmly plugged into a working wall outlet. Check your home’s circuit breaker or GFCI outlet for a trip.
- Inspect the Control Box: Locate the bed’s motor control box (usually under the mattress). Listen for a faint hum or look for a small power indicator light.
Step 2: Reset the Remote and Bed System
If power isn’t the issue, a reset can clear electronic glitches. This re-establishes the connection between the remote and the bed’s receiver. Think of it as rebooting a frozen computer.
- Unplug the adjustable bed’s power cord from the wall outlet.
- Remove the batteries from the non-working remote control.
- Wait for at least 60 seconds to allow all components to fully discharge.
- Reinsert the remote batteries and plug the bed back into power.
Test the remote immediately after this reset sequence. This process often resolves unresponsive button issues caused by signal errors.
Step 3: Diagnose Signal and Interference Problems
Sometimes, the remote is functional but its signal cannot reach the receiver. Wireless interference or physical obstructions can block the command. Identifying this requires a simple test.
Try operating the remote from very close range, pointing directly at the bed’s control box. If it works up close but not from your bedside, you have a signal issue. Common sources of interference include:
- Other electronics (Wi-Fi routers, baby monitors, cordless phones).
- Large metal objects or furniture between you and the bed.
- A failing infrared (IR) sensor on the bed’s receiver module.
Advanced Fixes for a Dead Adjustable Bed Remote
If basic troubleshooting fails, your remote or bed system may have a deeper issue. These advanced steps help diagnose whether you need a repair or replacement. Proceed carefully to avoid voiding warranties.
How to Test if the Problem is the Remote or the Bed
This critical test isolates the faulty component. You need a working remote, which could be a spare or borrowed from a compatible bed. A universal remote from our product section also works perfectly for this test.
- Obtain a known, working remote that is compatible with your adjustable bed model.
- Follow the pairing instructions (if any) for the new remote with your bed base.
- Attempt to operate the bed with the functioning test remote.
If the test remote works, your original remote is faulty and needs replacement. If the test remote also fails, the issue lies within the bed’s control box, wiring, or motors.
When to Contact Customer Support or a Professional
Some problems require expert intervention. Knowing when to call for help prevents safety risks and further damage. Your warranty status is a major factor in this decision.
- Warranty Coverage: Always contact the manufacturer first if your bed is under warranty. DIY repairs often void warranty protection.
- Internal Component Failure: Suspect this if the bed makes unusual grinding noises, smells of burning, or has no power light on the control box.
- Complex Wiring Issues: Exposed wires, damaged cords, or frequent circuit trips indicate an electrical problem needing a professional technician.
Remote Compatibility for Replacement
Not all remotes work with all beds. Using an incompatible model will leave you with the same “not responding” problem. You must match the communication protocol and pin configuration.
Check your bed’s make, model, and control box serial number. Contact the manufacturer with this information for a guaranteed OEM replacement. For universal remotes, verify the compatibility list includes your bed’s brand and series.
Preventative Maintenance for Your Adjustable Bed Remote
Preventing remote failure is easier than fixing it. Simple, regular habits can extend the life of your remote and bed system significantly. This proactive approach ensures reliable operation night after night.
Establish a Proactive Battery Maintenance Routine
Batteries are the weakest link in any wireless remote system. A scheduled replacement plan prevents sudden failure. Don’t wait for the remote to die before taking action.
- Schedule Replacements: Change the batteries every 6-12 months, regardless of use. Set a calendar reminder to make this automatic.
- Use Quality Batteries: Invest in reputable, name-brand alkaline batteries. Avoid cheap, heavy-duty, or rechargeable types unless specified by the manufacturer.
- Check for Corrosion: When changing batteries, inspect the compartment for any white or blue crusty residue. Clean contacts gently with a cotton swab and rubbing alcohol if needed.
Protect Your Remote from Physical Damage
Drops, spills, and pressure are common causes of internal damage. A remote is an electronic device that needs gentle handling. Implementing simple storage solutions can prevent accidents.
Consider using a remote control caddy or holder mounted to your bedside frame or wall. This keeps it off the floor and away from potential spills. Always avoid placing heavy objects like books or tablets on top of the remote.
Ensure a Clean Connection and Reduce Interference
The signal path between your remote and the bed’s receiver must be clear. Over time, dust and new electronic devices can disrupt this connection. A quick periodic check maintains optimal performance.
- Monthly, wipe the remote’s infrared (IR) sensor window with a dry cloth.
- Ensure the IR receiver on the bed’s control box is not obstructed by bedding or furniture.
- Relocate other wireless devices (like routers) if they are placed directly on or under the bed frame.
Following these steps minimizes signal blockage and keeps your commands getting through reliably.
DIY Repair vs. Professional Service: Making the Right Choice
Deciding whether to fix the remote yourself or call a pro depends on several factors. This comparison helps you assess the cost, risk, and complexity of your specific situation. Choose the path that is safest and most cost-effective for you.
When a Do-It-Yourself Fix is the Best Option
DIY repairs are suitable for external, low-risk components. If you are comfortable with basic tools and following instructions, you can solve these common problems.
- Remote Replacement: Swapping a faulty remote for a new, compatible one is usually plug-and-play. This involves simple battery installation and sometimes a quick pairing process.
- Power Cord Issues: Replacing a visibly damaged power cord is straightforward if you can find an exact OEM replacement. Always unplug the bed before attempting this.
- Basic Resets & Re-pairing: Following manufacturer reset procedures, as outlined earlier, is a safe and effective DIY task that requires no tools.
Signs You Need to Hire a Professional Technician
Some symptoms indicate serious internal faults. Attempting these repairs yourself can be dangerous, cause further damage, or void your warranty.
- Burnt Smell or Smoke: This indicates an electrical short or motor burnout. Immediately unplug the bed and contact a professional.
- Exposed or Frayed Internal Wires: Handling mains voltage wiring requires licensed expertise to prevent shock or fire hazard.
- Grinding Noises from Motors: This suggests mechanical failure inside the actuator. Repairing or replacing these components is complex and often requires special tools.
Cost Comparison: Repair, Replace, or Upgrade?
Weighing the financial implications helps guide your final decision. Consider this simple breakdown to evaluate your best move.
| Option | Typical Cost Range | Best For |
|---|---|---|
| DIY Remote Replacement | $20 – $150 | Isolated remote failure, tech-savvy users. |
| Professional Service Call | $100 – $300+ (plus parts) | Internal bed repairs, warranty work, complex diagnostics. |
| Full Base Upgrade | $500+ | Older beds with repeated failures or desired new features. |
How to Program and Pair a New Adjustable Bed Remote
Successfully installing a new remote requires proper pairing with your bed’s control system. This process varies between universal and brand-specific OEM remotes. Following the correct steps is crucial for functionality.
Step-by-Step Guide for Universal Remote Pairing
Universal remotes use codes to communicate with different bed brands. The manual will have a list of codes corresponding to manufacturers like Serta, Sealy, or Tempur-Pedic.
- Insert fresh batteries into your new universal remote control.
- Locate the code list in the manual for your bed’s specific brand.
- Turn on the bed’s power and press the designated “Code Search” or “Set” button on the remote.
- Enter the numeric code for your bed brand using the remote’s number pad.
- Test a function like “Head Up” to confirm the pairing was successful.
Pairing an OEM (Original Equipment Manufacturer) Remote
Brand-specific replacements are designed for seamless integration. The process is often simpler but must be done precisely to establish the wireless link.
- Power Cycle Sync: For many brands, you simply insert batteries, plug the bed in, and press a button simultaneously on the remote and base.
- Automatic Search: Some systems automatically enter pairing mode when a new remote is powered on near the operational base.
- DIP Switch Alignment: Older models may require you to match tiny physical switches inside the remote and control box.
Always refer to the official manufacturer’s guide for your exact bed model. Incorrect pairing can result in partial or no function.
Troubleshooting a New Remote That Won’t Pair
If your new remote fails to connect, don’t assume it’s defective. Several common issues can block the pairing process. Methodically check these points.
First, ensure the bed is plugged in and the control box has power. Verify you are using the correct, unexpired batteries. Double-check that you are using the right code or procedure for your specific bed model and remote version.
If problems persist, perform a full system reset (unplug bed, remove remote batteries, wait 60 seconds) and attempt the pairing procedure again from the beginning.
Adjustable Bed’s Warranty Coverage
Your warranty is a critical resource when dealing with remote or bed malfunctions. It can save you hundreds of dollars on repairs or replacements. Knowing what is covered and how to file a claim is essential.
What Parts Are Typically Covered Under Warranty?
Coverage varies by manufacturer but generally follows a tiered structure. Remotes, as electronic components, often have a shorter coverage period than the frame or motors.
- Full Warranty (Years 1-2): Most brands offer comprehensive coverage for all parts and labor, including the remote control, motors, and electronics.
- Limited Warranty (Years 3-10+): Coverage often shifts to protect the frame and motors long-term, while remotes and other accessories may no longer be covered.
- Professional Service: In-warranty repairs usually require a manufacturer-authorized technician. DIY repairs during this period can void the remaining warranty.
How to File a Successful Warranty Claim for a Remote
A smooth claim process gets your bed fixed quickly. Being prepared with the right information is the key to success. Follow these steps to initiate your claim efficiently.
- Locate your original sales receipt and the bed’s warranty card or manual.
- Gather the bed’s model number, serial number, and the remote’s model number.
- Contact the retailer or manufacturer directly via their official customer service line or website.
- Clearly describe the problem and the troubleshooting steps you’ve already attempted.
- Follow their instructions, which may include sending a video of the fault or arranging a service visit.
Common Warranty Exclusions and Pitfalls to Avoid
Warranties are not all-inclusive. Certain actions and conditions can immediately nullify your coverage. Understanding these exclusions protects your rights.
Commercial use of a residential bed often voids the warranty. Damage from improper assembly, misuse, or accidents is not covered. Using non-OEM parts or third-party repair services can also terminate your agreement.
Always keep your bed clean and used according to the manual’s instructions. This maintains your warranty eligibility in case a legitimate manufacturing defect arises later.
Alternative Control Methods When Your Remote Fails
While waiting for a repair or replacement, you are not completely stranded. Modern adjustable beds often have built-in backup controls. Knowing these alternatives provides immediate relief and functionality.
Using Manual Controls and Wired Backup Panels
Check your bed frame carefully for secondary control options. These are designed specifically for situations where the wireless remote is unavailable. They offer basic but essential functionality.
- Side-Mounted Buttons: Many bases have small, recessed buttons on the side rail. These typically control the head and foot positions independently.
- Wired Hand Control: Some models include a secondary wired remote that plugs directly into the control box, bypassing wireless issues entirely.
- Control Box Buttons: In rare cases, the main power unit under the bed may have manual override buttons for testing and emergency use.
Connecting to Smartphone Apps and Voice Assistants
If your bed has Bluetooth or Wi-Fi capabilities, your phone can become the remote. This requires initial setup when the bed is operational but is invaluable later.
Download the manufacturer’s official app (e.g., Reverie Sleep, Serta, Tempur-Pedic). Ensure your phone is connected to the same Wi-Fi network as the bed base. You can then use the app or link to Amazon Alexa or Google Assistant for voice commands like “Alexa, raise the head of the bed.”
Emergency Manual Adjustment Procedures
In a worst-case scenario where all electronics fail, you may need to manually adjust the bed. This is a physical process to return the bed to a flat position for safety or comfort.
- Locate the Manual Crank Socket: Find a small, often plastic-covered hole on the side of the motor actuator(s).
- Insert the Emergency Crank: Use the provided hand crank (usually shipped with the bed) and insert it into the socket.
- Turn the Crank: Rotate the crank handle slowly to manually raise or lower the bed section. This requires physical effort but will move the frame.
Consult your manual for the exact crank location and procedure, as it varies by model. This is a last-resort method.
Conclusion: Regaining Control of Your Adjustable Bed
An unresponsive adjustable bed remote is a solvable problem. This guide has provided a clear path from simple troubleshooting to advanced solutions. You can diagnose and fix most issues yourself.
The key takeaway is to start with basic power and connection checks before assuming the worst. Follow our systematic steps to identify the true culprit. This saves time, money, and frustration.
If DIY fixes fail, use our product recommendations to find a compatible replacement remote. Always check your warranty coverage before proceeding with any repair. Contacting the manufacturer is often the fastest solution.
With the right knowledge, you can restore your bed’s comfort and convenience quickly. Enjoy a perfect night’s sleep with fully functional controls once again.
Frequently Asked Questions about Adjustable Bed Remote Problems
What is the most common reason for an adjustable bed remote not working?
The most frequent cause is dead or incorrectly installed batteries. This simple power issue accounts for the majority of remote failures. Always try fresh, high-quality batteries first.
Other common culprits include a tripped power outlet for the bed base or signal interference from other electronics. A full system reset often resolves these secondary issues quickly.
How do I reset my adjustable bed remote control?
To perform a full reset, unplug the bed’s power cord from the wall. Next, remove the batteries from the remote. Wait at least 60 seconds for all components to discharge completely.
After waiting, reinsert the batteries and plug the bed back in. This clears temporary electronic glitches and re-establishes the connection between the remote and the bed’s receiver.
Can I use a universal remote for any adjustable bed?
Most universal remotes are compatible with many major brands, but not all. You must verify your specific bed model is on the remote’s compatibility list. Check the product manual or description before purchasing.
Universal remotes work by using pre-programmed codes for different manufacturers. They are an excellent cost-effective solution if your exact OEM remote is discontinued or overly expensive.
Why does my adjustable bed remote work only up close?
If the remote only functions at very close range, you have a weak signal. This is typically caused by interference from other wireless devices like Wi-Fi routers, baby monitors, or cordless phones.
It can also indicate failing batteries or a deteriorating infrared (IR) sensor on the bed’s control box. Try relocating other electronics and replacing the remote’s batteries with new ones.
What should I do if my new replacement remote won’t pair?
First, ensure you are following the correct pairing procedure for your specific bed and remote model. Double-check that you are using the right code for universal remotes. Incorrect codes are a common mistake.
Ensure the bed is powered on and the remote has fresh batteries. Perform a full system reset (unplug bed, remove batteries, wait, restart) and attempt the pairing process again from the beginning.
How can I manually adjust my bed if the remote is completely dead?
Many adjustable beds have a manual crank for emergencies. Locate the small crank socket on the side of the bed frame, usually near the motor. Insert the provided hand crank and turn it to raise or lower the section.
If no crank is available, check for manual buttons on the side of the bed frame or control box. As a last resort, you must contact customer service for guidance or a professional technician.
Are adjustable bed remotes covered under warranty?
Remote controls are typically covered under the bed’s limited warranty, but often for a shorter period than the frame or motors. The first 1-2 years usually include full parts and labor coverage for the remote.
Always check your specific warranty terms. You will need your proof of purchase and bed model number to file a claim. DIY repairs on a bed under warranty may void the coverage.
What is the best way to maintain my adjustable bed remote?
Implement a proactive battery replacement schedule every 6-12 months. Use high-quality alkaline batteries and avoid cheap or rechargeable types unless specified. This prevents most sudden failures.
Physically protect the remote from drops and spills by using a bedside caddy. Keep the IR sensor window on the remote and the bed’s receiver clean and free from dust or obstructions.