Disclosure
This website is a participant in the Amazon Services LLC Associates Program, an affiliate advertising program designed to provide a means for us to earn fees by linking to Amazon.com and affiliated sites.
To close a bunk bed frame, you’ll need to fold, disassemble, or collapse its parts safely, depending on the bed’s design—whether it’s a foldaway, modular, or convertible model.
Have you ever looked at a bunk bed and wondered, “How do I actually close this thing without damaging it—or hurting myself?” You’re not alone. Whether you’re downsizing, rearranging a room, or prepping for a move, closing a bunk bed frame can feel like solving a giant 3D puzzle. Many people rush the process, missing important steps that could lead to injury, damaged parts, or a lopsided reassembly later.
From DIY-savvy parents to college students and space-conscious apartment dwellers, this article is written with your specific needs in mind. Let’s make closing your bunk bed frame stress-free, safe, and surprisingly satisfying.
Best Bunk Bed Frames
1. DHP Twin-Over-Futon Convertible Bunk Bed with Metal Frame
Why we picked it: This frame offers a sturdy yet lightweight design with detachable beds. You can easily separate it into two standalone beds, making it perfect for closing or rearranging without tools.

- Multi-functional metal bunk bed over convertible futon couch design. Bottom bunk…
- Twin size mattress and full size futon mattress are sold separately. Maximum…
- Two sturdy integrated 12″ wide side ladders, full length 13″ upper guard rails…
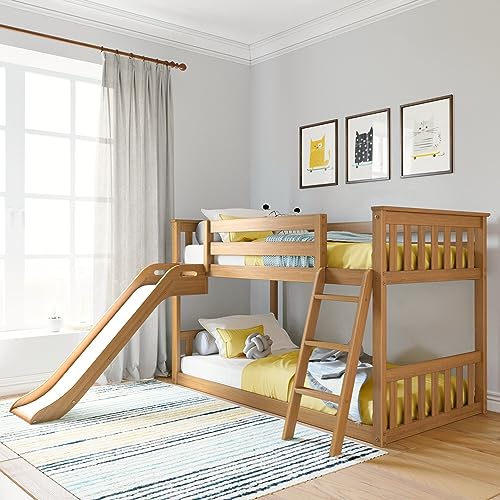
2. Max & Lily Twin Over Twin Low Bunk Bed with Slide
Why we picked it: Ideal for kids’ rooms, this bunk bed is designed with modular components and built-in safety features. It’s easy to unbolt and reassemble, making closing hassle-free and kid-safe.
- Space-Saving Design with Slide: Create a playful haven with this Low bunk bed…
- Superior Quality Construction: Crafted from durable, knot-free solid wood, this…
- Sturdy & Secure Support: Capable of accommodating up to 400 lbs. This twin bunk…
3. Storkcraft Caribou Solid Hardwood Twin Bunk Bed
Storkcraft’s option stands out for its sturdy build and ease of dismantling. Crafted with quality hardwood, it combines durability with convenience, making it a reliable choice for frequent folding without compromising on structural integrity.

- TWIN OVER TWIN BUNK BED FOR KIDS: Twin over twin bunk bed with ladder…
- GREENGUARD GOLD CERTIFIED, SAFETY TESTED: Screened for more than…
- QUALITY CRAFTMANSHIP: Crafted of rubberwood solids, engineered wood, and wood…
Can All Bunk Bed Frames Be Closed or Folded?
No, not all bunk bed frames are designed to be closed or folded. The ability to close a bunk bed frame depends entirely on its construction type—specifically whether it’s modular, foldable, or fixed.
1. Fixed Bunk Bed Frames
These are the most common and least flexible. Made from solid wood or metal, fixed bunk beds are designed to be permanent room fixtures. Their components are usually bolted together tightly and not meant to be collapsed or folded. To “close” these, you’ll need to fully disassemble the frame by removing bolts, slats, and rails. While this isn’t impossible, it’s time-consuming and requires tools like an Allen wrench, screwdrivers, and sometimes a rubber mallet.
2. Modular or Convertible Bunk Beds
Modular frames are designed with flexibility in mind. These beds can often be separated into two individual twin beds or adjusted into different configurations. They’re easier to disassemble and reassemble, making them ideal for people who frequently move or redecorate. This type is often labeled “convertible” or “detachable” by manufacturers.
3. Foldable or Murphy-Style Bunk Beds
This is a more niche but growing category. Foldable bunk beds (often called Murphy bunk beds or wall-mounted bunk beds) are built to close vertically against the wall, similar to a traditional Murphy bed. These models use gas springs or locking hinges and can be closed in seconds—ideal for small apartments or multi-use guest rooms.
Bottom Line:
If your bunk bed is fixed, you’ll need to disassemble it step-by-step to “close” it. If it’s modular or foldable, the process will be much quicker and easier. Always check the user manual or manufacturer’s site to confirm the type of bed you have and follow their safety guidelines for closure.
What Tools Do I Need to Safely Close a Bunk Bed Frame?
To safely close or disassemble a bunk bed frame, you’ll need a few basic hand tools, some protective gear, and possibly moving supplies—depending on the bed’s design and materials. Having the right tools ensures the process is efficient, damage-free, and most importantly, safe.
Essential Tools:
- Allen Wrenches/Hex Keys
Most bunk beds, especially metal and modular designs, use hex bolts. An Allen wrench set with both metric and imperial sizes will help you unscrew frame bolts easily. - Screwdrivers (Flathead and Phillips)
For beds with wooden frames or side rails attached by screws, a good set of screwdrivers is essential. A cordless screwdriver can save time, but hand screwdrivers offer more control. - Rubber Mallet
If parts are tightly fitted or stuck due to age or paint swelling, a rubber mallet helps loosen them without damaging the wood or metal. - Adjustable Wrench or Socket Set
Some bunk beds have nuts and bolts that require additional torque to loosen. A wrench helps you grip and unscrew them without stripping.
Helpful Add-Ons:
- Work Gloves
Protect your hands from splinters, metal edges, and pinching during disassembly. - Moving Blankets or Towels
Lay these down to protect bed parts and your flooring during the process. They’re especially useful when dealing with hardwood or painted components. - Ziplock Bags + Labels
Use small bags to keep screws, bolts, and brackets organized. Label each one by part or step to simplify reassembly. - Flashlight or Headlamp
Useful for spotting screws or bolts tucked inside dark corners or behind bed slats.
Always read the manufacturer’s manual (if available) before starting. Some frames have hidden brackets or locking mechanisms you might miss. Trying to force something closed without the proper sequence can result in cracked wood, bent metal, or stripped screws.
How Long Does It Take to Close or Disassemble a Bunk Bed Frame?
The time it takes to close or disassemble a bunk bed frame depends on the bed’s construction, how familiar you are with the design, and whether you’re working alone or with help. On average, expect to spend 30 minutes to 2 hours on the entire process.
1. Type of Bunk Bed Frame
- Foldable or Murphy-Style Beds:
These are designed to close in minutes. Some models fold up into a wall or cabinet and can be stowed away in under 5–10 minutes with minimal effort. - Modular or Convertible Beds:
Designed for easy assembly and disassembly, these can be closed (usually by separating into two single beds) in about 30–45 minutes, depending on your tools and experience. - Traditional Fixed Frames:
These take the longest—usually 1 to 2 hours. Fixed beds often have multiple fasteners, safety rails, slats, ladders, and stiff joints. If screws are worn or the wood is swollen, the process may be even slower.
2. Experience Level and Tools
- If this is your first time, you’ll likely spend time figuring out where screws are located and how parts are connected. Reading through the instruction manual (if you have it) will help reduce trial-and-error.
- If you’re experienced or already familiar with the frame, it could cut your time by nearly half.
- Using a power screwdriver, socket wrench, and organized hardware containers will also speed up the process significantly.
3. Are You Working Alone or With Help?
Disassembling a bunk bed solo is possible, but it’s much safer and quicker with a second person. One person can stabilize while the other unscrews. With help, you can reduce time by 30–50% and prevent accidents like tipping or part damage.
Time yourself as you go through each step. Take pictures before and during disassembly—they’re invaluable when reassembling the bed later.
How Do I Prevent Damage While Closing My Bunk Bed Frame?
Closing or disassembling a bunk bed frame can be a smooth and safe process—if you take the right precautions. Without care, you risk damaging wood surfaces, stripping screws, warping metal joints, or injuring yourself. Below are proven ways to prevent damage and ensure your bunk bed remains in great condition for future use or resale.
1. Read the Manual or Manufacturer’s Guide First
If you still have the instruction manual or can find it online (try searching the brand + model name), read it thoroughly. Many bunk beds—especially modular ones—have specific disassembly sequences. Ignoring these steps can lead to cracked wood or broken brackets.
2. Protect Surfaces and Flooring
Use moving blankets, towels, or foam mats on the floor to cushion the bed parts during disassembly. Lay them under the work area to prevent scratches or dents on hardwood, tile, or carpet.
3. Use the Right Tools (and Don’t Force Anything)
Make sure your Allen wrenches, screwdrivers, and wrenches match the hardware sizes exactly. Avoid using oversized or worn tools that can strip screws. If a part doesn’t budge, don’t yank or twist it aggressively—use a rubber mallet to gently loosen joints, or apply WD-40 to stuck bolts.
4. Label and Organize All Parts
Use ziplock bags and masking tape to keep track of screws, bolts, and small connectors. Label them based on the part they came from (e.g., “ladder bolts,” “top frame joints”) for easy reassembly. This prevents you from losing or mixing up hardware, which often leads to forced misfitting and damage.
5. Watch for Fragile Connectors and Dowels
Some wood bunk beds have wooden dowels or plastic connectors that can snap under pressure. Pull parts apart slowly and evenly, keeping joints aligned as you separate them.
6. Work with a Partner
Having someone hold or stabilize one side while you unscrew the other dramatically reduces the chance of a part falling, tipping, or snapping under stress.
Take clear, labeled photos at every step of disassembly. These serve as visual references and help prevent incorrect reassembly that can weaken the bed’s structure over time.
Can I Reassemble the Bunk Bed Easily After Closing It?
Yes, you can reassemble a bunk bed after closing or disassembling it—if you’ve taken the proper steps during the breakdown. The ease of reassembly largely depends on how well you’ve organized the parts, the condition of the hardware, and whether you documented the disassembly process.
1. The Importance of Labeling and Organization
This is the single most helpful step to make reassembly smooth. Store all bolts, screws, and brackets in labeled bags. If you skip this, you might struggle to match fasteners to their original locations—leading to guesswork, delays, or even improper assembly.
Also, keep a parts inventory. Many bunk beds come with a specific number of washers, brackets, and slats. Use a simple checklist to make sure everything is accounted for before you begin rebuilding.
2. Use Reference Photos and Instructions
Taking photos during disassembly (especially close-ups of the ladder, safety rails, and corner joints) helps you put everything back where it belongs. If you have the user manual, keep it nearby. If not, check the manufacturer’s website—many offer downloadable guides.
3. Inspect Parts Before Reassembly
Before you rebuild, inspect all hardware and components. Look for:
- Stripped screw holes
- Cracked wooden slats
- Bent metal rods
- Loose dowels or connectors
Replace any worn or damaged parts before putting the bed back together. Reusing compromised components can reduce structural integrity and pose safety risks.
4. Follow the Assembly Sequence Carefully
Always reassemble from bottom to top—starting with the lower bunk frame, followed by support slats, guard rails, and then the upper structure. This order ensures stability as you work. Avoid over-tightening bolts too early—secure everything loosely first, align it all properly, then tighten bolts in a cross-pattern for even pressure.
5. Get Help If Needed
Reassembling a bunk bed is easier—and safer—with two people. While one person holds a frame or slat, the other can fasten it into place. Trying to do it alone can risk dropping or misaligning heavy components.
Should I Close or Disassemble the Bunk Bed When Moving?
Yes—you should disassemble the bunk bed before moving it. While it may seem tempting to move the frame in one piece, doing so increases the risk of damaging the bed, injuring yourself or movers, and scratching walls or floors.
Disassembling—or “closing”—the bed is not only safer but also more efficient when transporting it through tight doorways, stairwells, or into moving vehicles.
1. Structural Integrity and Risk of Damage
Bunk beds are tall, heavy, and often built from multiple bolted sections. If you try to carry a fully assembled bed, the stress on the joints and bolts can cause:
- Splintering in wooden frames
- Bent or warped metal components
- Loosening or snapping of hardware mid-move
Even strong models aren’t designed to handle lateral force when lifted sideways or angled around corners. Closing or disassembling the bed minimizes these risks.
2. Navigating Tight Spaces
Most homes and apartments have narrow doorways, low ceilings, and sharp turns. A fully assembled bunk bed typically won’t fit without forcing it, which can result in:
- Dents on walls
- Cracked drywall
- Broken stair railings or light fixtures
Disassembling allows you to carry manageable parts and maneuver more easily.
3. Easier Loading and Stacking in a Moving Truck
Broken-down pieces can be neatly stacked, wrapped in blankets, and secured inside a truck. This not only protects the bed from impact damage but also saves space and prevents tipping during transit.
4. When You Might Keep It Partially Assembled
If you’re moving the bed within the same home or between floors—and the frame is lightweight—you might keep lower components assembled. Just ensure they’re secure, and that you and your helpers can handle the weight safely.
5. Moving Tip:
Before you start disassembly, take photos of the fully assembled bed and label each component and hardware bag. This makes reassembly at the new location fast and frustration-free.
What Safety Precautions Should I Follow When Closing a Bunk Bed?
When closing or disassembling a bunk bed, safety should always be your top priority—both to protect yourself and the bed itself. Bunk beds often involve heavy components, sharp edges, and tools that can cause accidents if not handled properly. Follow these key safety precautions to ensure a smooth and injury-free process.
1. Wear Protective Gear
Though it might seem like an easy task, closing a bunk bed involves using tools and handling heavy parts—which can lead to injuries. Always wear:
- Work gloves: Protect your hands from sharp edges, splinters, and rough metal or wood.
- Safety goggles: If you’re using power tools like a drill or screwdriver, goggles can shield your eyes from flying debris or screws.
- Sturdy footwear: Wear closed-toe shoes to protect your feet if a part falls or gets dropped.
2. Work in a Clear, Well-Lit Area
Make sure the space around you is clear of obstacles so you don’t trip over parts or tools. A clutter-free workspace also helps prevent dropping tools on the bed frame, which could cause damage. Additionally, make sure the area is well-lit, so you can easily spot screws, bolts, and small connectors.
3. Keep Tools in Reach
Before you start disassembling, arrange your tools and hardware close by. This prevents you from making unnecessary movements or looking away from your work area, reducing the chance of accidents. Use a tool belt or small toolbox to keep essential tools like wrenches, screwdrivers, and Allen wrenches within arm’s reach.
4. Ensure Stability During the Process
When working on a large, heavy bed frame, keep it stabilized. If you’re removing parts like slats, rails, or ladders, make sure the remaining structure is balanced. If working on a metal bed frame, it might slide or tip over if not held in place. Having a second person helps keep it steady while you work.
5. Remove Heavy Mattress and Bedding First
Before you start disassembling or closing the bed, remove the mattress, bedding, and any other accessories. This reduces the weight and prevents unnecessary strain on the frame during the process. Plus, it eliminates the risk of getting caught or tripping over loose bedding while moving parts around.
6. Don’t Rush the Process
Closing a bunk bed frame is not a race—take your time. Rushing increases the risk of accidents. Make sure all screws are fully loosened before removing parts, and don’t pull on tight joints. Always use appropriate tools and keep screws and bolts tightened evenly to avoid putting undue stress on the frame.
7. Be Careful with Sharp Edges and Metal Parts
If you’re working with metal bunk beds, take care with sharp edges on frame corners, safety rails, or ladder rungs. These parts can cause cuts or scratches if not handled carefully. Use a rubber mallet instead of a hammer to tap stubborn pieces loose, and avoid using your bare hands when separating parts.
Conclusion
Closing or disassembling a bunk bed frame can seem like a challenging task, but by following the right procedures and prioritizing safety, you can handle it with ease. Whether you’re moving the bed, making space, or just giving it a fresh setup, the key is organization, using the right tools, and taking it step by step. Remember to carefully label parts, ensure everything is secure, and take your time to avoid accidents.
If you plan to reassemble the bunk bed later, keeping everything organized will save you time and frustration. With these tips in mind, you’ll be able to maintain the integrity of your bed frame, keep your space safe, and ensure a smooth reassembly process.